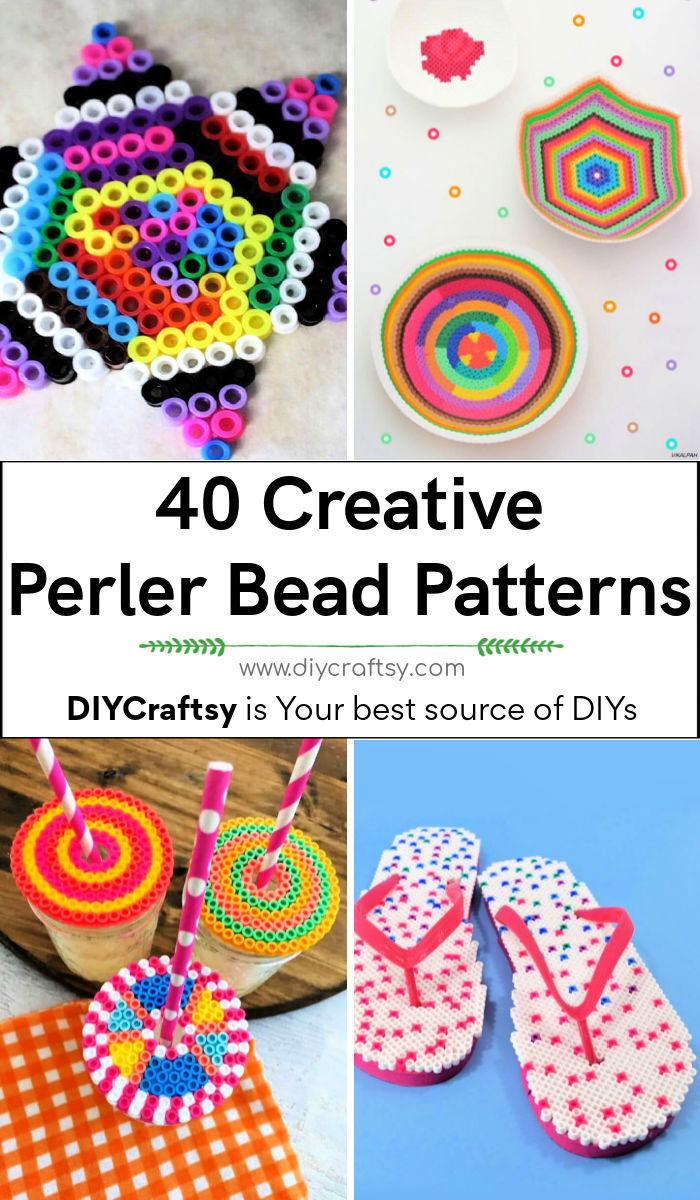
Perler beads offer a colorful and creative way to craft intricate designs and patterns. Step into the colorful and versatile realm of Perler bead crafts with our collection of 40 easy and cute perler bead patterns and design ideas. Perler beads, known for their adaptability in crafting, offer a fun and engaging way to create everything from charming accessories to unique home decor. Our perler bead ideas guide is thoughtfully tailored to help crafters of all levels discover new and creative ways to work with these tiny beads, fostering both skill development and artistic expression.
Open a treasure trove of creative potential with our carefully curated list of Perler bead patterns. Each design is crafted to inspire and guide you through an enjoyable crafting experience. Whether you’re fashioning handmade gifts or adding a personal touch to your living space, our perler bead patterns with instructions are here to ensure your crafting journey is both delightful and rewarding. Get ready to be infused with perler bead ideas and inspiration as you explore the following sections filled with Perler bead magic.
Why Explore Free Perler Bead Patterns?
Perler beads offer a unique medium to express creativity. By delving into free Perler bead patterns, designs, and ideas, you open up a world of possibilities. This craft is not only fun but also beneficial in numerous ways:
- Development of Fine Motor Skills: Perler bead crafting requires precision, which helps both children and adults develop and refine their fine motor skills.
- Enhancing Concentration: Focusing on bead placement and pattern following can increase attention spans and concentration levels.
- Encouraging Patience and Perseverance: Completing a bead project takes time and patience, teaching valuable lessons in seeing a task through to completion.
- Stress Relief: The repetitive nature of placing beads can be incredibly therapeutic, offering a form of stress relief and mindfulness.
- Quality Family Time: Perler bead projects are a great way to spend time with family, promoting teamwork and bonding over shared creative goals.
- Customizable Gifts: Handmade bead crafts make thoughtful and personalized gifts for friends and loved ones on any occasion.
- Home Decor: You can create unique and colorful items to enhance your home decor, from coasters to wall art.
- Educational Tool: For children, Perler beads can be a fun way to learn about colors, patterns, and even basic geometry.
- Eco-Friendly Option: Instead of buying new plastic items, crafting with Perler beads allows you to create and repurpose, leading to more sustainable living.
Getting Started with Perler Beads
To make the most of these free patterns and designs, here are some tips to get started:
- Organize Your Beads: Before beginning a project, sort your beads by color. This will make it easier to follow patterns and speed up the crafting process.
- Invest in Quality Tools: Good tweezers, a sturdy pegboard, and the right ironing paper can make a big difference in the ease and enjoyment of your project.
- Begin with Simple Patterns: If you’re new to Perler beads, start with less complex designs and gradually work your way to more intricate patterns.
- Protect Your Work Surface: Always use a heat-resistant surface when ironing your beads to prevent any damage.
- Stay Inspired: Regularly seek out new patterns and ideas to keep your creativity flowing and your interest in Perler bead crafting alive.
By exploring the world of Perler bead ideas, you’ll find a fulfilling hobby that is both fun and beneficial. Perler beads offer a colorful and versatile option. So why wait? Start your beading adventure today!
Crafting with Perler Beads: A Beginner’s Guide to Getting Started
Perler beads can open up a world of creativity, whether you’re crafting with kids or looking to unwind with a mindful activity. Here’s a beginner’s guide to help you start your journey with Perler beads with confidence and enjoyment.
Understanding Perler Beads
What Are Perler Beads?
- Perler beads are small, colorful beads that you arrange on a pegboard to create designs.
- When heated with an iron, they fuse together, forming a solid piece.
Benefits of Perler Bead Crafting
- Enhances Creativity: Unleashes your imagination as you translate ideas into bead art.
- Improves Focus: Concentrating on bead placement sharpens your attention to detail.
- Relaxes the Mind: The act of placing beads can be meditative, reducing stress and anxiety.
Gathering Your Materials
Before you begin, ensure you have all the necessary supplies:
- Perler Beads: Available in a variety of colors and finishes.
- Pegboard: The platform on which you arrange your beads.
- Ironing Paper: Protects the beads and your iron during the fusing process.
- Iron: Used to heat and fuse the beads together.
- Tweezers (optional): Helpful for placing and adjusting beads.
Creating Your First Design
Step-by-Step Guide:
- Choose a Pattern: Start with a simple design, like a heart or a flower.
- Place the Beads: Use tweezers for precision, and place beads one by one onto the pegboard following your pattern.
- Iron Your Design: Cover with ironing paper and gently iron in a circular motion until the beads are fused.
- Let It Cool: After ironing, let your design cool down before removing it from the pegboard.
Tips for a Successful Craft
- Start Simple: Don’t overwhelm yourself with complex patterns at the beginning.
- Work in Good Lighting: This ensures you can clearly see your beads and colors.
- Iron Evenly: Apply heat evenly to avoid over-melting or under-melting beads.
- Patience Is Key: Take your time with placement and ironing for the best results.
Perler beads are more than just a craft; they’re a pathway to relaxation, creativity, and fun. By following these steps and tips, you’ll be well on your way to creating beautiful Perler bead art that you can be proud of. Enjoy the process, and let your creativity shine!
Essential Techniques for Crafting with Perler Beads
Crafting with Perler beads is an enjoyable and creative hobby that is both simple to learn and endlessly versatile. Whether you’re looking to create jewelry, home décor, or even your favorite video game characters, mastering a few key techniques will make your projects come to life with ease and precision. Below, we outline some essential Perler bead techniques to help you excel in your crafting endeavors.
Preparing Your Materials
- Organize Your Beads: Before starting, sort your beads by color. This saves time and makes it easier to follow patterns.
- Choose the Right Pegboard: Select a pegboard that fits the size and shape of your project. Clear pegboards are great for placing over patterns.
- Use Proper Ironing Paper: Ironing paper is crucial to protect your beads and iron. Use the paper provided with the beads or parchment paper.
Bead Placement Techniques
- Tweezer Usage: For precise placement, use tweezers. This is especially helpful for intricate designs or small pegboards.
- Creating Symmetry: Start from the center and work your way out for symmetrical designs, ensuring an even and balanced creation.
- Filling in Large Areas: Use a bead sweeper or pour beads directly onto the pegboard, then spread and organize them as needed.
Ironing and Finishing
- Even Heat: When ironing, move the iron gently in a circular motion to evenly fuse the beads without overheating.
- Check Fusion Consistency: Carefully lift the edge of the ironing paper to check the fusion. Beads should be melted together but still have visible holes.
- Cooling: After ironing, place a heavy book on top of your design while it cools to prevent it from curling.
Advanced Crafting Techniques
- 3D Creations: Once you’re comfortable with flat designs, try creating 3D structures by fusing together multiple pieces.
- Mixing Bead Sizes: For more texture and detail, mix different sizes of beads within the same project.
- Layering: Add depth by layering extra beads on top of a fused base.
By following these helpful techniques, you’ll be well on your way to creating stunning Perler bead crafts. Always remember to iron with care, be patient, and let your creativity lead the way.
Celebrate Seasons with Perler Bead Designs
Create Seasonal Home Decor with Perler Beads
Transform your home throughout the year with seasonal Perler bead decorations. These easy-to-make crafts add a festive touch to your living space and allow for creative expression no matter the occasion. Here’s how to get started:
- Spring Blossoms: Craft a set of colorful flowers or a vibrant rainbow to celebrate the arrival of spring. These cheerful designs can be used as magnets, coasters, or wall art.
- Summer Fun: Embrace the warmth with Perler bead designs of suns, flip-flops, and beach scenes. These summery crafts can be great additions to a themed party or simply to brighten up your home.
- Autumn Harvest: As leaves change color, create Perler bead patterns of pumpkins, leaves, and acorns. These autumnal pieces make charming table decorations or can be hung as a garland.
- Winter Wonderland: Welcome winter with snowflakes, trees, or menorahs. These holiday designs can be used to adorn your tree or to add a cozy touch to your home during the chilly months.
Personalize Gifts with Perler Beads
Handcrafted Perler bead gifts are a thoughtful and personal way to show someone you care. Here are some gift ideas:
- Custom Keychains: Design a keychain that reflects the recipient’s interests or hobbies.
- Photo Frames: Surround a cherished photo with a custom Perler bead frame.
- Jewelry: Create unique bracelets, earrings, or necklaces with intricate Perler bead patterns.
Perler Bead Tips for Every Crafter
To ensure your crafting process is enjoyable and your creations are successful, follow these simple tips:
- Use the Right Temperature: When ironing, find a medium heat setting that melts the beads together without warping them.
- Create a Bead Buffer: For intricate designs, start with a border to keep the beads in place.
- Practice Patience: Some patterns take time to complete. Work on your project in stages if needed.
By integrating these Perler bead ideas into your seasonal decor and gift-giving, you’ll bring a handmade touch that is both charming and memorable.
FAQs about Perler Bead Patterns
Discover answers to common questions about Perler bead crafts. Get tips, tricks, and creative ideas for your next bead project!
What are Perler beads?
Perler beads are small, plastic beads that come in various colors. When placed on a pegboard and ironed, they fuse together to create colorful and durable designs.
How do I start with Perler bead crafts?
To start, you’ll need Perler beads, a pegboard, ironing paper, and an iron. Begin with simple patterns and as you become more comfortable, move on to more intricate designs.
Can children do Perler bead crafts?
Yes, children can enjoy Perler bead crafts. They are excellent for developing fine motor skills and can be a fun way for kids to express their creativity under adult supervision, especially when using the iron.
What can I make with Perler beads?
You can make a wide array of items with Perler beads, such as keychains, jewelry, home decor, and even 3D objects. The possibilities are virtually endless!
Do I need any special equipment?
Other than the basic supplies (beads, pegboard, ironing paper, and iron), you might find tweezers helpful for placing beads. For larger projects, bead sweepers can help to spread out beads on the pegboard.
How do I prevent my Perler bead creation from curling after ironing?
To prevent curling, place a heavy book on top of the finished design as it cools. This will help it to stay flat.
Can Perler bead crafts be an educational tool?
Absolutely, Perler beads can be used to teach children about colors, patterns, counting, and basic geometry in a fun and interactive way.
Are Perler beads environmentally friendly?
Perler beads allow you to create new items rather than buying them, which can be a more sustainable option. They encourage repurposing and crafting over purchasing new plastic products.
What should I do if my Perler beads are not fusing evenly?
When ironing, ensure you are using a circular motion and applying even heat. If some beads are not fusing, gently go over those areas again with the iron.
Can I mix different sizes of Perler beads in one project?
Yes, mixing different sizes can add texture and detail to your work. However, keep in mind that smaller beads will fuse faster than larger ones, so adjust your ironing technique accordingly.
By exploring these FAQs and incorporating the tips provided, you’ll enhance your crafting experience and enjoy the fun and relaxation that come with creating Perler bead art.
40 Easy and Free Perler Bead Patterns and Ideas
Craft your very own creations today with these 40 easy perler bead patterns! Each Perler bead design is accompanied by complete step-by-step instructions and a user-friendly visual guide to ensure a fun and easy crafting experience.
1. How to Make a Perler Bead Emoji Keychain
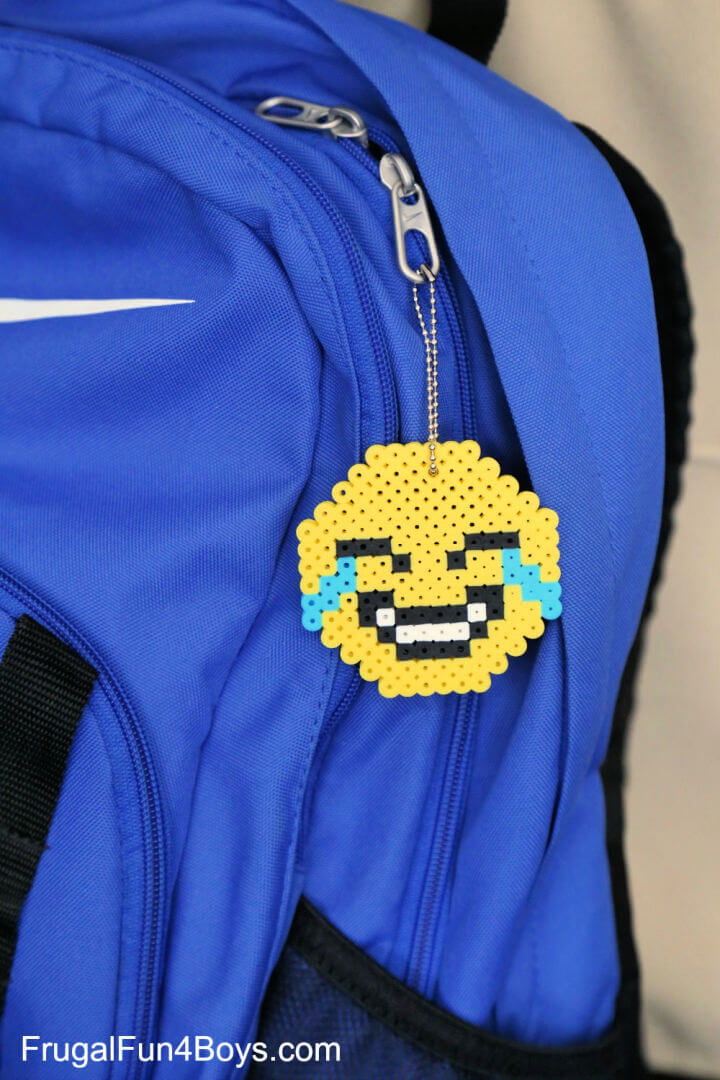
Create emoji keychains with Perler beads for a fun and engaging craft suitable for all ages. Frugal Fun For Boys and Girls provides a step-by-step guide to making these colorful accessories. You’ll need Perler beads, pegboards, keychains, an iron, and a nail for enlarging the bead holes.
By following the provided images, you can replicate various emoji expressions, such as the laughing crying face or the sunglasses emoji. Attach these personalized keychains to your keys or backpack for a unique touch. Remember to use the special ironing paper to protect your iron while fusing the beads. Enjoy crafting these adorable keychains that can showcase your personality or make thoughtful gifts.
2. Homemade Perler Bead Flip Flops
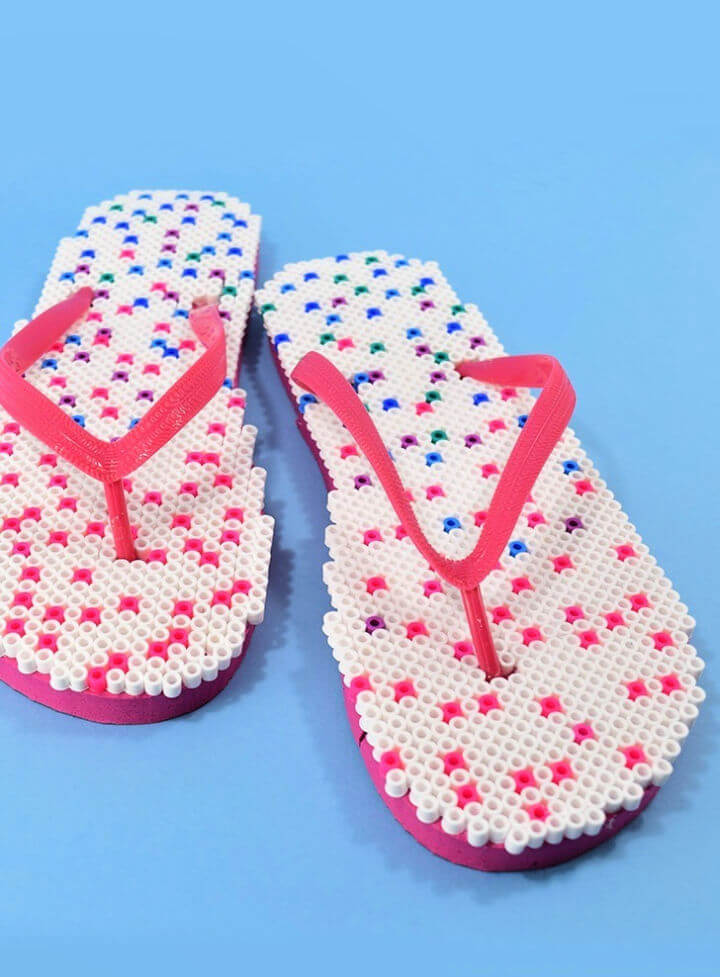
Transform your summer footwear with a vibrant touch of creativity using Perler beads! Dream a Little Bigger offers an engaging tutorial on crafting unique Perler bead flip flops that are sure to stand out. With a simple pair of flip flops and a colorful selection of Perler beads, this DIY project combines fashion with fun.
The step-by-step guide is designed to be instructive and easy to understand, ensuring a delightful crafting experience. Follow the tutorial to glue and iron your way to a pair of custom, eye-catching sandals. This craft is not only a chance to express your style but also a perfect activity to engage with on a sunny afternoon. Get ready to step out in your handmade Perler bead flip flops and turn heads with your bespoke summer accessory!
3. Quick and Easy DIY Perler Bead Mermaid
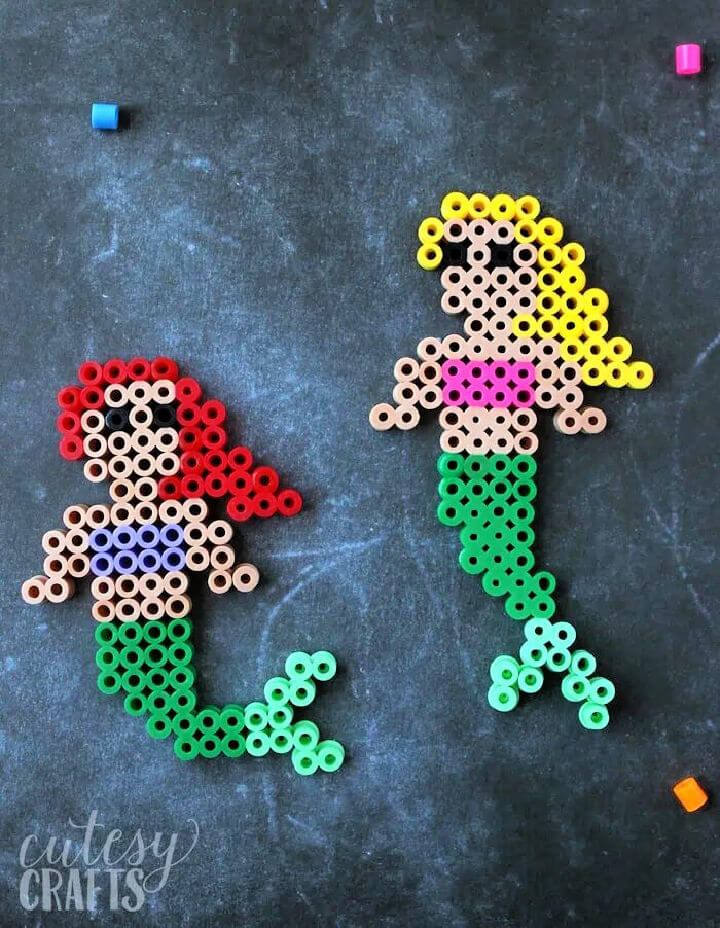
If crafting with perler beads brings joy to your little ones, Cutesy Crafts has a treat with their easy mermaid perler bead patterns. Perfect for summer activities or any creative playtime, these patterns are designed to ensure a smooth crafting experience. With these patterns, children can create charming mermaids reminiscent of Ariel, along with their sea creature friends, without any frustration.
A clear pegboard is recommended for these projects to help young crafters easily follow the patterns. For more aquatic fun, the site also offers a variety of mermaid crafts to explore. Dive into the colorful world of perler bead art and watch as your kids bring their own little mermaids to life.
4. Make Your Own Perler Beads Minecraft
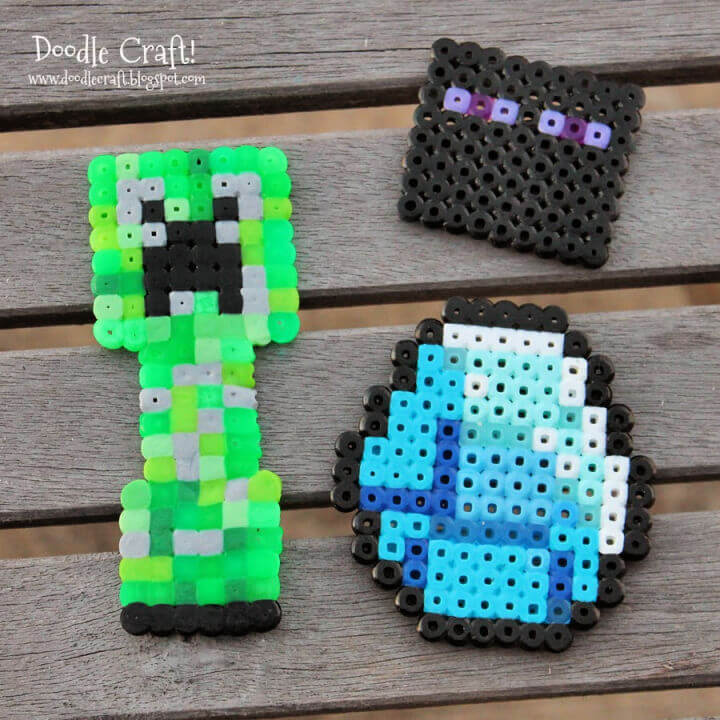
Engage in the pixel-perfect craft of Minecraft-themed creations with Perler or Hama beads! If your love for crafting meets your enthusiasm for this block-building game, you’ll find joy in making melty bead projects that bring the digital world to life. Doodlecraft‘s blog offers a glimpse into a collection of bead crafts, including shimmering diamonds, menacing zombies, and iconic creepers.
Fans of all ages can enjoy creating swords, endermen, and various blocks to recreate the Minecraft universe in vibrant, tangible form. Simple to follow and endlessly entertaining, these bead projects are perfect for any crafting session. Get your beads ready and start crafting your favorite Minecraft characters and elements today!
5. Beautiful DIY Perler Bead Minion
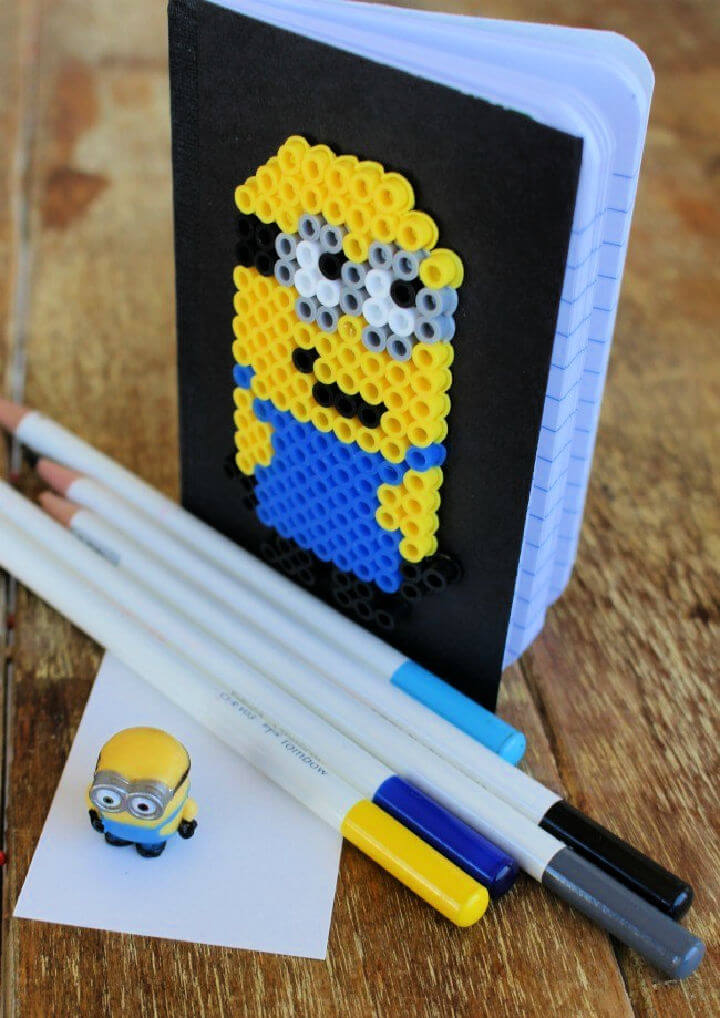
Discover the joy of crafting with the Perler Bead Minion Kit, a featured project on Laura Kelly‘s Inklings. If you’re fond of crafting and love the playful charm of Minions, this Perler Bead activity provides endless hours of creativity. Laura Kelly guides you through transforming these colorful beads into a delightful Minion design, perfect for personalizing notebooks or creating unique gifts.
With her clear, instructive narrative, and a passion for all things Minions, Laura offers inspiration to create and customize with these tiny beads. Her helpful tips make it easy to dive into this engaging craft, ensuring a fun and rewarding experience for crafters of all skill levels. So grab your Perler Beads, and let your imagination run wild with Laura Kelly’s creative Minion project.
Watch This Video: DIY Perler Beads Cord Organizer – Perler Bead Patterns (04 Minutes 18 Seconds)
6. Free Perler Bead Summer Pattern
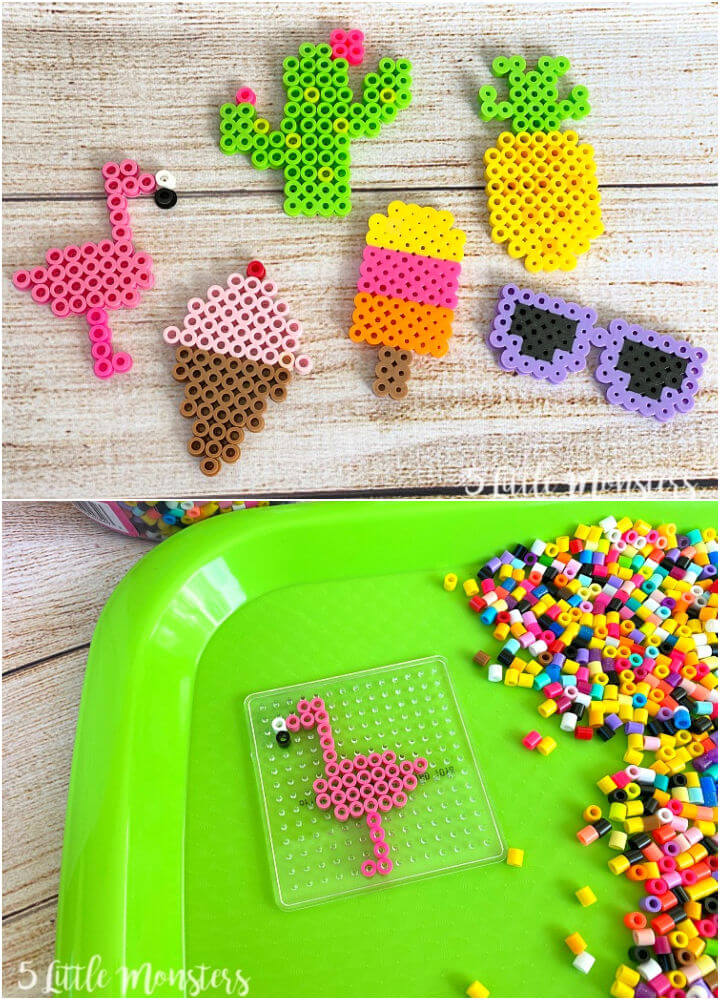
Welcome to the vibrant world of summer perler bead patterns where creativity meets fun! In our latest craft project, we’re diving into a sunny collection of designs perfect for keeping kids engaged and reducing screen time. With a simple setup using perler or fuse beads, a square fuse bead board, an iron, and some parchment paper, anyone can create charming summery magnets or just enjoy the craft.
Follow the color graphs to arrange the beads, fuse them together with heat, and voilà—you have an adorable summer-themed decoration. Whether adding a playful touch to your fridge with magnets or crafting just for the joy of it, these patterns are sure to provide hours of enjoyment and a splash of seasonal flair to your home. 5littlemonsters
7. Make Winnie the Pooh Perler Bead Keychains
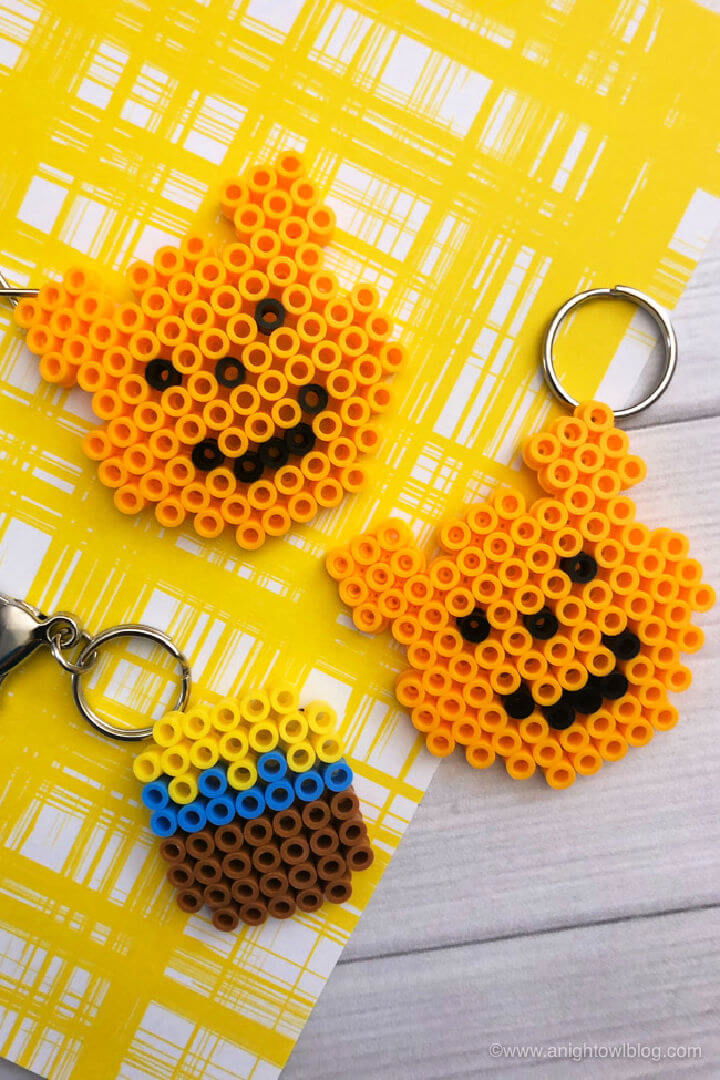
Creating Winnie the Pooh Perler Bead Keychains is a whimsical way to bring the charm of the Hundred Acre Wood into your everyday life. Ideal for fans of Disney’s Christopher Robin movie or those who simply adore the classic characters, this craft offers a delightful experience in making personalized keychains. Using perler beads, you can follow a straightforward pattern to design your own Pooh and Honey Pot figures, perfect as gifts or keepsakes.
With easy-to-gather materials like a pegboard, beads, ironing paper, and an iron, you’ll be ready to assemble these charming accessories. The process involves placing beads onto the pegboard, ironing them to fuse together, and then attaching them to a keychain. These handcrafted items not only serve as a fun project but also add a touch of nostalgia to your keys or backpack. Visit the A Night Owl Blog for step-by-step instructions and more creative perler bead ideas.
8. Handmade Perler Bead Mario for Kids
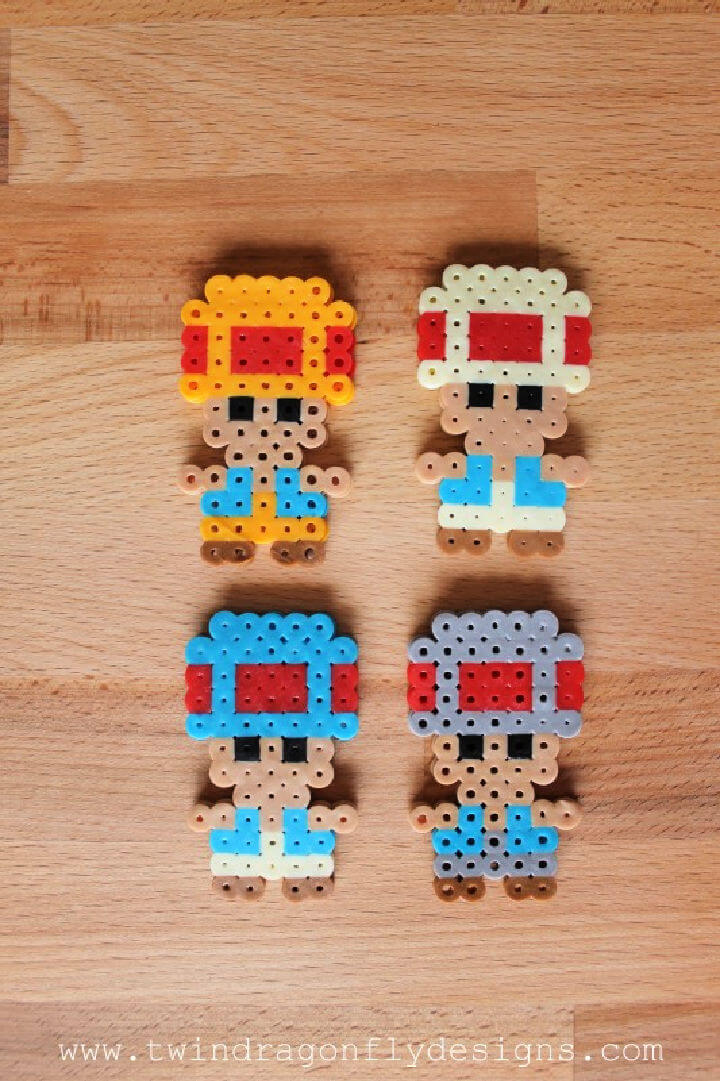
Crafting with perler beads is an engaging and enjoyable activity for kids and fans of the Super Mario series. At Homemade Heather, you’ll find a collection of Mario perler bead design patterns that can bring your favorite characters to life. These patterns allow for creativity in making iconic figures like Mario, Luigi, Yoshi, and more.
With clear instructions and the use of helpful tools like flat-bottom dry irons and perler bead tweezers, even those new to perler beads can achieve great results. Organize your beads with stackable containers to keep your crafting area tidy. Choose your favorite character and start crafting a piece of Super Mario magic today!
9. Adorable DIY Perler Bead Earrings
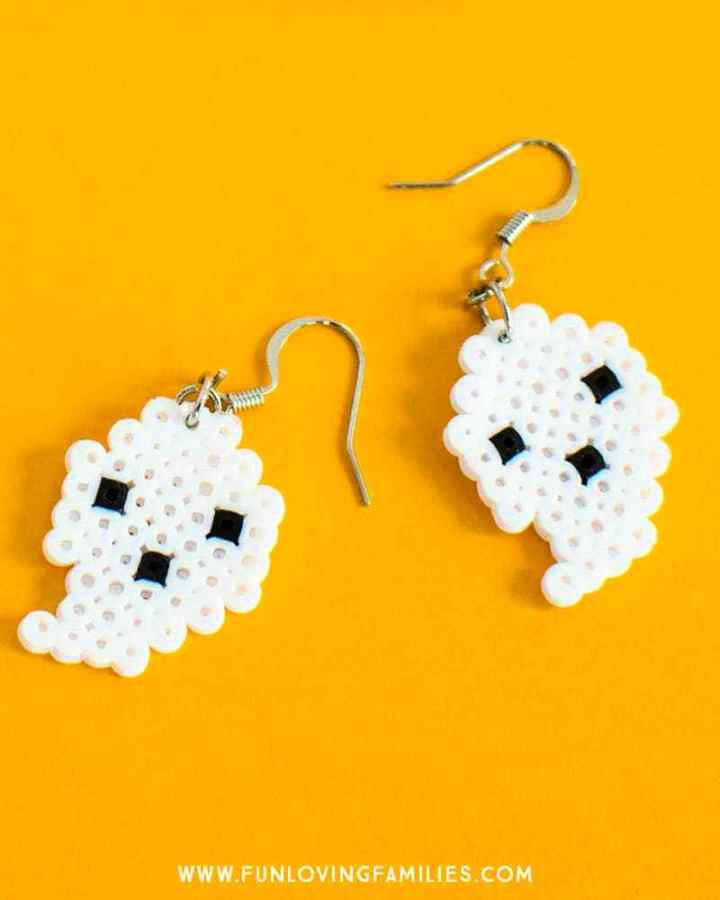
Get ready to add a spooky flair to your Halloween outfit with these cute and simple DIY Perler Bead earrings, courtesy of Fun Loving Families. Ideal for crafting enthusiasts looking for a festive project, this guide walks you through creating your own mini Perler bead earrings with a charming ghost design. You’ll need white and black mini Perler beads, a pegboard, ironing paper, tweezers, an earring kit, and some basic pliers.
Follow the step-by-step instructions to melt your beads into a ghostly shape, attach jump rings, and finish with a fish hook earring. Perfect for tweens and teens to make at Halloween parties or sleepovers, this craft promises a fun and creative experience that results in a pair of adorable earrings to show off during the spookiest time of the year. Happy crafting and have a fantastic Halloween!
10. How to Make a Perler Bead Star War
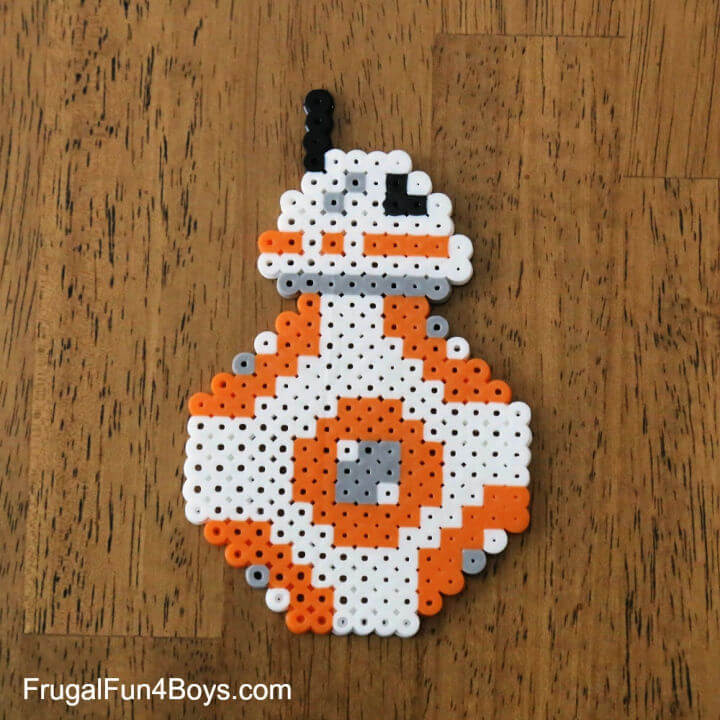
Create your own Star Wars: The Force Awakens themed artwork with Perler beads, the small plastic beads that fuse together when ironed. Frugal Fun For Boys and Girls provides a set of patterns that will appeal to crafters and Star Wars fans alike. With designs including the adorable BB-8, the imposing Kylo Ren, and the iconic Millennium Falcon, these patterns are perfect for honing fine motor skills while enjoying creative time.
To start, you’ll need a variety of Perler beads, square pegboards, and an iron. Visit Frugal Fun For Boys and Girls for inspiration and guidance on how to bring these beloved characters to life in bead form. Whether creating for fun or as a gift, these patterns will surely add a touch of intergalactic flair to your crafts.
11. DIY Citrus Perler Bead Coasters
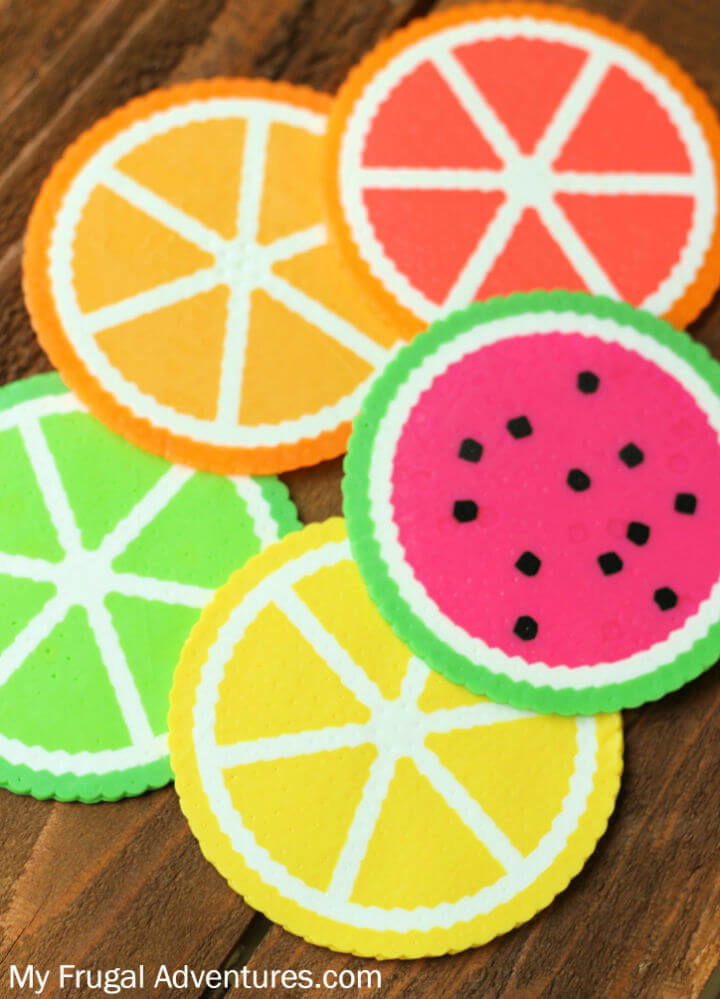
Are your kids captivated by the creativity that perler beads offer? My Frugal Adventures brings you a refreshing and engaging craft project that’s perfect for summer fun: Citrus Perler Bead Coasters. Ideal for little hands looking to create something vibrant and practical, this craft is a wonderful way to spend quality time with your children.
The project is straightforward and budget-friendly, requiring only a handful of supplies such as assorted perler beads, a circle pegboard, and an iron. Not only do these coasters serve as a charming addition to your home décor, but they also make excellent gifts or group activities. Follow the easy-to-understand guide and add a splash of color to your family’s crafting adventures with these fruit-themed coasters.
12. Perler Bead Picture Frame Heart for Valentine’s
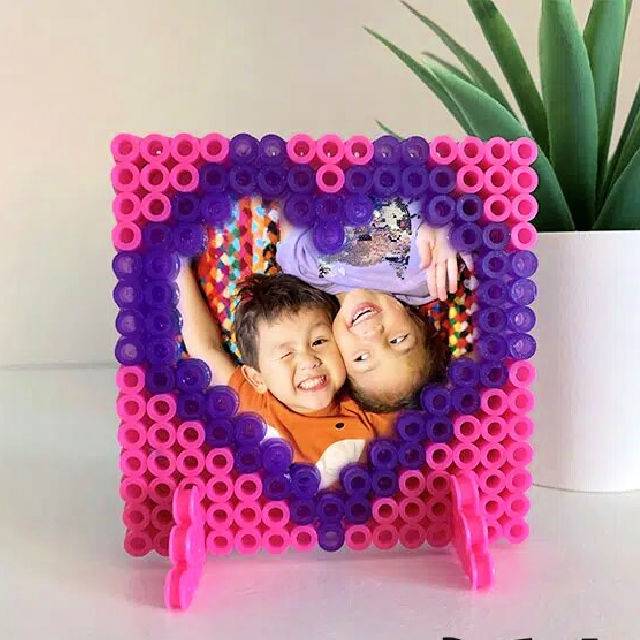
Create a charming Perler Bead Picture Frame Heart for Valentine’s Day with this engaging tutorial from Red Ted Art – Kids Crafts. Perfect for kids and craft enthusiasts, this project lets you frame cherished memories using colorful Hama beads. You’ll need a square pegboard, beads, parchment paper, an iron, and a photo or artwork of your choice. Follow the simple instructions to assemble your beaded heart frame and add a personal touch to your Valentine’s or Mother’s Day gift. With an instructive and helpful guide, you can easily craft a heartfelt keepsake.
13. DIY Fuse Bead Grip for Nintendo Switch
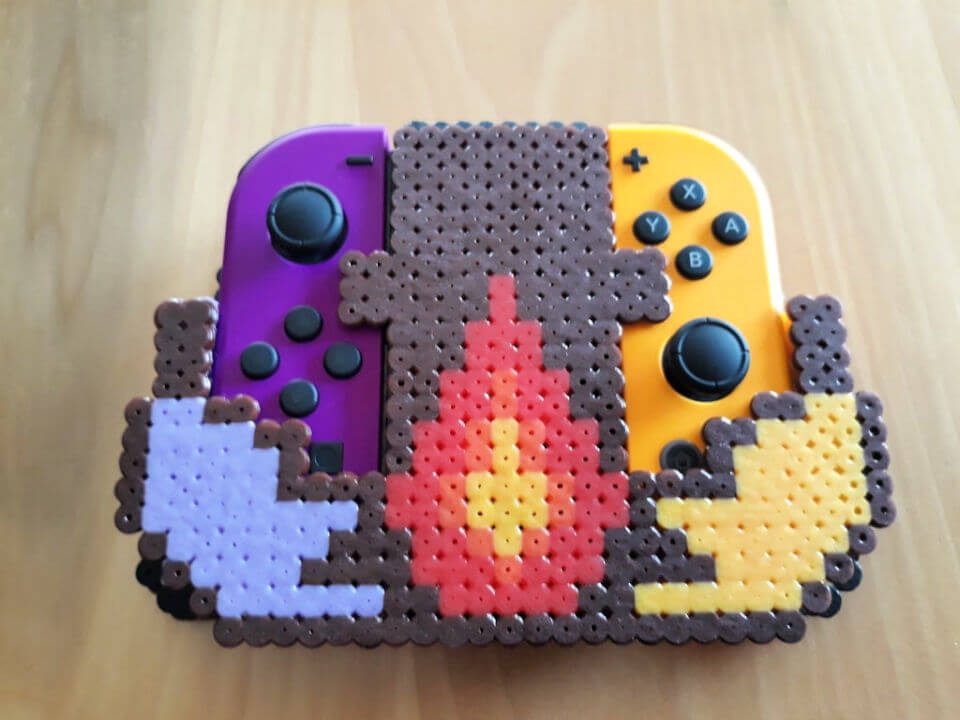
Discover a unique DIY project for Nintendo Switch enthusiasts with the Fuse Bead Grip guide on Instructables. Tailored for crafters who enjoy hands-on activities, this tutorial walks you through creating a homemade grip for your Joy-Con controllers using fuse beads. Ideal for those without access to a 3D printer, it employs a simple layering and gluing technique reminiscent of low-res 3D printing.
With clear instructions on constructing the grip’s base, walls, and cover, this project requires patience, beads, a pegboard, an iron, and a few other common supplies. Customize your grip with different colors and decorations, and follow the step-by-step process to enhance your gaming experience with a personal touch. Perfect for gifting or personal use, the Fuse Bead Grip is a crafty addition to your gaming gear.
14. Make a Perler Bead Harry Potter
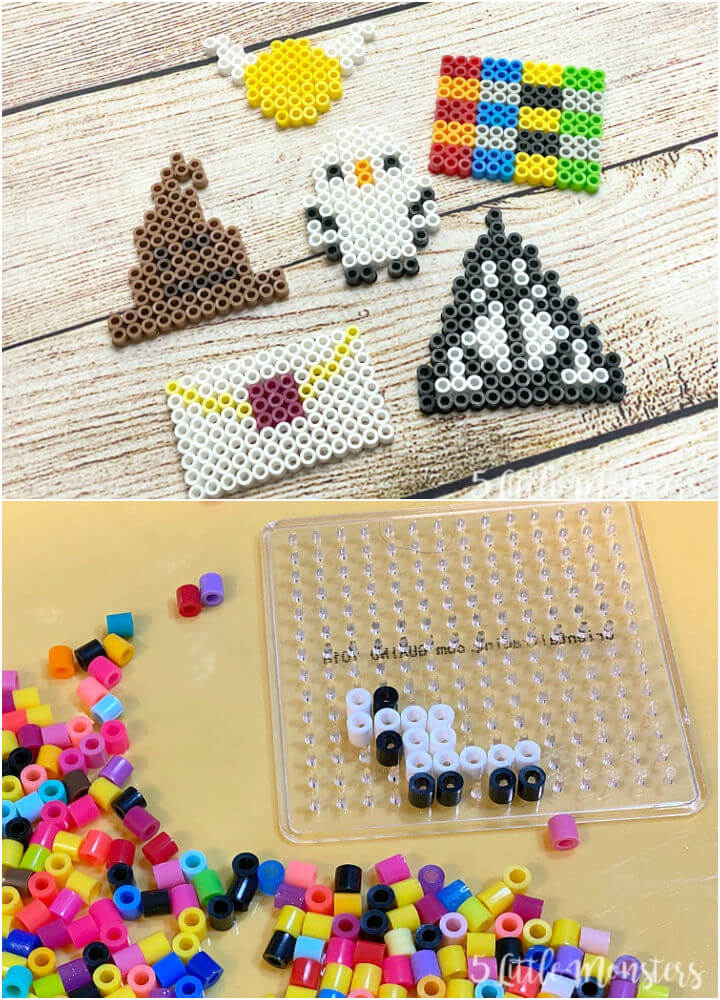
Step into the enchanting realm of Harry Potter with Perler bead designs that will spark your creativity and bring a touch of magic to your crafting sessions. 5 Little Monsters offers a delightful collection of simple, Harry Potter-themed Perler bead patterns, perfect for fans of all ages.
Celebrate Harry’s 40th birthday by crafting icons like the Deathly Hallows, Sorting Hat, and more. With easy-to-follow graphs and a basic 14×14 pegboard, these designs are a joyful way to create your very own wizarding world trinkets. Transform your finished pieces into charming magnets or just enjoy them as is. Grab your beads, ironing paper, and let’s get crafting on these spellbinding designs!
15. Unique Perler Bead Fast Food Coasters
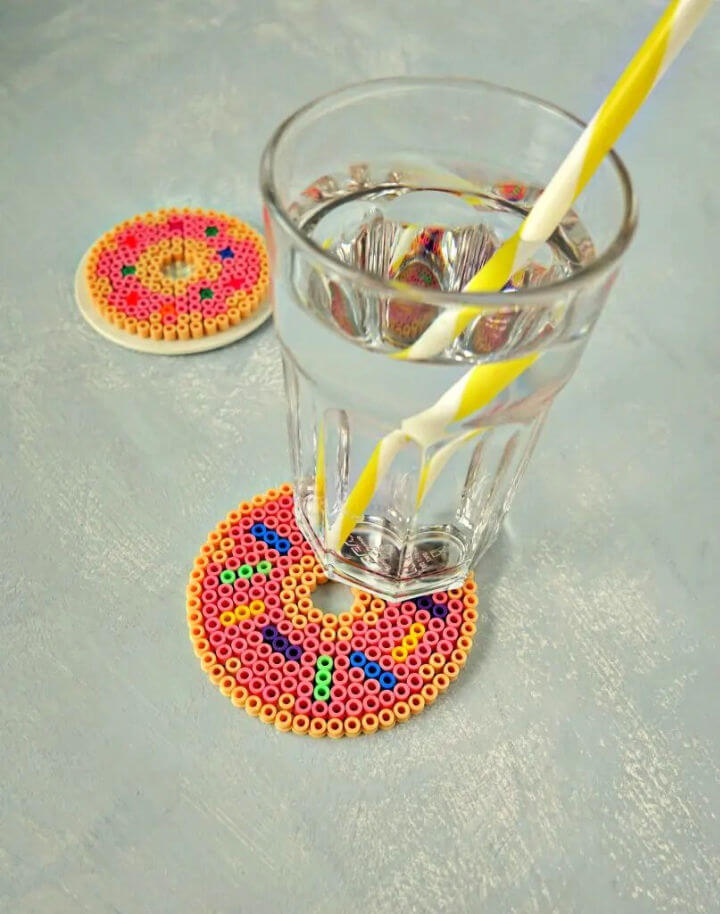
Dive into a fun and creative DIY project with The Makeup Dummy‘s guide on crafting your own fast food-themed Perler bead coasters. Perfect for summer gatherings or to add a playful touch to your home decor, these coasters are not only durable but also customizable.
The guide provides clear instructions for assembling your beads on a pegboard, choosing the right colors, and fusing them together with an iron and baking paper. These coasters can be a delightful conversation starter or a personal statement piece. Ideal for crafters who enjoy personalized home accessories, these beaded creations are a practical way to protect surfaces while sipping on your favorite beverages.
16. DIY Perler Bead Dinosaur for Kids
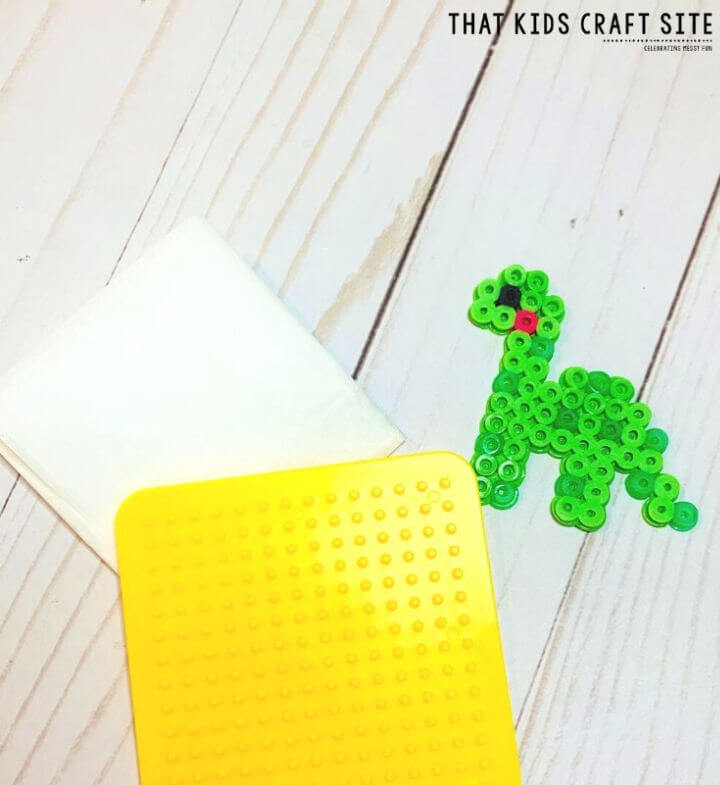
Ignite your crafting adventure with a fun and accessible dinosaur Perler bead pattern from That Kids’ Craft Site. Ideal for kids who are passionate about prehistoric creatures, this engaging activity is a fantastic way to introduce them to the joys of crafting with Perler beads. With a straightforward design that employs a basic color palette, children can easily follow along and create their own dinosaur in no time.
This project encourages creativity and gives children the freedom to experiment with different color combinations—why not try a vibrant rainbow dinosaur or a cool pink and purple one? Essential tools such as bead tweezers make the process smoother, ensuring an enjoyable experience for all. Once complete, kids will beam with pride at their handmade dino creation. Dive into some crafting fun today and watch as your child’s imagination takes shape with every bead they place.
17. Homemade Perler Beads Bowl With Designs
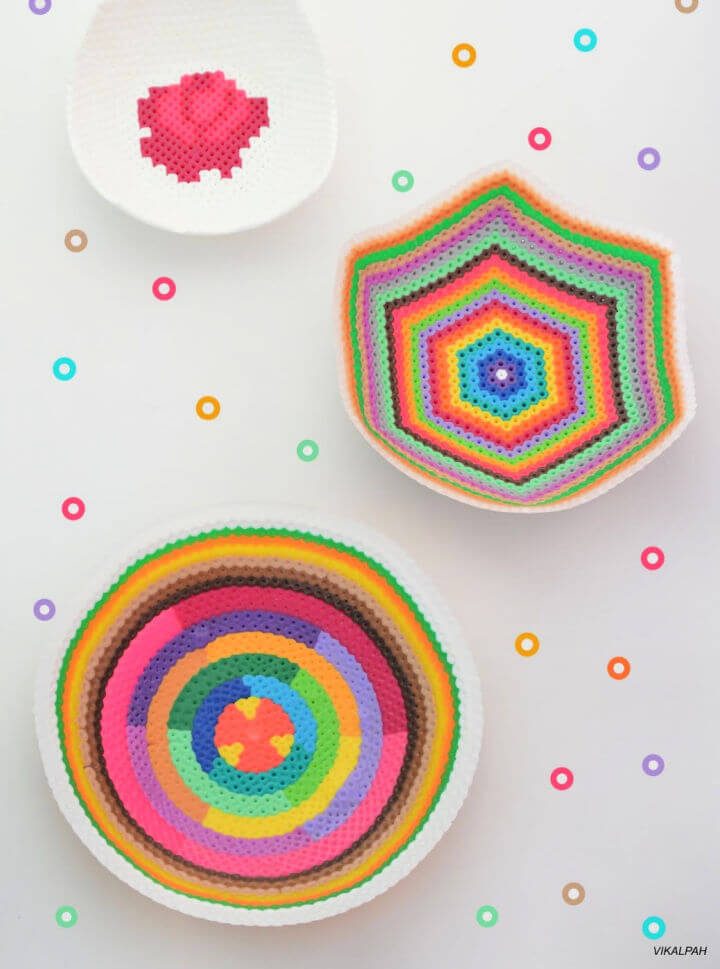
Are you ready to craft something unique and eye-catching? Our latest blog offers a step-by-step guide to creating your own perler beads bowl, complete with stunning designs. Find out how to transform simple materials like perler beads, a glass bowl, and a few common household tools into a beautiful and sturdy decorative piece.
With clear instructions and helpful tips, you can personalize your bowl with various patterns and colors. Ideal for both crafting novices and those with a passion for DIY projects, this engaging tutorial will walk you through the process, ensuring a rewarding and enjoyable crafting experience. Join us and bring a touch of handmade charm to your home décor. Vikalpah
18. Making Your Own Fruit Perler Bead Magnets
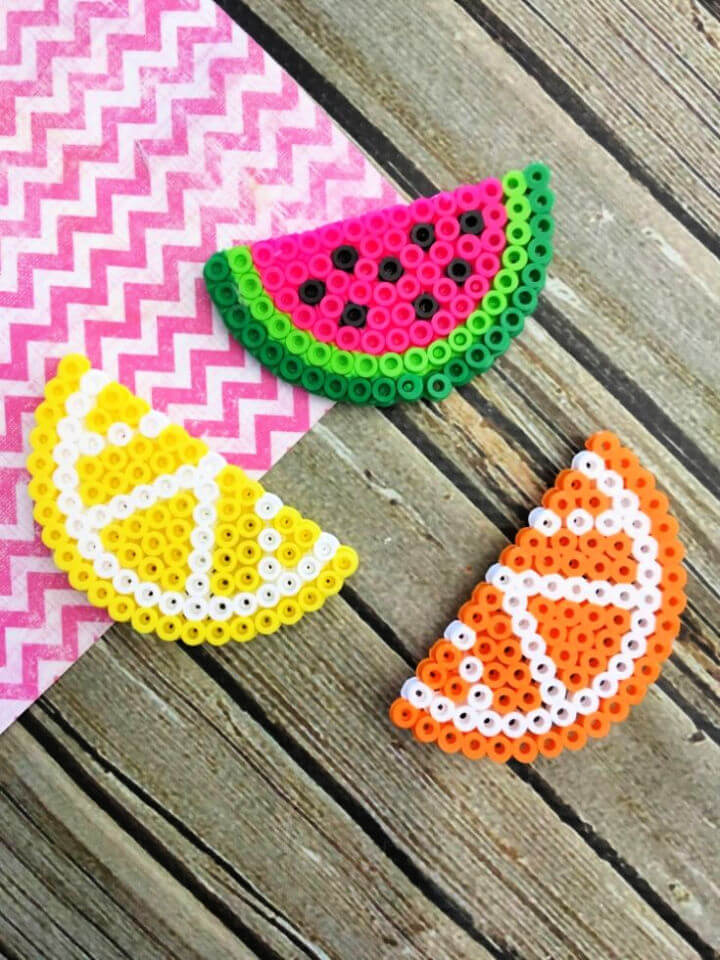
Discover how to create vibrant fruit perler bead magnets with a step-by-step tutorial from Frugal Mom Eh! These adorable crafts are a perfect way to add a splash of color and cheer to your fridge or magnetic board. The process is simple: select your beads, arrange them on a pegboard using the provided templates, iron to fuse the beads together, and attach a magnet. Suitable for crafters of all skill levels, these magnets make for a delightful activity on a lazy afternoon or as a homemade gift idea. Dive into crafting these fruity designs for a touch of summer no matter the season.
19. Awesome DIY 3D Perler Bead Pikachu and Squirtle
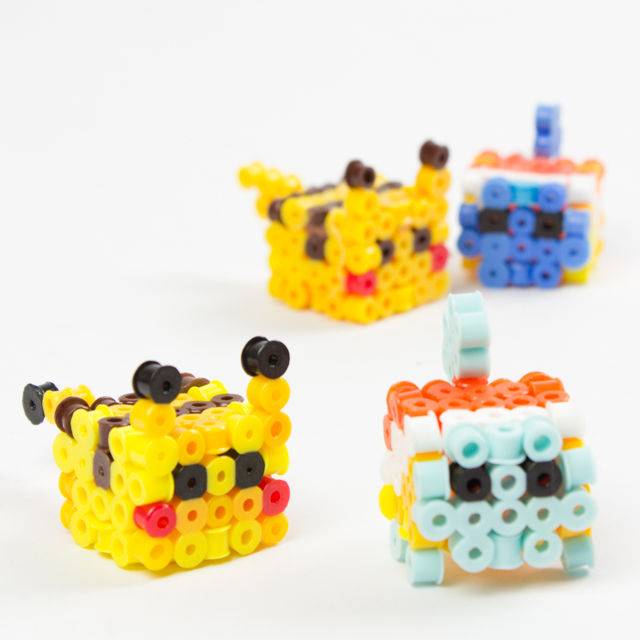
For all Pokemon enthusiasts eager to dive into crafting, Pink Stripey Socks brings a charming project that combines nostalgia and creativity. Learn how to construct a 3D Perler bead Pikachu and Squirtle with these free patterns. It’s a straightforward activity that transforms colorful beads into beloved Pokemon characters in a few simple steps.
The provided tips ensure a smooth assembly, such as securely ironing the pieces and not flattening them too much. And for an extra touch of cuteness, consider adding small googly eyes. Dive into this project and you might just find yourself wanting to craft the entire Pokemon collection. Happy crafting!
20. How to Make a Giant Hama Bead Lollipop
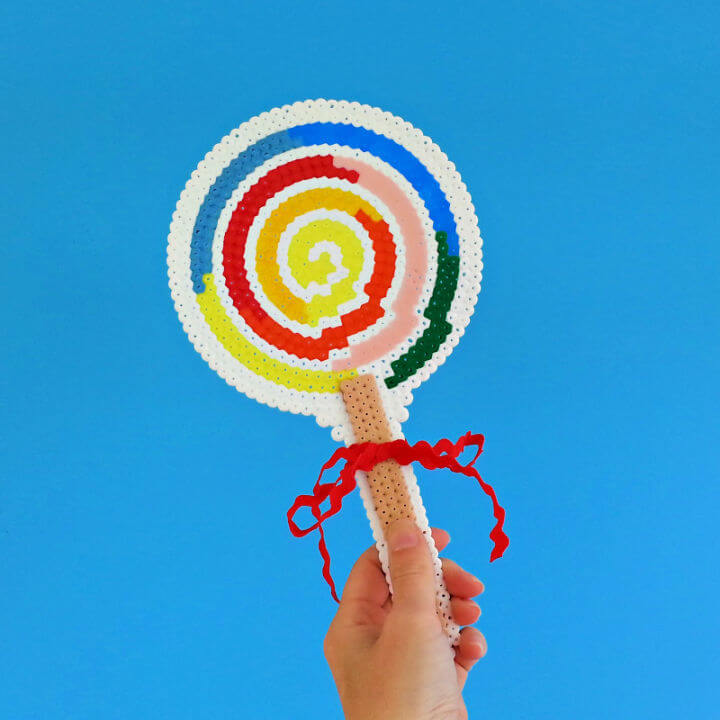
Unleash your inner pop star with the Giant Hama Bead Lollipop pattern, ideal for crafting a Katy Perry-inspired costume accessory. This fun and colorful project requires a large round and square pegboard and a mix of vibrant Hama or Perler beads. The pattern is straightforward, allowing you to easily recreate the design or customize it to your liking.
If you encounter any stability issues with the lollipop stick, the tutorial offers a smart solution using extra sticks and super glue for reinforcement. This DIY lollipop is not only perfect for parties but also durable enough for playtime with kids. Get creative and add a personal touch with a pretty bow to complete your whimsical lollipop. Happy crafting and enjoy adding a pop of color to your costume with this playful accessory! Cupcake Cutie
21. Daisy and Donald Perler Bead Necklaces
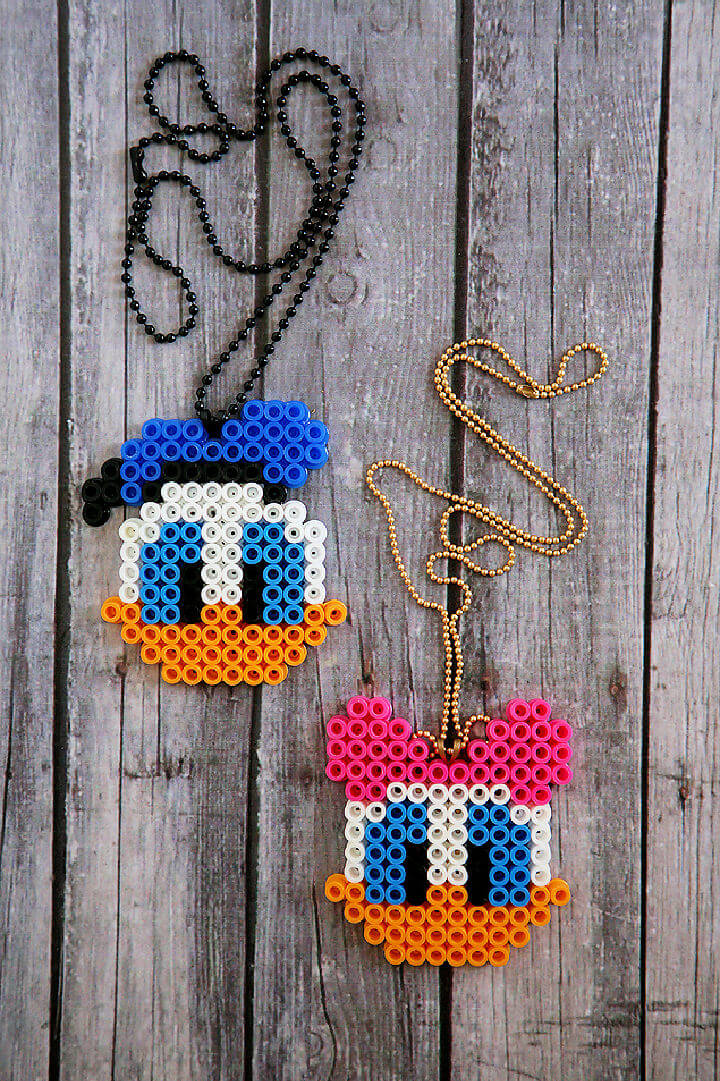
Crafting with Perler beads is a fun and creative way to make unique accessories, and Eighteen25‘s guide to creating Daisy and Donald Perler Bead Necklaces is perfect for anyone eager to add some Disney charm to their jewelry collection. This DIY project is straightforward, making it an excellent activity for families planning a trip to Disneyland or anyone who loves crafting.
The tutorial outlines the supplies needed, such as Perler beads, a pegboard, parchment paper, bail plates, ball chain, E6000 glue, and a metal headband for those preferring to make a headband. With easy-to-follow instructions, crafters can iron their designs and assemble them into necklaces or headbands. The guide provides helpful tips on customizing the chain length and securing the design, ensuring a successful crafting experience and a personalized, handmade accessory.
22. Beginner-Friendly DIY Perler Bead Unicorn
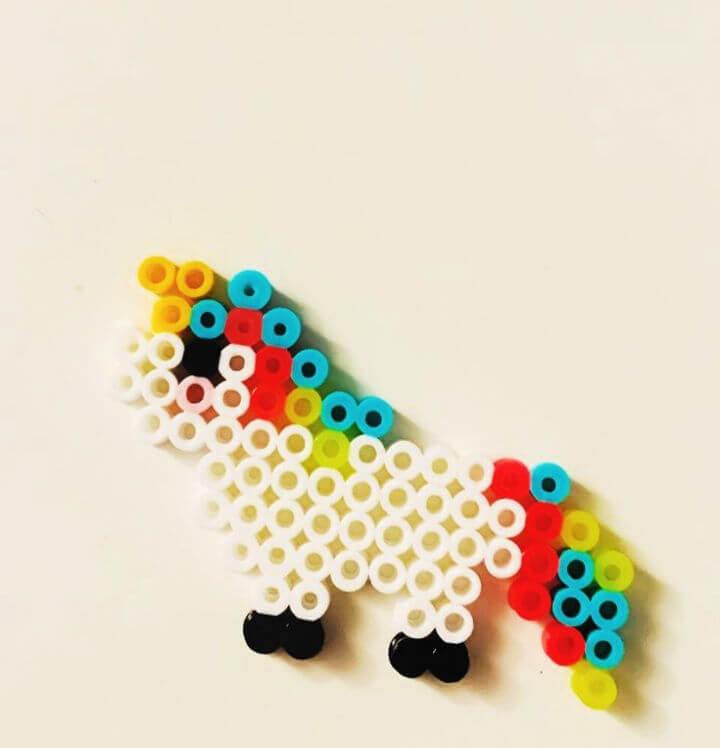
Bring your crafting skills to life with a whimsical Perler bead unicorn, perfect for kids and fun for all ages. That Kids’ Craft Site offers a free printable pattern that makes creating your own vibrant, rainbow-maned unicorn a breeze. Gather your colorful beads, a pegboard, ironing paper, and an iron, and follow the simple instructions to piece together this magical creature. Ideal for a rainy day activity or a playful learning experience, the project can transform into charming decorations or creative accessories once completed. Engage with this hands-on craft, and let the joy of making a Perler bead unicorn inspire your next artistic adventure.
23. Free Perler Bead Shark Pattern
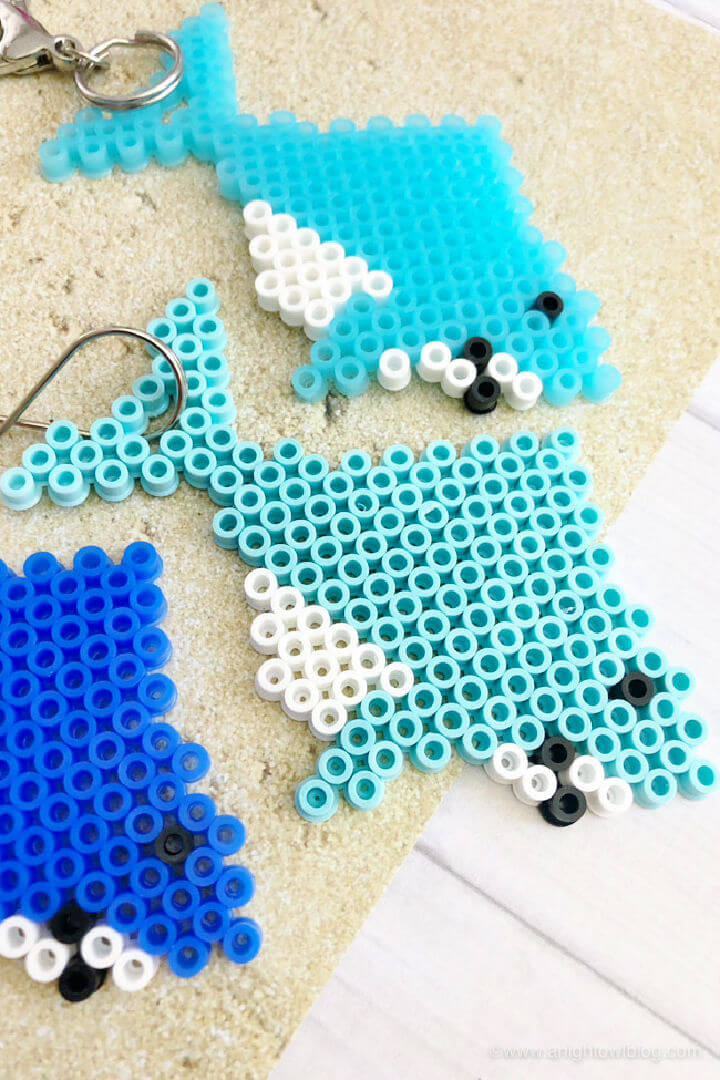
Get ready to celebrate Shark Week or add a splash of marine-themed fun to your keyring collection with the Shark Perler Bead Pattern from A Night Owl Blog. Ideal for crafting enthusiasts and shark admirers, this easy-to-follow guide helps you create charming shark keychains using perler beads. You’ll need a pegboard, perler beads, ironing paper, tweezers, an iron, and keychain attachments to embark on this crafty adventure.
Start by arranging beads to form the shark’s silhouette, then iron them together for a sturdy design. Once cooled, attach the keychain, and you’ve got a personalized aquatic accessory. This project is perfect for a hands-on party activity or a relaxing craft session. Dive into making these adorable keychains and add a creative bite to your crafting repertoire!
24. Easy DIY Perler Bead Square Monograms
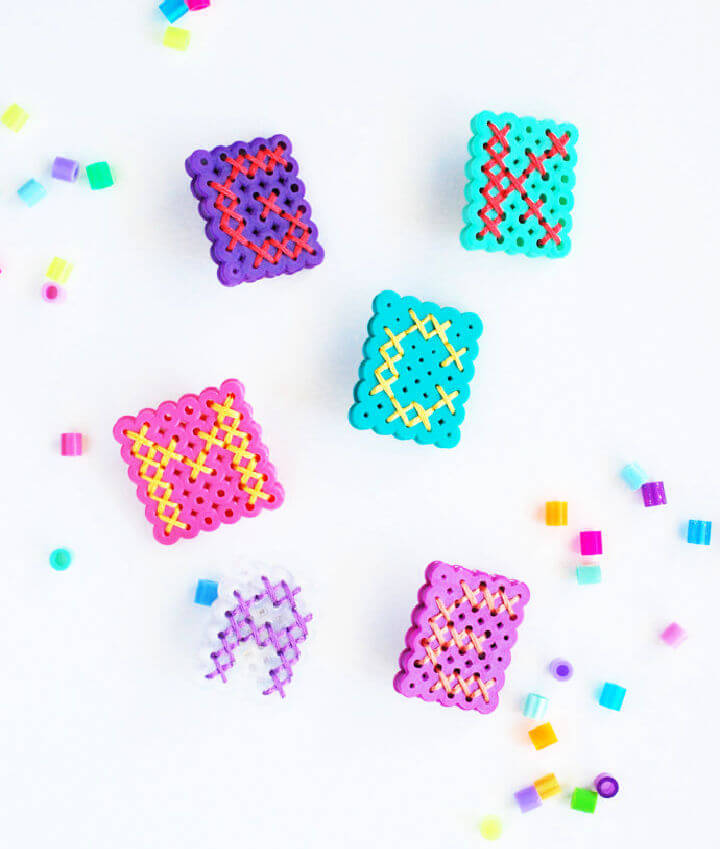
If you have a fondness for crafting and want to personalize your accessories with a unique touch, learning how to make perler bead monograms could be the perfect project for you. This engaging and instructive guide walks you through the creation of perler bead pieces adorned with your chosen monogram, utilizing simple cross-stitch techniques to achieve a charming and customized look.
From assembling the necessary materials, such as perler beads, a bead board, and embroidery floss, to the ironing process that fuses the beads together, each step is detailed to ensure clarity and ease. Whether stitching a letter for a special pin, creating magnets, or even making a mini banner, the guide helps crafters of all levels to produce lovely, handcrafted items.
The final touch of attaching a pinback transforms your perler bead creation into a fashionable accessory that can be worn proudly or given as a thoughtful, handcrafted gift. With easy-to-follow instructions, this guide ensures a rewarding crafting experience, providing a fun way to explore the versatility of perler beads while adding a personal touch to your craft repertoire. Handmade Charlotte
25. How to Make a Perler Beads Drink Topper
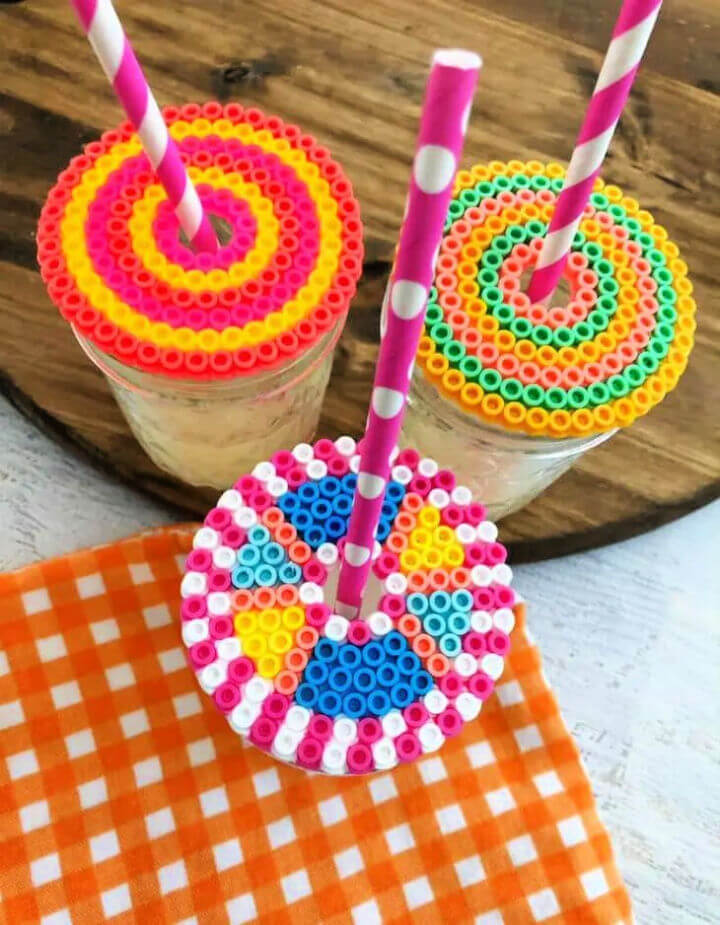
Create your own Perler Beads Drink Topper with iSaveA2Z.com‘s engaging craft idea! This project is perfect for summer, offering a clever way to keep bugs out of your drinks while enjoying the outdoors. The colorful toppers can also serve as drink markers, making them as functional as they are fun. Use a circle pegboard and your choice of Perler beads to design a unique pattern.
Remember to leave the center peg and surrounding circle empty for the straw. Once you’ve crafted your design, simply iron the beads between ironing paper until they fuse, let cool, and place on your drink container. It’s a simple, yet creative activity that kids and adults can enjoy together, and it’s a practical addition to any summer gathering. Get ready to sip in style and pest-free!
26. DIY Perler Bead Rainbow and Unicorn Brooches
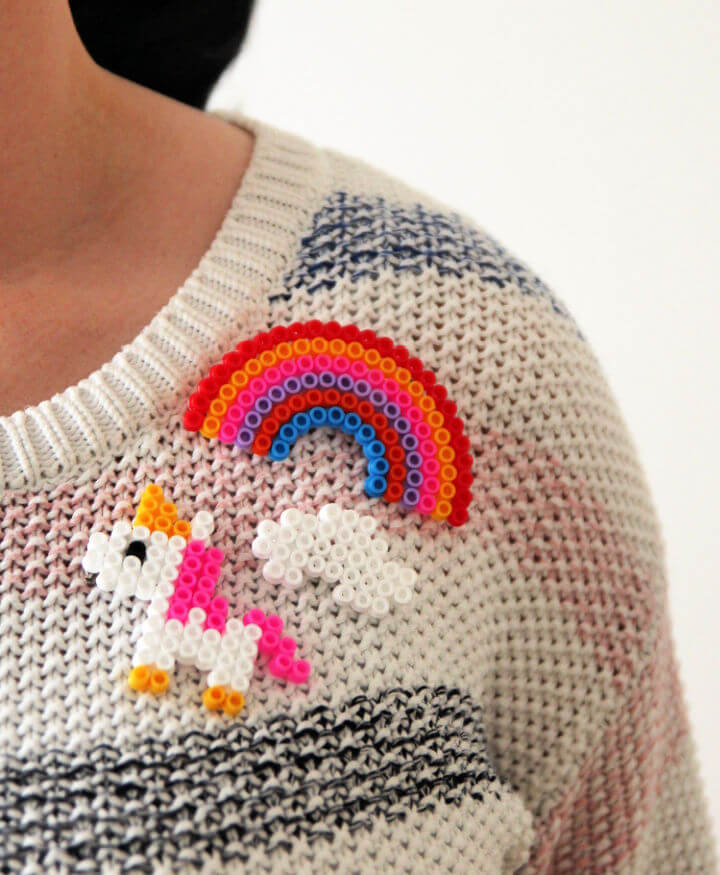
Revisit your childhood creativity with Gathering Beauty‘s DIY guide on crafting charming Perler bead rainbow and unicorn brooches. These vibrant beads offer a nostalgic touch and a versatile crafting experience. The tutorial is easy to follow, perfect for anyone who enjoys making unique, handmade accessories.
Step-by-step instructions help you transform simple beads into magical brooches, complete with tips for ironing and securing the brooch pin. It’s a delightful way to spend a rainy day, creating whimsical pieces for yourself or as gifts for friends and family. With just a pegboard, beads, parchment paper, and a few tools, you can bring these adorable designs to life.
27. Make a Video Game Beadsprite Using Perler Beads
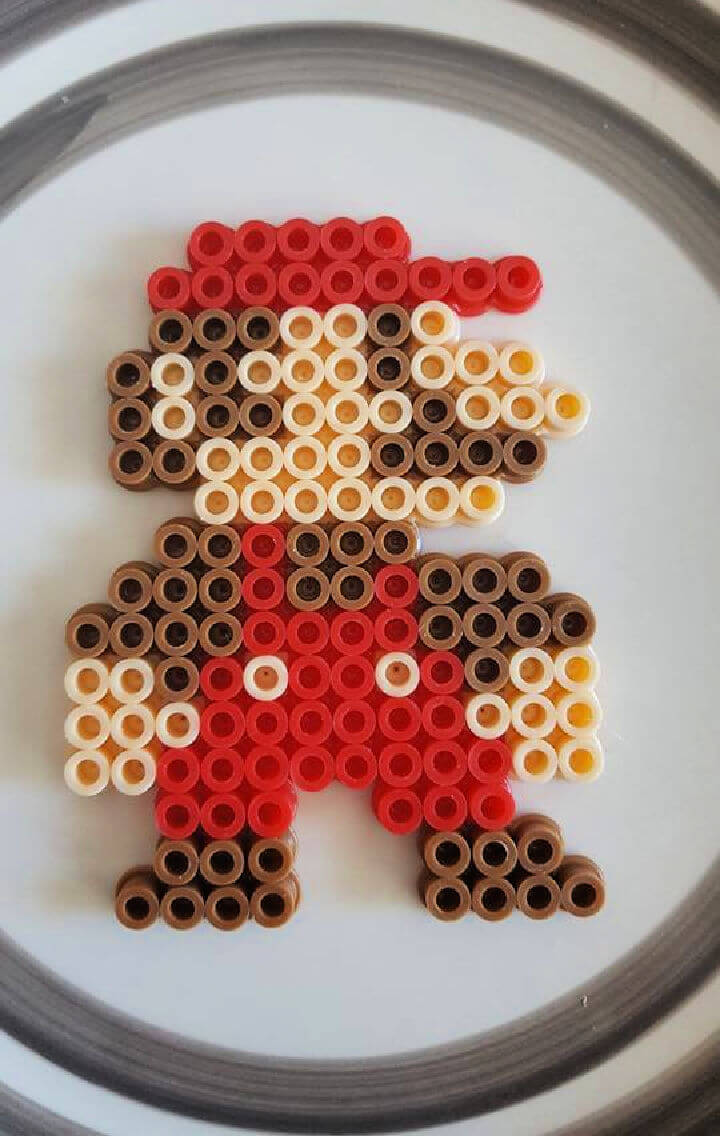
Create captivating video game beadsprites with Perler beads, following this easy guide from Instructables. Perfect for crafting enthusiasts, this step-by-step tutorial helps you bring pixelated game characters to life. No need for extensive crafting skills—just a bit of patience and creativity. You’ll learn to select colors, arrange beads on a pegboard, and safely melt them into a cohesive, vibrant design. Plus, get expert tips to make your beadsprite art stand out. Whether crafting for fun or as unique gifts, enjoy making these charming, nostalgic pieces that pay homage to the classic era of gaming.
28. Artkal Bead Majora’s Mask from Legend of Zelda
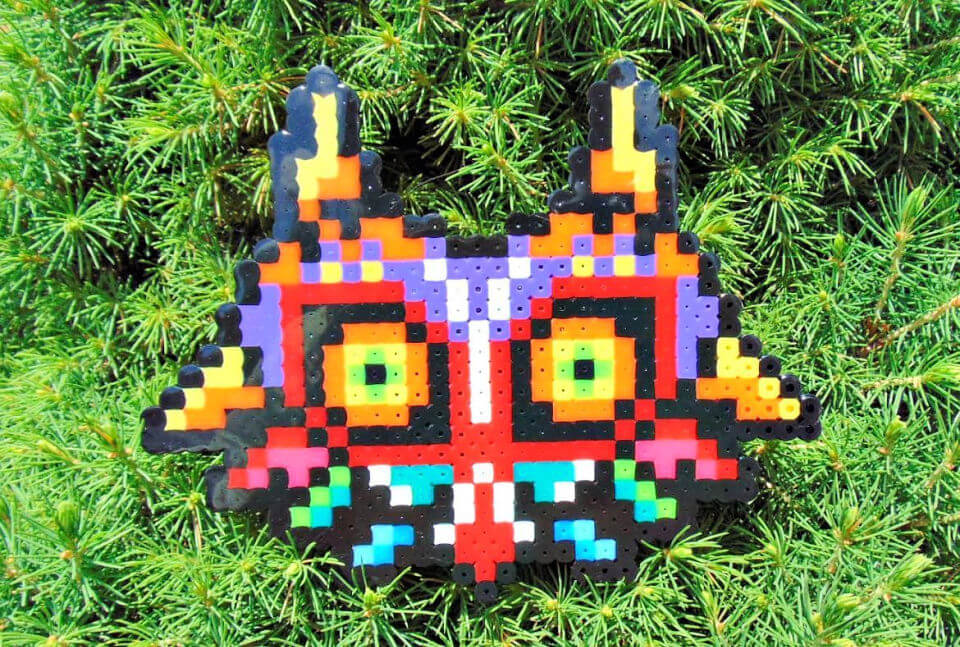
Create a vibrant Majora’s Mask from The Legend of Zelda with the Artkal Bead pattern, designed for crafters who appreciate the intricacies of beadwork. On Krysanthe’s website, you’ll find a user-friendly guide to bring this iconic mask to life using Artkal’s extensive color selection.
The pattern is simple enough for younger enthusiasts yet offers an enjoyable project for all skill levels. As you venture into this crafting experience, enjoy the ease of working with Artkal Beads and their seamless melting quality, ensuring a stunning sheen finish. Step into the creative world of Zelda-themed art and make a masterpiece to admire or gift to a fellow fan.
29. DIY 3D Red Beaded Rose for Girlfriend
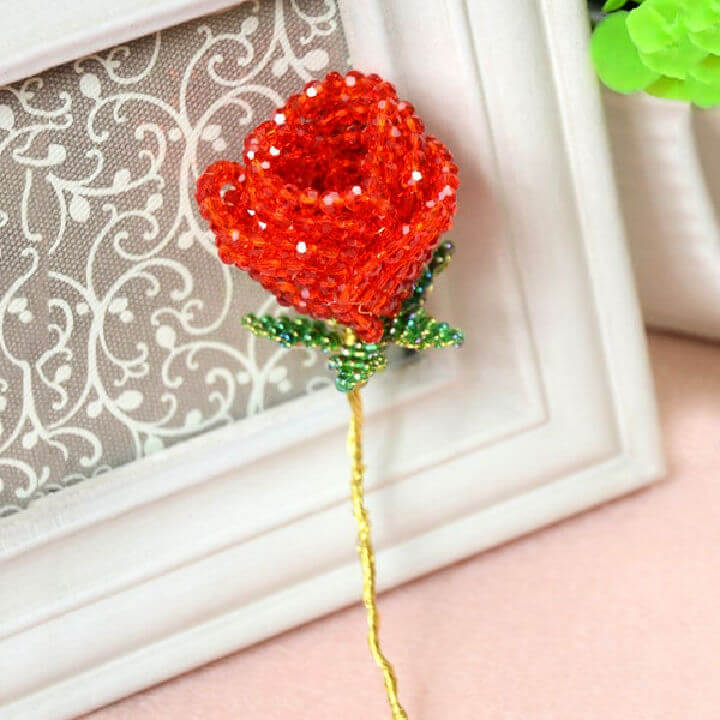
Craft a unique and heartfelt Valentine’s gift for your girlfriend by making a 3D red beaded rose, symbolizing deep love and affection. Instructables offers a step-by-step guide that simplifies the process, providing a detailed list of materials and clear instructions to ensure your handmade creation blooms beautifully. Perfect for those who enjoy personalizing their gifts, this tutorial will help you design a memorable keepsake that your partner can cherish. With patience and creativity, your crafted beaded rose will become a testament to your dedication and love.
30. Homemade Perler Bead Disney Princess Chip Clips
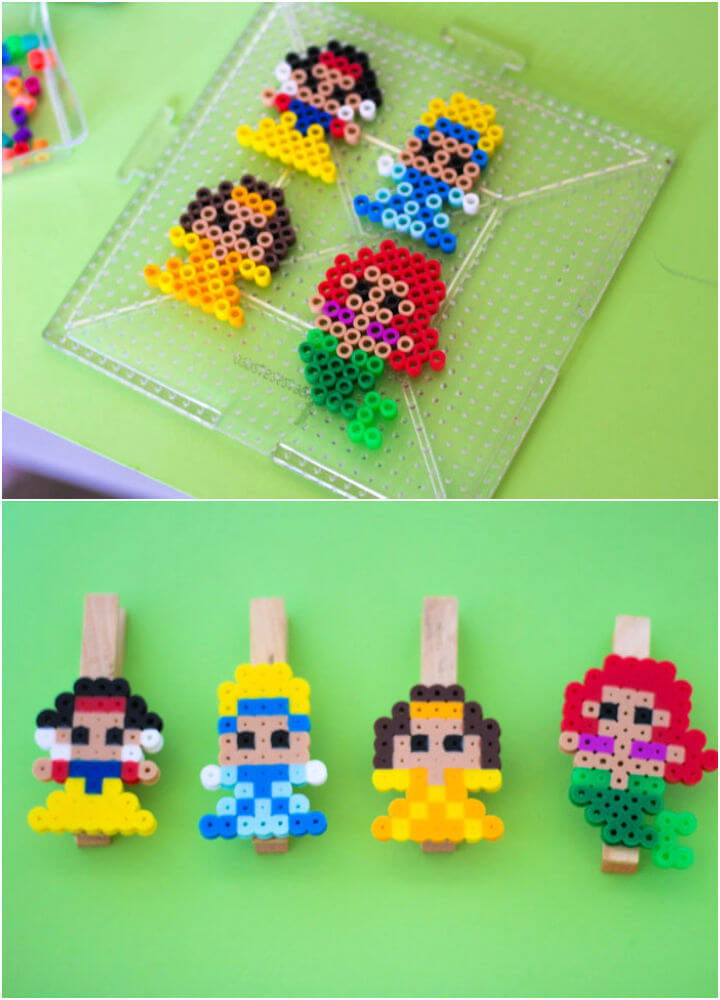
Creating charming Princess DIY Chip Clips using Perler Beads is a delightful craft that brings a touch of whimsy to your kitchen organization. The project is simple and budget-friendly, with a total cost of around $5 if you need to purchase supplies. By following the instructions provided by Do It Your Freaking Self, you can fashion your very own cute and functional clips in under an hour, perfect for keeping snack bags sealed or just adding some character to your home.
Remember to safely use a hot glue gun to affix your finished princess designs to the clothespins. This engaging activity is not only enjoyable but also helps in developing fine motor skills, making it ideal for crafting alongside children. As you work, perhaps let the tunes from “Little Mermaid” inspire your creative process for an even more magical crafting experience.
31. Beginner’s Guide to Make a Hama Bead Keyring Owl
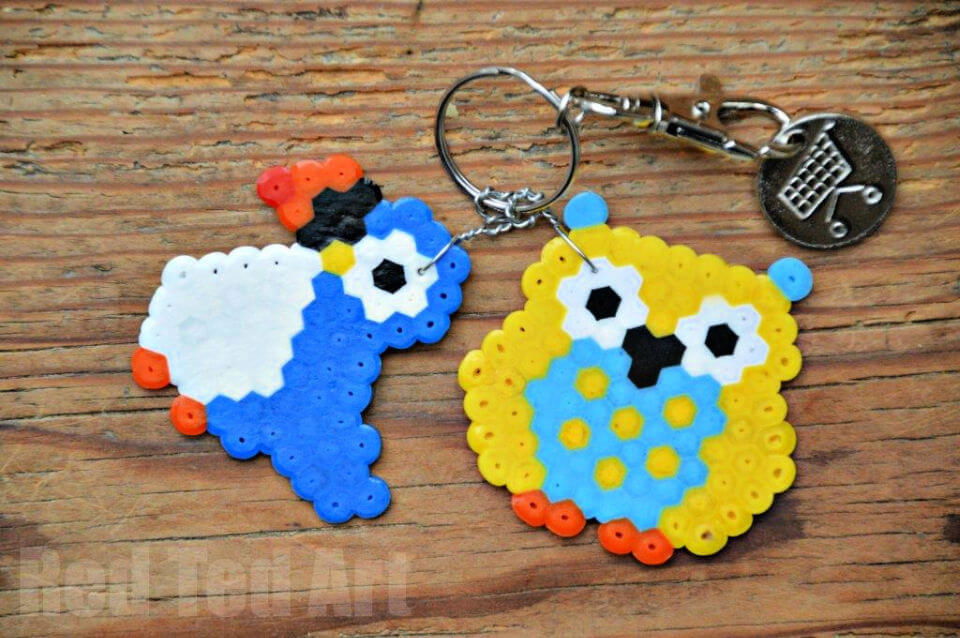
Discover a charming and creative activity that kids can enjoy while crafting meaningful gifts with Red Ted Art‘s guide to making Hama Bead Keyring Owls. This craft is perfect for children who want to show appreciation to their teachers or loved ones with a handmade token.
The guide provides clear instructions on creating cute keyrings using Hama beads (also known as Perler or Melty beads), a hexagon or star-shaped tray, ironing paper, and a keyring. Red Ted Art – Kids Crafts offers a step-by-step tutorial, ensuring the process is enjoyable and the results are durable and delightful. Engage in this craft to make personalized gifts for Father’s Day, Mother’s Day, or any special occasion.
32. How to Make a Cool Perler Bead Guitar
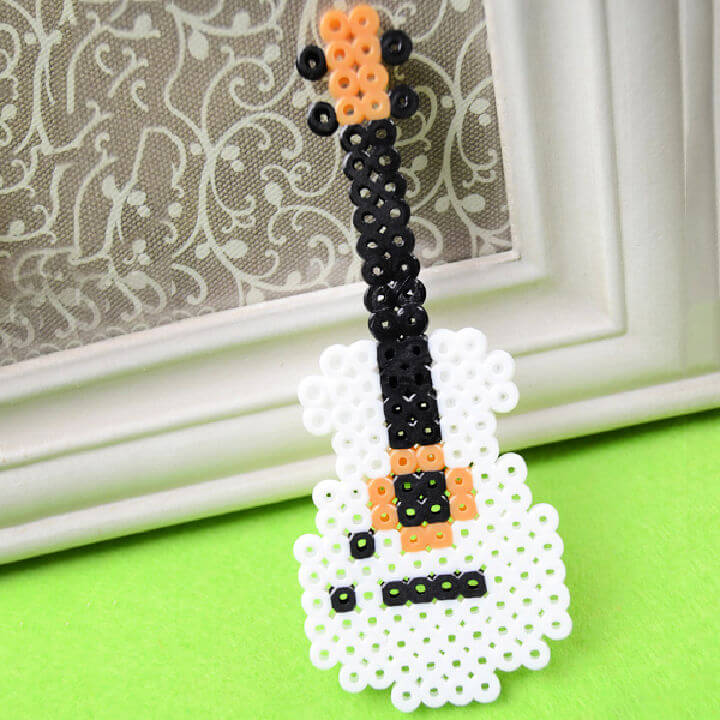
Creating a cool Perler bead guitar pattern is an enjoyable and straightforward project perfect for adding a personalized touch to your home decor. On Pandahall.com, you can follow an easy tutorial to craft a unique decoration piece using simple materials like dark yellow, black, and white Perler beads, a square pegboard, pressing paper, and an iron. The process involves shaping the guitar’s body and other elements, which are then fused together with heat.
While the ironing part should be done by an adult, the project is a fun activity that can be enjoyed by crafters looking to make a colorful and creative item for their space. It’s an opportunity to experiment with different bead colors and to make a statement piece that reflects your personal style. Remember, safety first—keep the iron out of children’s reach. Enjoy crafting your very own Perler bead guitar and brighten up any room with your handmade creation.
33. DIY Perler Bead Star Art for Kids
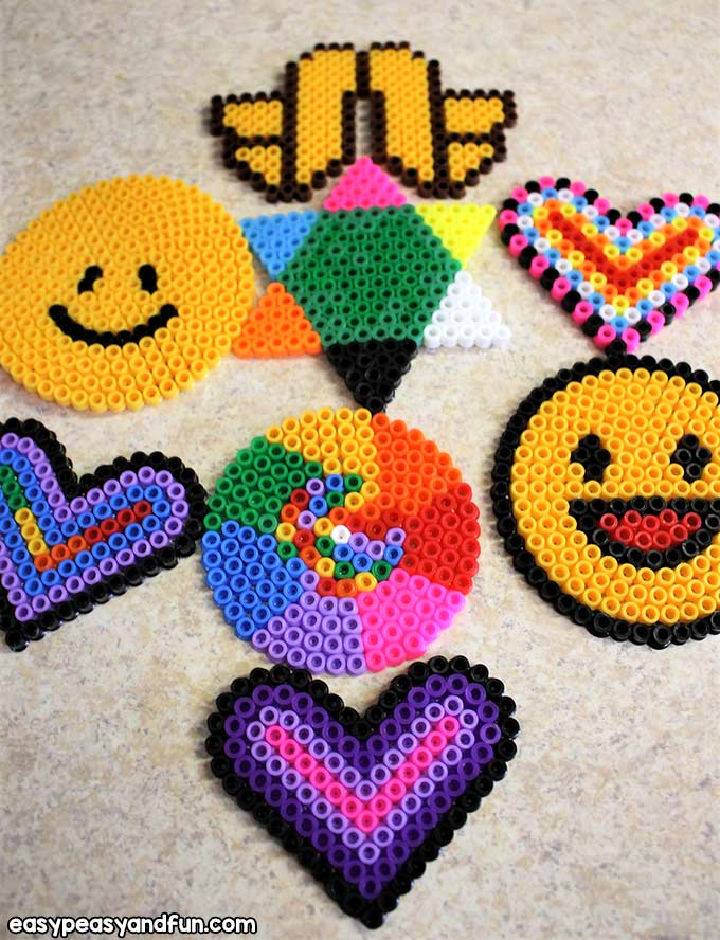
Discover how Perler Beads can transform your kid’s art class into a vibrant space of creativity with Easy Peasy and Fun’s comprehensive guide. These classic crafts offer a fun experience for children, encouraging them to explore color theory and design principles. With helpful tips on organizing supplies, step-by-step instructions, and tricks for ironing beads, instructors and parents can lead engaging art lessons that result in beautiful, handmade creations. Dive into this resource for all the essentials on incorporating Perler Beads into art activities that are both educational and enjoyable.
34. Awesome Perler Bead iPhone Case Holder
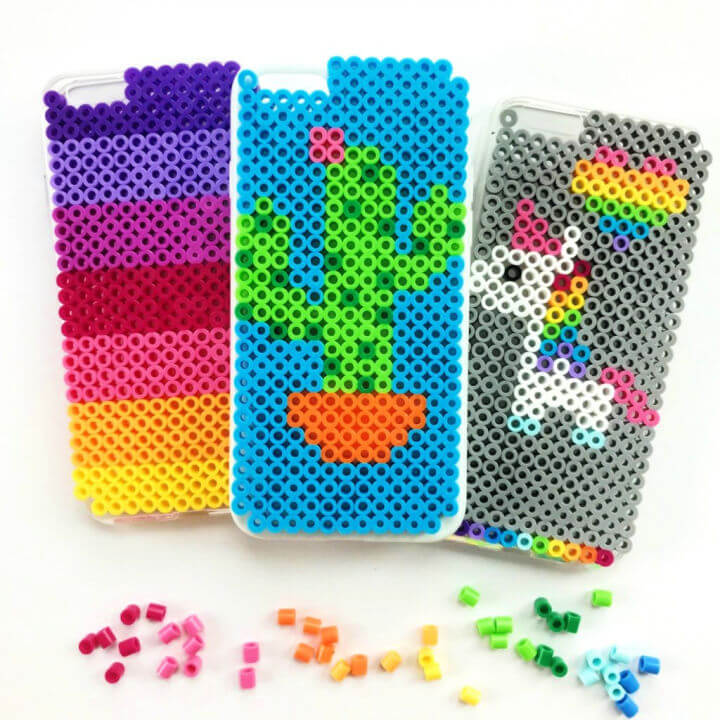
Unleash your artistic side and transform ordinary perler beads into a stunning, custom iPhone case holder with guidance from Color Made Happy. This DIY project is a creative way to infuse personality into your device’s accessory. The process is straightforward and invites you to exercise your imagination.
Begin by designing your pattern on a pegboard, then iron the beads to fuse them together. Adhere your creation onto an iPhone case using strong craft glue, and voila—a unique and vibrant case is ready to flaunt. This engaging craft not only offers a custom solution to phone protection but also provides a therapeutic crafting session that can be enjoyed by all. Dive in and enjoy the simple pleasure of making something truly one-of-a-kind.
35. Simple DIY Perler Bead Bookmarks
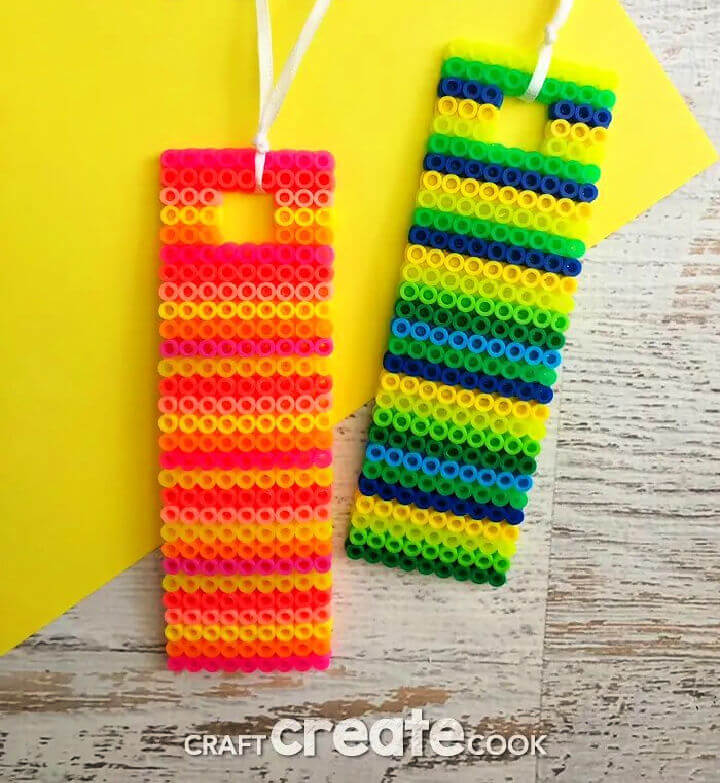
Create personalized bookmarks with Perler beads to add a splash of color to your reading routine. The process is simple and enjoyable, ideal for a creative afternoon activity. Gather your Perler beads, a pegboard, ironing paper, ribbon, scissors, and an iron, and you’re ready to start crafting. Design your bookmark by arranging beads in patterns or stripes, creating a piece that’s uniquely yours.
With easy ironing steps and ribbon attachment instructions provided by Craft Create Cook, you’ll have a charming and functional bookmark in no time. Perfect for crafting enthusiasts or anyone seeking to infuse their reading with a touch of handmade charm, these Perler Bead Bookmarks are a delightful project to make for yourself or as gifts for fellow book lovers.
36. Making Jewellery Trays from Perler Beads
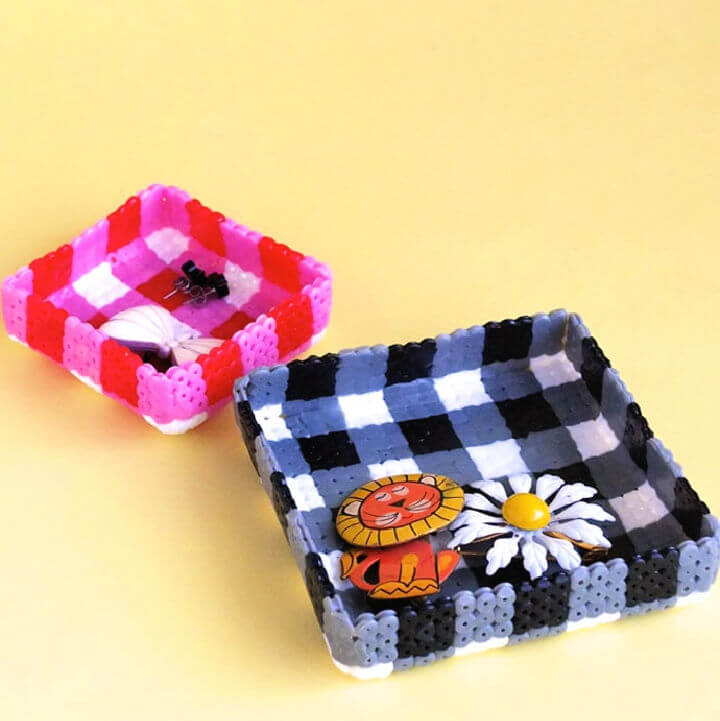
Create a stylish gingham-patterned jewellery tray with a simple and enjoyable DIY project from My Poppet Makes. Perfect for organizing small trinkets and adding a personal touch to your space, these trays are crafted from colorful Perler or fuse beads. The process requires a pegboard, tweezers, silicone paper, an iron, and a small box or flat wood piece for shaping. With care taken to avoid the hot, melted plastic, you’ll quickly fuse and fold your way to a custom accessory holder. Make it uniquely yours by selecting colors that match your decor, and enjoy the charm and functionality it brings to your home.
37. DIY Day of the Dead Perler Bead Skulls
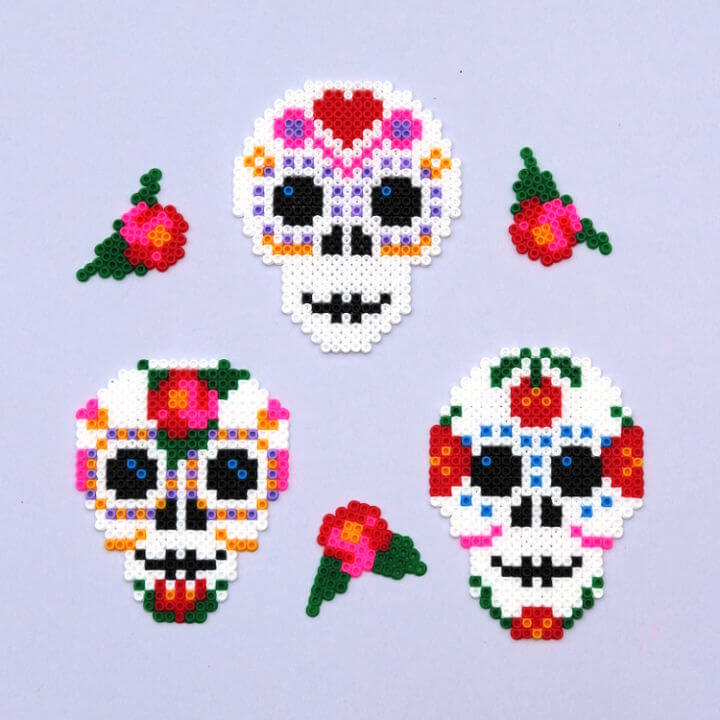
Discover how to create vibrant Day of the Dead Perler bead skulls with a step-by-step guide from Gathering Beauty. Ideal for festive decorations or unique coasters, this DIY project is perfect for crafting enthusiasts eager to explore the versatility of Perler beads.
By following the instructive tutorial, you can easily adapt cross-stitch patterns to Perler bead creations and fuse your designs with simple tools like tweezers, ironing paper, and an iron. The result is a colorful, handcrafted piece that captures the spirit of the Day of the Dead celebration. With clear instructions, the process is engaging and straightforward, making it a delightful craft activity for any DIY aficionado.
38. How to Make a Perler Bead Necklace
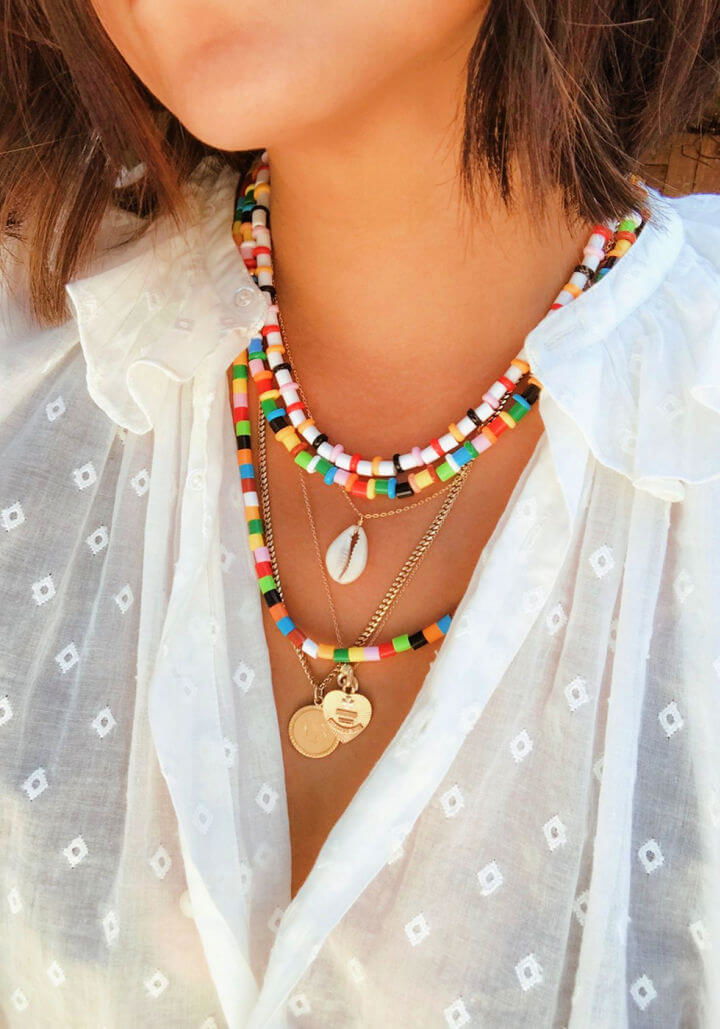
Get crafty with Honestly WTF‘s DIY Perler Bead Jewelry guide, perfect for anyone who enjoys making their own accessories. Transform colorful Perler beads into chic flat donut beads simply by baking them in your oven. With easy-to-follow steps, you can create personalized jewelry pieces like bracelets and necklaces.
The project is quick, with no need for clasps, as it suggests using elastic cording for convenience. Finishing touches like crimp covers not only conceal the knots but also add a professional touch, ensuring your necklace looks great from every angle. Dive into this nostalgic and fun craft, and add a pop of color to your jewelry collection with your unique Perler bead creations.
39. Make a 3D Perler Bead Pokeball
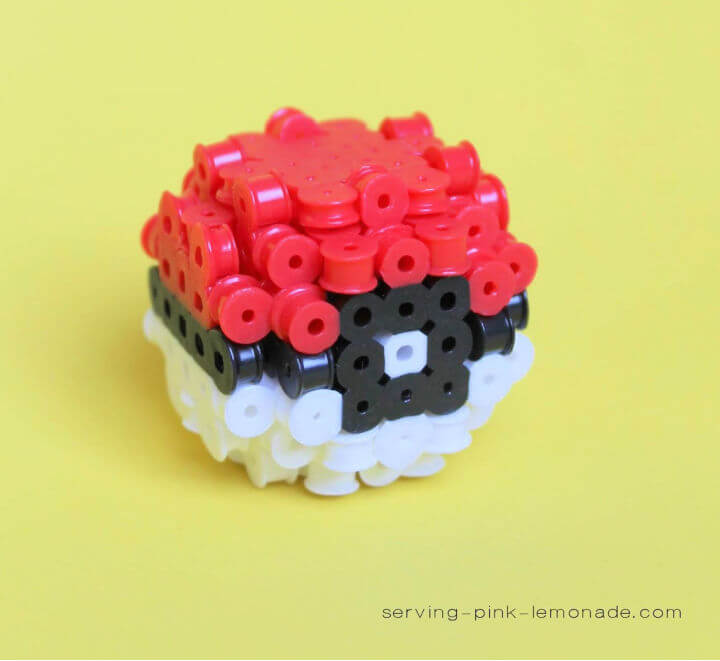
If crafting with perler beads piques your interest, the instructions for making a 3D Perler Bead Pokeball will provide a fun and creative challenge. Ideal for fans of the Pokémon series or those who love hands-on projects, these step-by-step guidelines make assembling a 3D Pokeball straightforward. Each piece is designed to interlock, similar to a puzzle, creating a visually appealing and tangible product.
Remember to iron the beads with just enough heat to meld them without flattening them excessively, ensuring a smooth assembly. As you gather your red, white, and black beads, get ready for an engaging crafting session that can lead to an array of unique designs, limited only by your imagination. Enjoy the process and proudly display your handmade 3D Perler Bead Pokeball once completed. Serving Pink
40. Colorful Perler Beads Change Holder
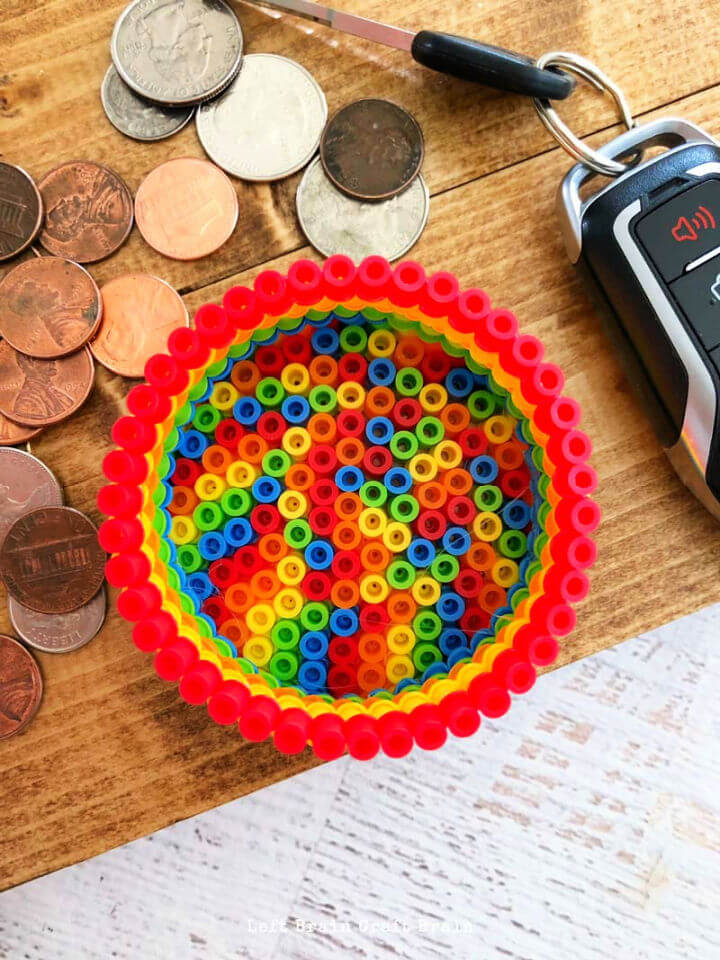
Create a charming and useful Perler Beads Change Holder with this engaging and easy-to-follow guide from Left Brain Craft Brain. Perfect for homemade gifts, such as Christmas or Mother’s Day and Father’s Day presents, this project allows kids to harness their creativity while making something practical. With just a few supplies like colorful Perler beads, ironing paper, a pegboard, tweezers, iron, and E6000 glue, you can craft a vibrant container that corrals loose change in style. Dive into crafting and enjoy making a gift that combines fun, learning, and utility all in one!
Conclusion
Ready to create with Perler beads? Our guide on 40 easy and cute perler bead patterns and design ideas offers an exciting array of projects to spark your creativity and enhance your crafting skills. Perfect for personalized gifts, home decor, or simply a fun activity, these perler bead patterns are tailored to inspire. Embrace the charm of Perler beads and start crafting your unique designs today for a rewarding and colorful crafting experience!


