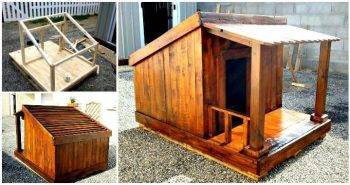
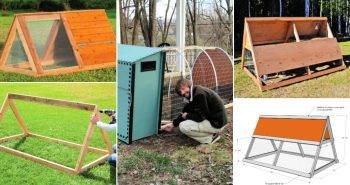
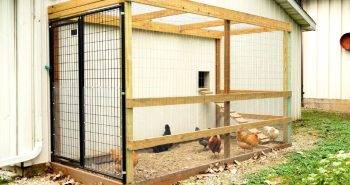
Do you have a dog? These 35 free DIY dog house plans are just perfect to build a dog house at home to make dog life easier! Do you remember seeing houses like these in cartoons when you were younger? This is where the dog would hide their snacks and live peacefully! These dog houses were a big thing, a few decades back! Now, people are just used to keeping dogs inside their houses. If you want to keep your dog outside your house or even bring some lovely dog house decor inside or maybe just want to treat your upper with something new, these free dog house plans and material list is a perfect guide that you can follow.
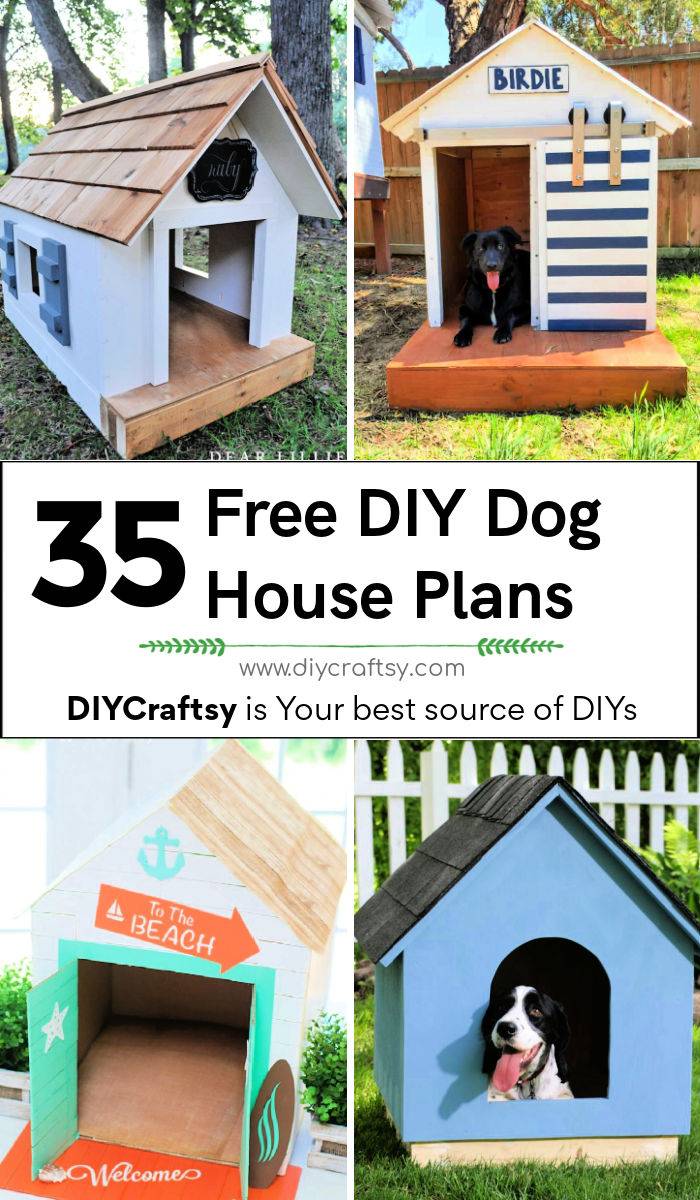
If one of your friends or loved ones just got a new dog and you’re planning on going to meet it, this can be a great gift! As it’s thoughtful, aesthetically pleasing, and just amazing! Make sure that they have a nice backyard where they can place it. Like, make a smaller one if it’s an apartment balcony. This article will cover a range of free DIY dog house plans, from plywood to pallet ones; from rustic to modern ones; or from A-frame to barn door ones; from insulated to indoor ones. As versatility is always appreciated, right? So, let’s dive into these dog house plans.
The best and simple dog house plans are here:
Build your dog a house of their own with these free dog house plans that include plan diagrams, step by step building instructions, and materials/cut lists with PDF to download.
Wooden Pallet Dog House:
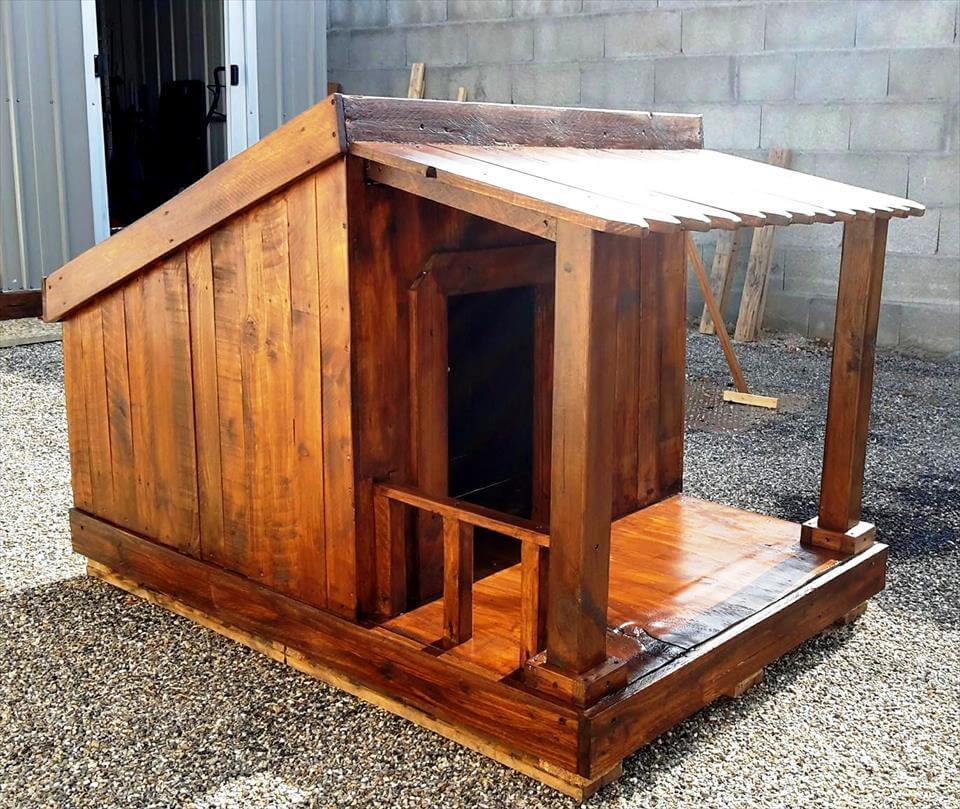
How easy it is to build a dog house with pallets, We have brought here this DIY pallet dog house step-by-step tutorial that will guide you through all the. ! Pallet Dog House
1. Snoopy Dog House
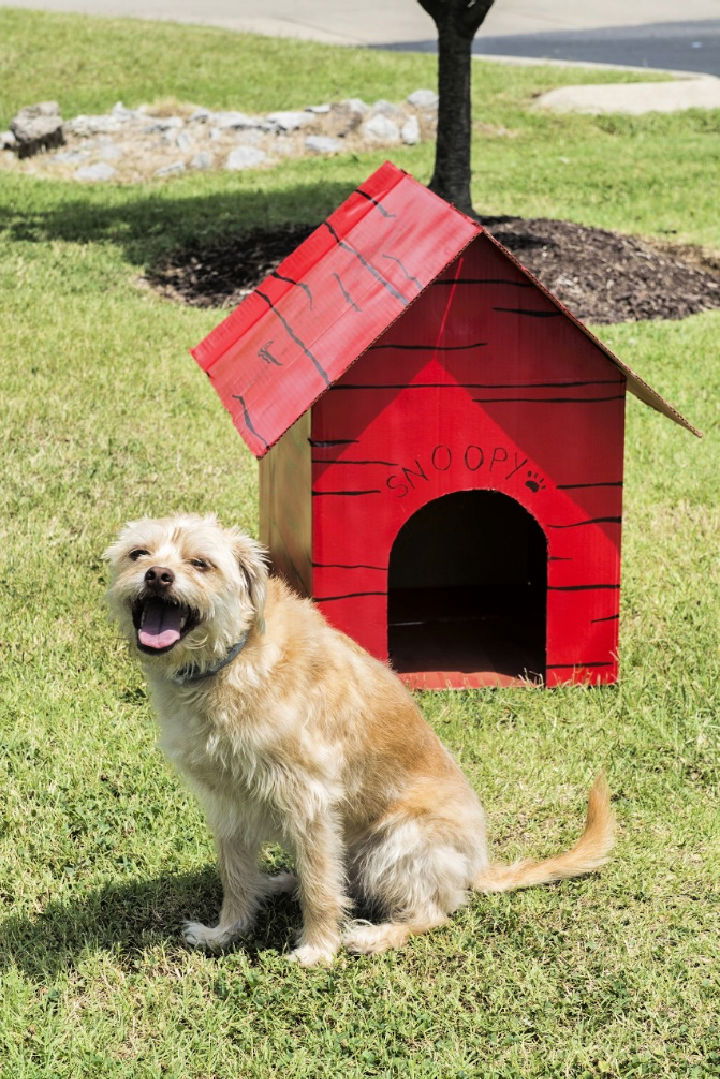
Recycling is definitely the best part of this amazing project! You don’t really need to buy new lumber for this absolutely stunning DIY dog house! Only two moving boxes – large or small, depending on your dog’s size – are required. Packing tape, spray paint, and a few other supplies are also required.
2. How to Build a Dog House
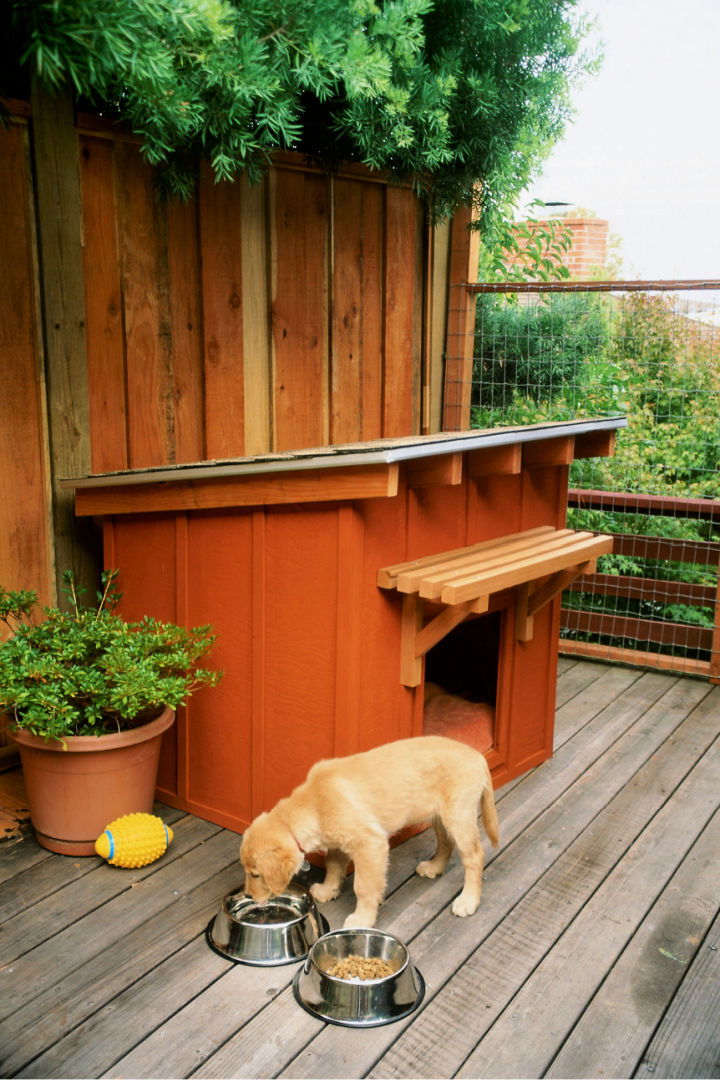
Delight your furry friend with a personalized mini ranch-style doghouse. This comprehensive guide, designed for beginning-to-intermediate woodworkers, provides detailed instructions on crafting a stylish and sturdy shelter for your large dog. From gathering materials to the final assembly, each step is clearly outlined, ensuring you build a cozy retreat for your pooch that also enhances your backyard aesthetic.
Sizes: Fits a large dog
Supplies:
- Tape measure
- Pencil
- Square
- Protractor
- Circular saw
- Paintbrush
- Electric drill
- Tin snips
- Hammer
- Plywood sheets (3)
- Deck screws
- Redwood 2-by-4s and 2-by-2s
- Exterior paint or stain
- Redwood lattice
- Panel adhesive
- Wire brads
- Metal drip edging
- Galvanized roofing nails
- Asphalt shingles
Cost: Approximately $200
Difficulty: Beginning-to-intermediate
Special Instructions:
- Paint cut panels before assembly.
- Ensure floor height matches front opening.
- Attach panels to the floor with corner reinforcement.
- Secure roof with exterior flanking rafters.
- Add arbor of 2-by-2s and lattice trim.
- Use metal drip edging and roofing nails for roof finishing.
Notes:
- Asphalt-shingle roof is removable for easy cleaning.
- Provides shade and a rustic look with redwood lattice battens.
Original Source: Sunset
3. Dog House Using Plywood
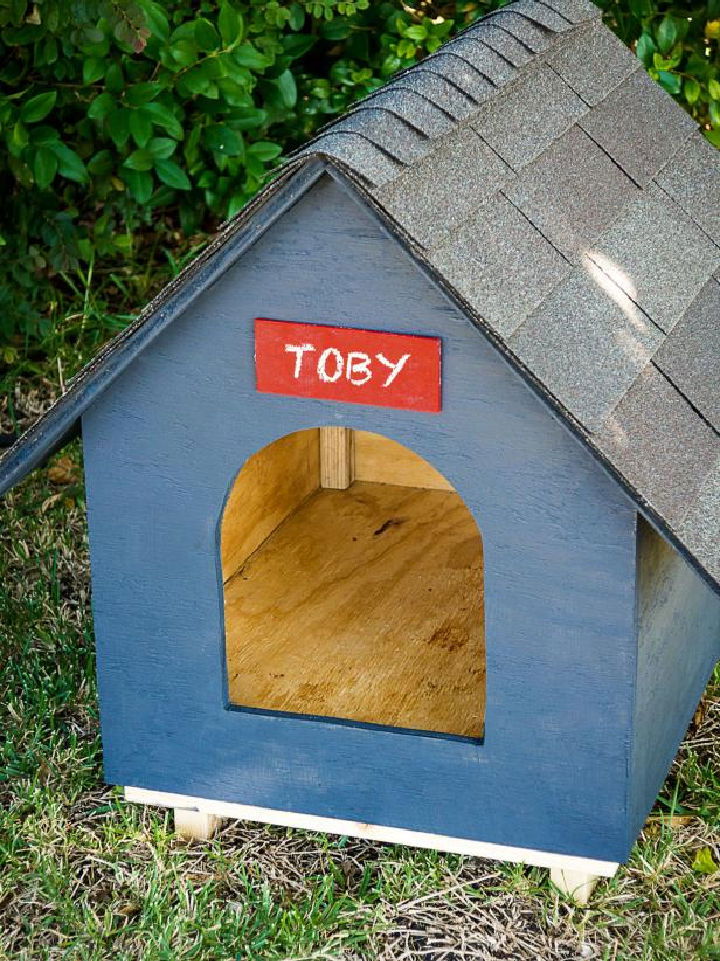
Treat your canine companion to a custom shelter with our easy-to-follow DIY dog house guide. This engaging and practical project is perfect for pet owners looking to make a warm, protective space for their furry friend. With minimal materials and simple instructions, you’ll craft a dog house that’s both cost-effective and durable. Learn the process step by step and discover the rewarding benefits of making a unique home that your dog will love.
Sizes:
- Small: 22″ x 22″ base
- Medium: 28″ x 28″ base
- Large: 34″ x 34″ base
Supplies:
- Plywood sheets
- Wood screws
- Waterproof paint
- Insulation panels
Cost:
- Estimated: $50 – $100
Difficulty:
- Beginner-friendly
Total Time:
- 4-6 hours
Special Instructions:
- Ensure all screws are flush to prevent injury.
- Customize the size based on your dog’s breed.
Notes:
- Seasonal adjustments may be required for extreme climates.
Original Source: HGTV
4. How to Build a Cozy DIY Wooden Doghouse: A Step-by-Step Guide
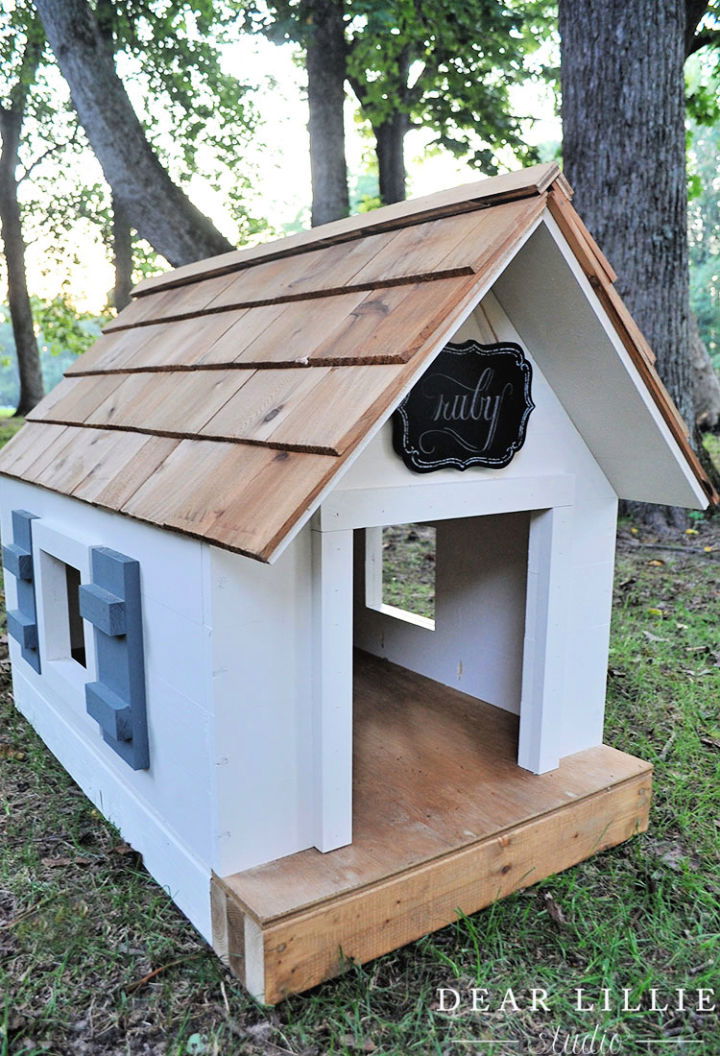
Dive into a comprehensive guide for constructing a charming wooden doghouse, perfect for your furry friend! Dear Lillie Studio provides a detailed, beginner-friendly tutorial that covers everything from material selection to the final touches. With clear instructions and visual aids, this DIY project ensures you build a safe and stylish retreat for your pup. Embrace your creativity and give your pet the gift of comfort with this unique, homemade doghouse.
Sizes:
- 1/2″ Plywood: Various sizes
- 2×4 Pine: Various lengths
- 1×4 Pine: Various lengths
- 1×4 Pine (45 Degree Cuts): Various sizes
- 1×2 Pine: Various lengths
Supplies:
- Plywood and Pine Boards
- White Cedar Shingles
- Golden Oak Stain by Minwax
- Paint (Ballet White and Steep Cliff Gray by Benjamin Moore)
- Wood Filler
- Pocket Hole Screws and Brad Nails
Cost: Varies depending on local prices of materials.
Difficulty: Intermediate
Total Time: One weekend project
Special Instructions:
- Ensure to drill pocket holes for attaching the walls.
- Use wood filler to cover screw holes and sand for a smooth finish.
- Follow safety precautions when cutting small, triangular pieces.
Notes:
- Customize the paint colors and stains to match your preferences or your home’s exterior.
- Add a personal touch with a hanging chalkboard sign or other decorations.
Original Source: Dear Lillie Studio
5. DIY Modern Dog House
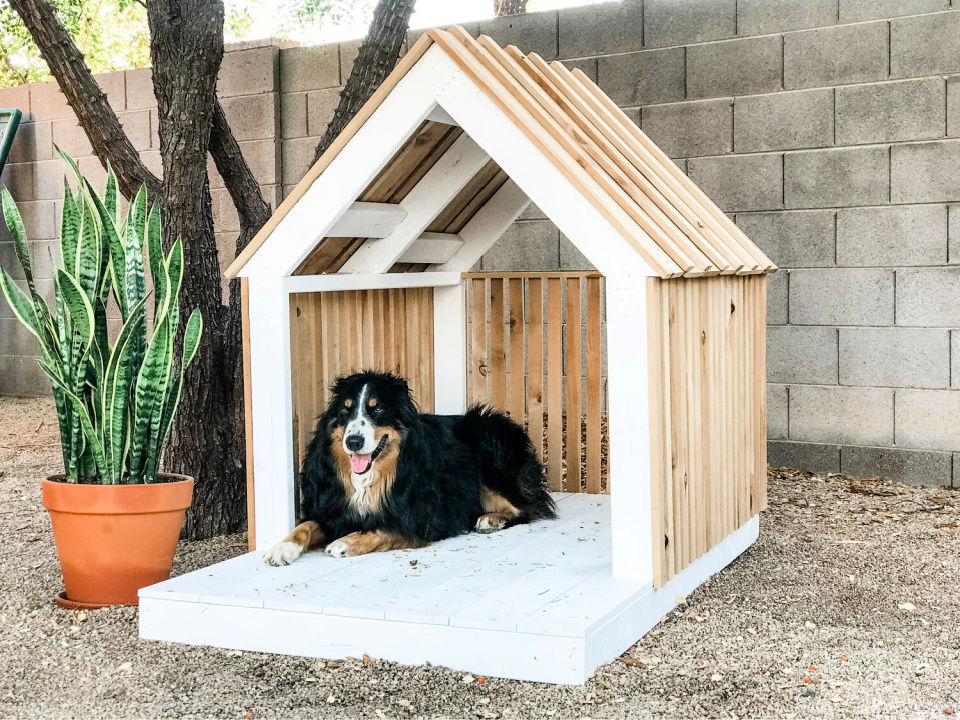
Build a Scandinavian-inspired modern dog house that’s perfect for your beloved pet. From selecting durable materials to the final assembly, our step-by-step instructions ensure a sturdy and aesthetically pleasing shelter for your canine companion. Whether you’re a seasoned DIYer or a novice, this guide provides all the essentials, including tips for optimizing comfort and airflow. Enhance your backyard and pamper your pooch with this unique and practical creation!
Sizes:
- Customizable to fit your dog’s size
Supplies:
- Cedar fence pickets
- 2×4 lumber
- Simpson Strong-Tie exterior framing screws
- Galvanized staples
- Exterior paint (optional)
Cost:
- Varies based on local prices and optional features
Difficulty:
- Intermediate
Total Time:
- Approx. (Specify hours/days)
Special Instructions:
- Ensure the base is square before attaching trusses.
- Use middle screw holes for back tie plates to avoid interference with slats.
- Paint the base/frame before attaching the roof or slats if opting for a two-tone finish.
Notes:
- Add a solar-powered fan for extra ventilation (optional).
- Adjust slat spacing based on your climate for optimal airflow.
Original Source: The Awesome Orange
6. Pallet Dog House
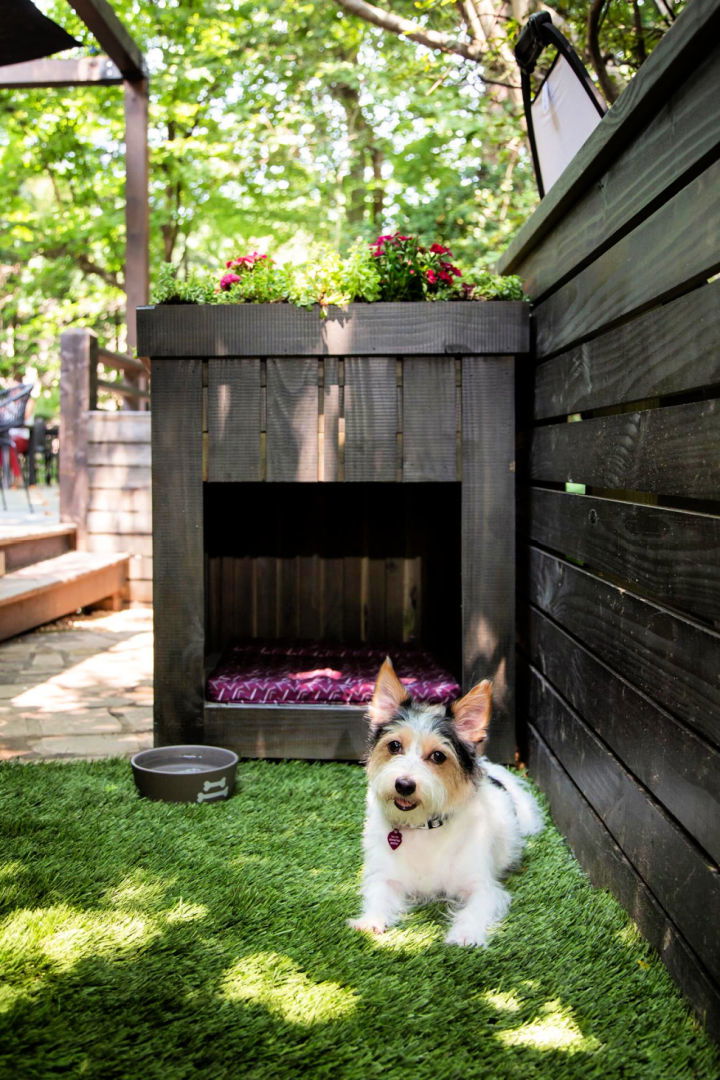
Transform a wooden pallet into a cozy, stylish doghouse with this DIY guide. Perfect for pet owners looking to repurpose materials and provide a unique shelter for their furry friend, this project not only reuses a pallet but also enhances your backyard aesthetics. This step-by-step guide will help you craft a chic doghouse, complete with a rooftop garden, using simple tools and supplies. Build a personalized space for your dog that’s both functional and environmentally friendly.
Sizes:
- Pallet base: Approximately 24″x26″ after cutting
- Corner boards, siding, and roof: Variable, cut to fit
Supplies:
- Wooden pallet
- Reciprocating saw or jig saw
- Pressure-treated 2x4s
- Galvanized nails or deck screws
- 1×4 and 1×2 lumber for framing and siding
- Circular saw
- Roofing material (scrap sheet metal or other)
- Exterior-grade silicone
- Stain/sealant combo
- Dog bed and outdoor toys (optional)
Cost: Variable, may use leftover materials or require new purchases.
Difficulty: Intermediate
Total Time: One weekend
Special Instructions:
- Ensure any wood in contact with the ground is pressure-treated to prevent decay.
- When installing siding, use whole boards at the corners for stability.
- Seal all seams, especially on the rooftop garden, to prevent water damage.
Notes:
- Pilot holes are recommended to avoid splitting wood when using screws.
- Customize the doghouse with a stain to match your outdoor decor.
Original Source: HGTV
7. Dog House with Barn Door
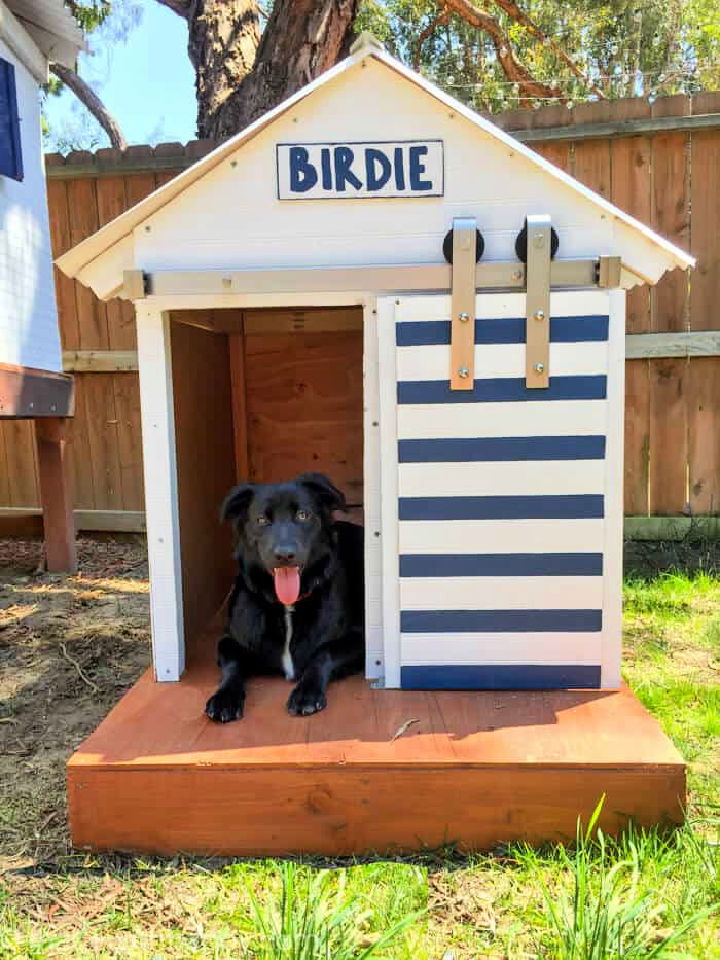
Delight your furry companion with a charming DIY Dog House, complete with a door, that’s perfect for your backyard. Our comprehensive guide provides you with free plans, step-by-step instructions, and a list of affordable materials. Whether you’re a beginner or seasoned DIYer, you’ll find this project rewarding as you build a cozy haven for your pet that’s both functional and stylish. Let’s get started on crafting a safe and comfortable shelter that your dog will love!
Sizes:
- Small: Suitable for dogs up to 25 lbs
- Medium: Ideal for dogs 25-60 lbs
- Large: Best for dogs 60-90 lbs
Supplies:
- Lumber (2x6x8ft, 2x3x8ft, 1x1x8ft)
- Plywood (4ftx8ft)
- Bead panel (4ftx8ft)
- Screws (2 ½ inches)
- Roof edging (white – 36″)
- PVC Roof Paneling (12ft)
- Barndoor Sliding Door Hardware
- Paint and Stain
- Wood Glue
Cost: Varies based on material selection and local prices.
Difficulty: Intermediate
Total time: One weekend
Special Instructions:
- Pre-drill holes to prevent wood splitting.
- Measure twice and cut once for accurate assembly.
- Stain the base and floor before framing for easier application.
Notes:
- Customize the dog house size based on your dog’s breed.
- Ensure the dog house is placed in a shaded area to provide comfort in all weather conditions.
- Regular maintenance will extend the life of the dog house.
Original Source: Made with HAPPY
8. A-Frame Dog House
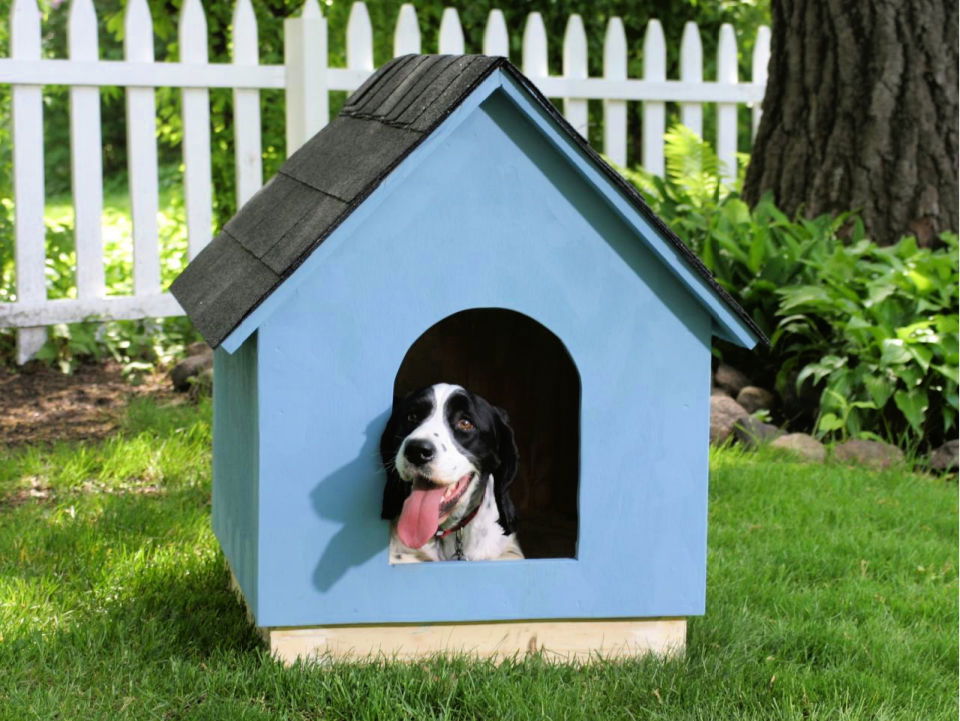
Ensure your furry friend has a safe and snug spot to relax outdoors with this straightforward DIY A-Frame doghouse guide. Crafted from durable materials, this project is designed for small to medium-sized dogs, providing insulation for all seasons. Our step-by-step instructions will help you build a cozy retreat that’s perfectly sized for your pet’s comfort and security. Ideal for beginner builders, the process promotes cost-effectiveness and customization, making it a valuable addition to your backyard.
Sizes:
- For small to medium-sized dogs, up to about 50 pounds.
Supplies:
- 3/4-inch-thick exterior-grade plywood
- 2×4 lumber for the base
- 2×2 fir or cedar for framing
- Galvanized wood screws (various lengths)
- Asphalt-impregnated roofing paper (tar paper)
- Galvanized roofing nails
- Low-VOC exterior paint or stain
- Wood putty (optional)
Cost:
- Variable, depending on local prices for materials
Difficulty:
- Beginner-friendly
Total time:
- One weekend
Special Instructions:
- Ensure the doorway size is approximately 10 inches wide and 13 inches high with a 3-inch lip at the bottom.
- Angle one edge of each roof panel at 45 degrees for a snug fit.
- Provide adequate ventilation by drilling holes in the back panel.
Notes:
- Always prioritize safety by using non-toxic, pet-safe materials.
- Customize the size based on your dog’s measurements for optimal comfort.
- Allow paint or stain to fully dry to avoid fumes that might affect your pet.
Original Source: HGTV
9. DIY Breezy Dog House
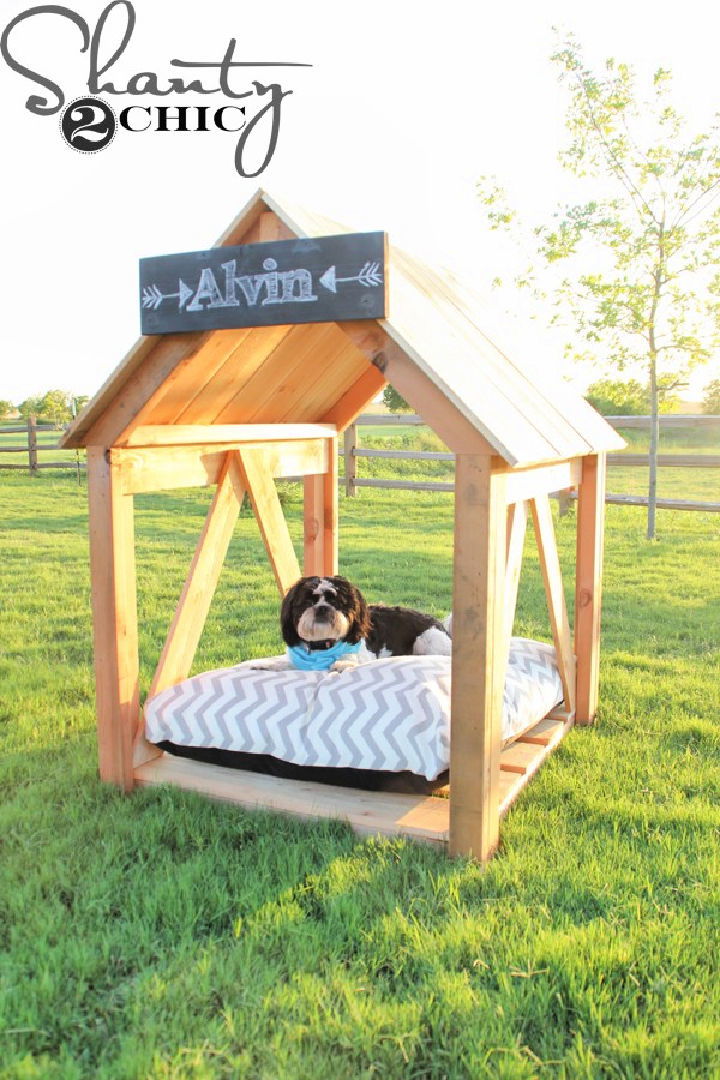
Discover how to construct a cozy retreat for your furry friend with our DIY dog house guide. This project offers a shaded sanctuary to keep your pet cool during hot Texas summers, featuring a fluffy bed and personalized name sign. Crafted for shih-tzus like Alvin or any small to medium-sized dog, this dog house is an affordable and straightforward endeavor, ideal for keeping your pet close by while outdoors. We provide step-by-step instructions to ensure a successful build, making this a perfect weekend project for pet-loving DIYers.
Sizes:
- Medium-sized pillow-fit dog house (specific measurements available in plans)
Supplies:
- Lumber (various sizes)
- Finish nails (1 1/4” and 2 1/2″)
- Wood glue
- Wood screws (2 1/2” Spax screws)
- Cedar board (1×4)
- Outdoor dog pillow
- Chalkboard sign
Cost:
- Approximately $70 in lumber
Difficulty:
- Beginner to intermediate level
Total time:
- One weekend project
Special Instructions:
- Assemble the bottom frame and attach the slats with finish nails and glue.
- Cut and attach the legs to the frame with wood screws.
- Secure the cedar board and side angled pieces with finish nails and glue.
- Construct the roof frame and attach it to the house.
- Attach roof slats and finish with a comfy pillow and chalkboard sign.
Notes:
- Customize the size and finish to suit your dog’s needs and your aesthetic preferences.
- Ensure that all nails and screws are properly secured to prevent injury.
- Regular maintenance will extend the life of the dog house.
Original Source: Shanty 2 Chic
10. Modern Dog House
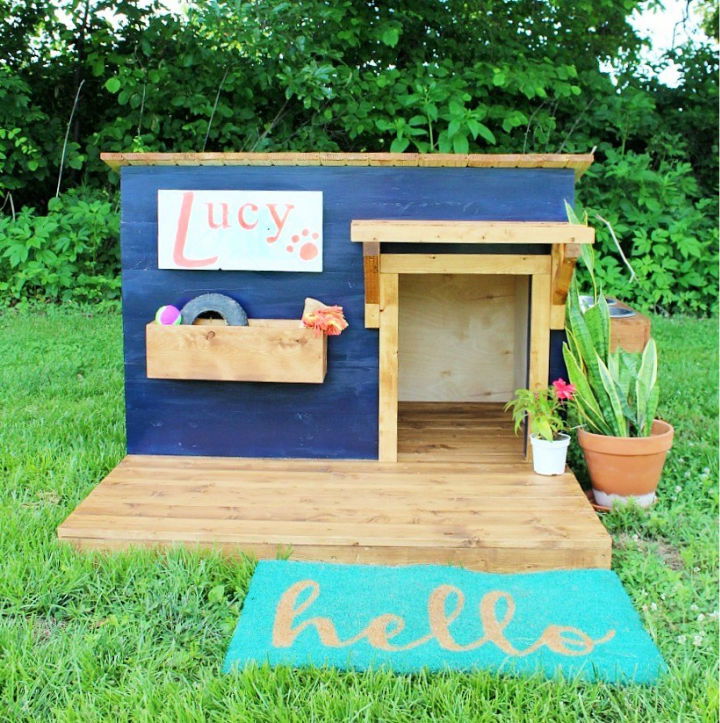
Treat your furry friend to a stylish and cozy retreat with our step-by-step guide on constructing a DIY dog house complete with a deck and canopy. This project, perfect for pet owners looking to combine functionality with modern design, provides a shaded outdoor space for your dog to relax during sunny days, and a warm, insulated haven for chilly nights. Follow our clear instructions to build a safe and welcoming abode that’s sure to make the neighbors—and your pup—jealous!
Sizes:
- Large enough for a medium-sized dog
Supplies:
- Miter saw
- Jig Saw
- Table Saw
- Drill
- Kreg Pocket Hole Jig
- Nail gun
- 2x4s (for the frame)
- 1×4 slats (for the deck)
- Tongue and groove 1x6s (for siding)
- Exterior paint and primer
- Outdoor stain and sealant
- Insulation
- ¼” plywood (for lining)
- Screws and nails
Cost:
- Varies based on local prices of materials
Difficulty:
- Intermediate
Total Time:
- 2-3 days
Special Instructions:
- Construct the deck first and stain it with outdoor sealant before attaching the house.
- Assemble the house frame and make sure it is the right size for your dog.
- Add siding with tongue and groove boards for better insulation.
- Prime and paint the dog house before adding the roof.
- Insulate the walls with staple insulation and line them with plywood.
- Construct the roof and finish it with outdoor stain and sealant.
- Consider adding a personal touch with a dog name sign or a floating dog bowl shelf.
Notes:
- Customize the dog house color and decorations to suit your taste and your dog’s personality.
- Ensure proper ventilation and insulation for your pet’s comfort.
- Build the dog house outside or in a space large enough to accommodate its final size for ease of transport.
Original Source: Woodshop Diaries
11. Insulated Dog House
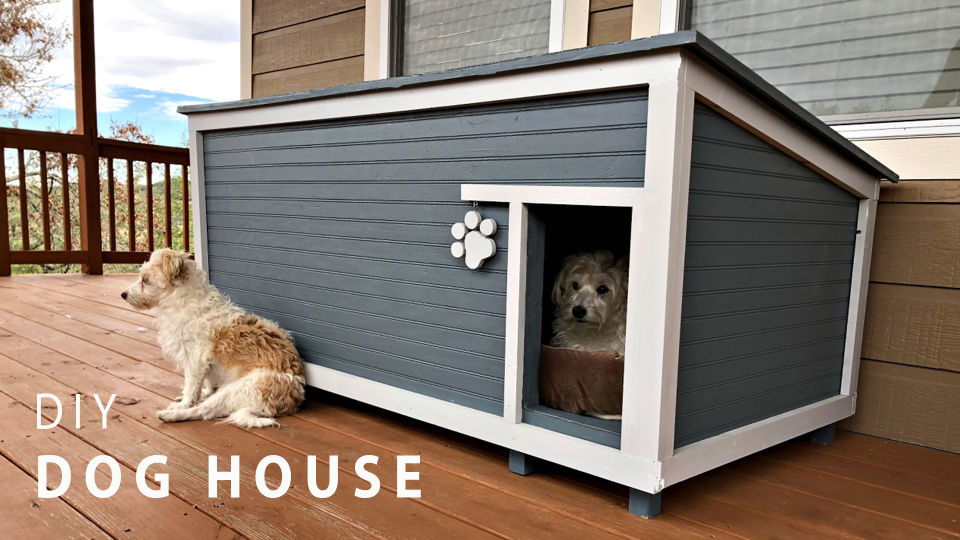
Build a cozy haven for your furry friend with this comprehensive guide on constructing an insulated dog house. Ideal for pet owners wanting to ensure their dog’s comfort during cold seasons, this DIY project covers everything from material selection to the final touches. With easy-to-follow steps and advice on customization, even novice builders can craft a durable, warm, and inviting shelter for their canine companion. Get ready to improve your dog’s quality of life while indulging in a rewarding weekend project.
Sizes:
- Customizable to pet size
Supplies:
- Insulation materials
- Wood panels
- Miter saw
- Pocket hole jig
- Screws and nails
- Paint or sealant
Cost:
- Varies based on material selection and size
Difficulty:
- Intermediate
Total time:
- 1-2 days
Special Instructions:
- Ensure all wood pieces are cut to the precise measurements for a snug fit.
- Apply sealant or paint to the exterior for weather resistance.
- Securely attach the roof to protect against the elements.
Notes:
- Customize the size to suit your dog’s breed and preferences.
- Consider adding a removable roof for easy cleaning.
Original Source:
12. Build a Dog House
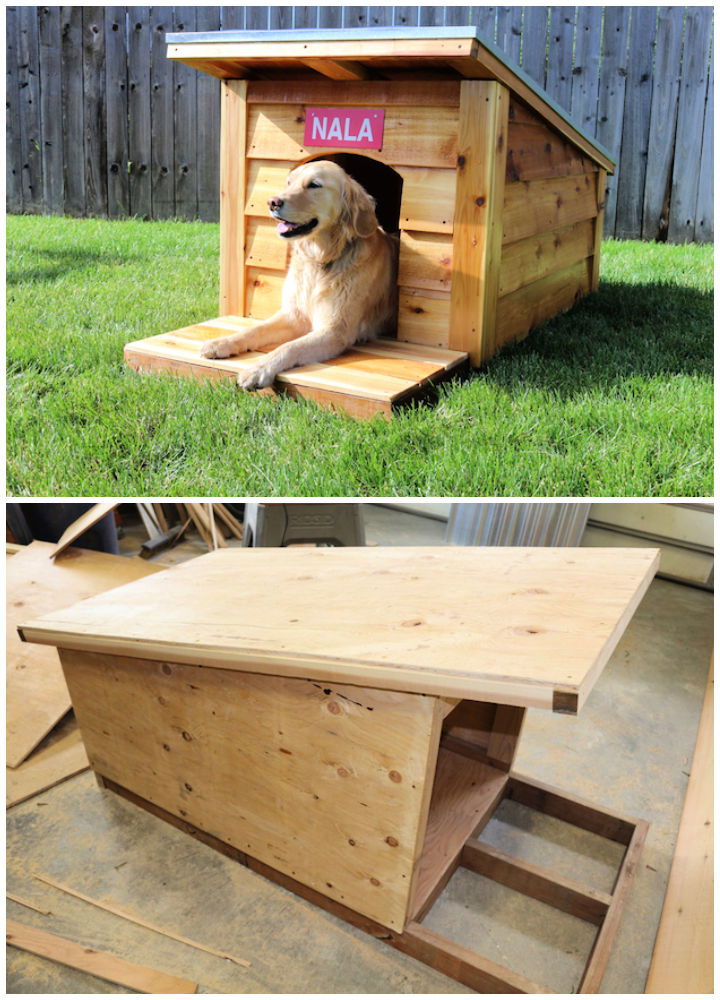
Discover how to make a warm and cozy retreat for your pet with our easy-to-follow DIY doghouse guide. With free plans, a step-by-step video from DIY Pete, and simple materials, you’ll be able to build a durable and stylish cedar doghouse complete with a sturdy metal roof. Perfect for DIY enthusiasts, this project is sure to provide a safe haven for your dog and enhance your backyard with its modern design.
Sizes:
- Base dimensions
- Wall dimensions
- Roof dimensions
Supplies:
- 2×4 boards
- Plywood sheets
- Metal roofing material
- Nails/Screws
- Wood glue
- Sandpaper
- Paint or Stain (optional)
Cost:
- Estimate based on current prices for materials
Difficulty:
- Suitable for beginners with basic carpentry skills
Total time:
- Estimated time from start to finish
Special Instructions:
- Ensure all wood pieces are cut to the correct size before assembly.
- Sand down rough edges to prevent splinters.
- Secure the roof properly to withstand weather conditions.
Notes:
- Personalize the doghouse by painting or staining.
- Consider adding insulation for additional warmth.
Original Source: DIY Projects With Pete
13. DIY Living Roof Dog House
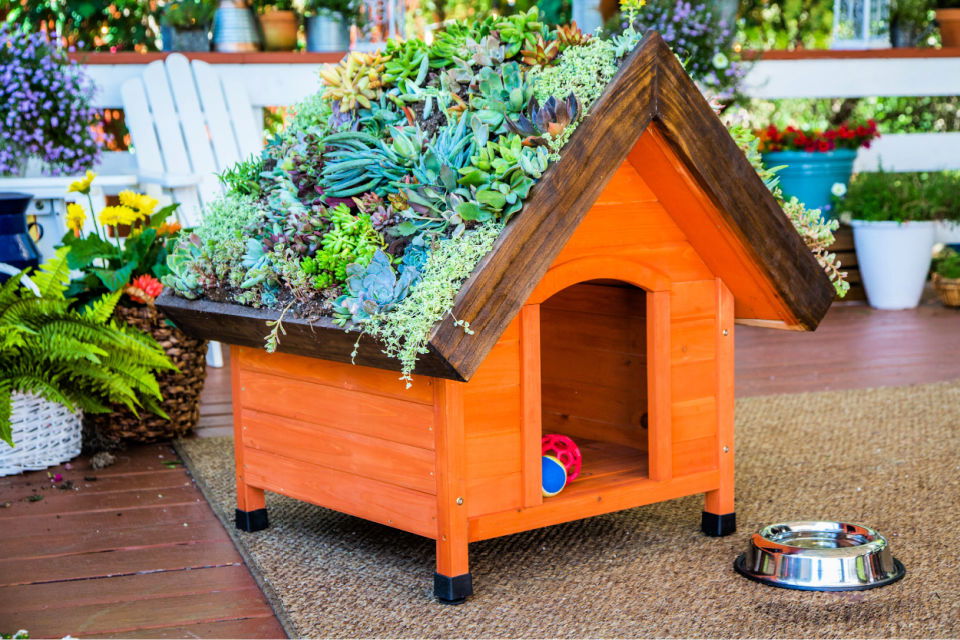
Ideal for pet owners who want to combine functionality with eco-friendly design, this guide helps you add a heat-reducing, living roof to your dog’s outdoor home. Not only does it keep your dog cool on hot days, but it also adds greenery to your yard. Follow these instructions to create a sustainable and charming shelter your pet will adore.
Sizes:
- Dog house roof dimensions (varies depending on your dog house)
- Box frame cut to the size of your roof
Supplies:
- Waterproof roofing felt
- Zip ties
- Rain gutter (vinyl)
- Roof repair tape
- Potting soil suitable for your chosen plants
- Pea pebbles or gravel
- Small succulents
- Galvanized roofing nails
- Wood (1×4 pieces)
- Screws
- Gloves
- Hand shovel
- Heavy-duty scissors or utility knife
- Wood glue
- Drill with drill bit
- Moss
Cost: Varies based on the size of your dog house and the materials you need to purchase.
Difficulty: Moderate
Total Time: Several hours to a day, depending on the complexity and size of your dog house.
Special Instructions:
- Measure your dog house roof to determine the size of the waterproof felt and frame box.
- Cut the materials to the required sizes using the appropriate tools.
- Construct the frame box using wood glue and screws and attach it to the roof.
- Add drainage holes to the bottom of the box.
- Securely attach the vinyl rain gutter with zip ties.
- Place the roofing felt and fix it with nails or tape.
- Layer the potting soil, pea pebbles, and moss in the box.
- Plant the succulents and add more soil and moss as needed.
Notes:
Securely attach the frame box to the roof to prevent movement and potential harm to your dog or damage to the structure. Choose dog-safe plants to ensure their well-being.
Original Source: Hallmark Channel
14. DIY Dog House with Porch
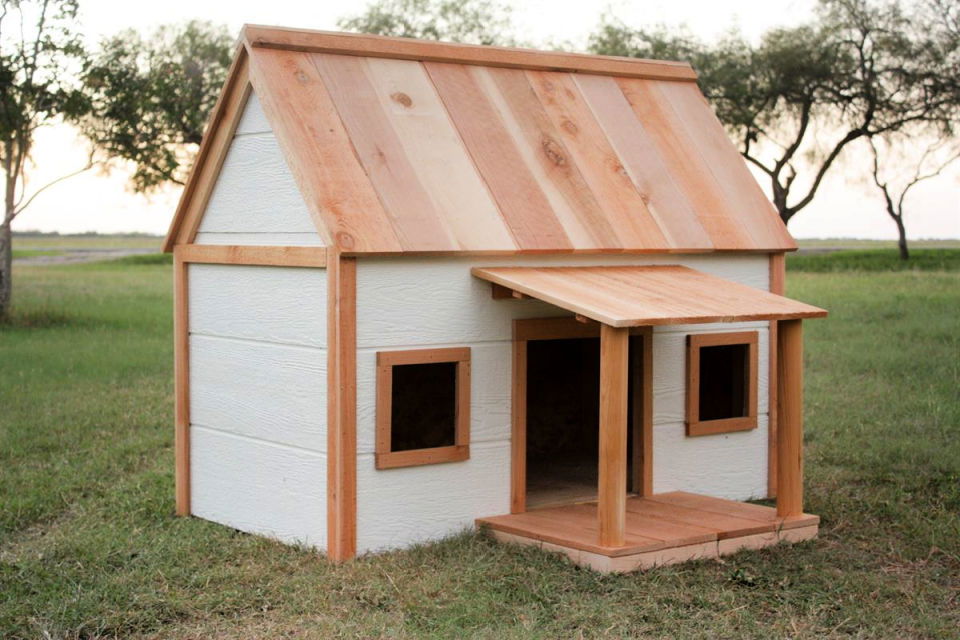
Build a cozy retreat for your furry friend with this DIY Dog House with Porch project. Not only does it offer a safe and stylish space for your dog, but it also enhances your backyard’s aesthetics. With clear, step-by-step instructions, you can customize the dog house to match your home’s exterior. Whether you’re a seasoned DIYer or new to woodworking, this guide will help you craft a welcoming abode that your dog will adore.
Sizes:
- Overall dimensions: Not specified, customizable based on the plan
- Porch size: As per construction steps
Supplies:
- Pocket hole jig
- 1 1/2″ Pocket hole screws
- 2 1/2″ Blue Kote pocket hole screws
- Outdoor wood glue
- 1 1/4″ Screws
- Cedar fence pickets
- 2x4s lumber
- Plywood sheets
- Roof boards
- Trim boards
- 2″ Dowel rod for porch pillars
- Paint or stain (optional)
Cost: Varies based on the local prices of materials.
Difficulty: Intermediate – suitable for those with some experience in woodworking and using tools.
Total Time: Not specified, will vary based on DIYer skill level and working pace.
Special Instructions:
- Ensure all wood pieces are cut to size before assembly.
- Apply outdoor wood glue to joints for added durability.
- Consider painting or staining the wood for weather protection and aesthetics.
- Add trim to windows and doors for a finished look.
- Adjust roof rafter angles to 45 degrees for a shorter roof profile if desired.
- Ensure the porch slope is slight for water runoff.
Notes:
- The plan can be adjusted for size to accommodate the specific needs of your dog.
- The dog house can be customized in color and finish to match your home.
- Use outdoor-specific screws and materials to ensure longevity.
- Tools required include a saw, drill, pocket hole jig, and brad nailer.
Original Source: Kreg Tool
15. Mobile Dog House
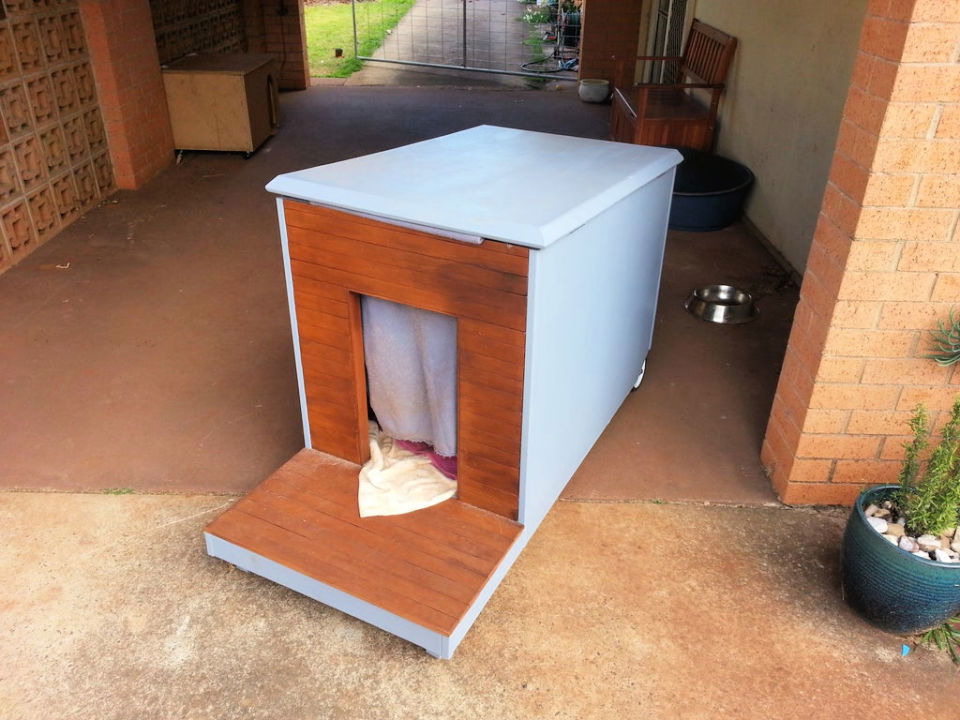
Ever been sticker-shocked by the prices of pet store dog houses? Why not invest some time into building a superior, lasting, and mobile dog house for your furry friend? Our comprehensive guide offers step-by-step instructions on creating a cozy, transportable haven for your dog that won’t break the bank. With detailed materials lists and preparation tips, even beginner DIYers can embark on this rewarding project. Enhance your pup’s comfort and embrace the satisfaction of handcrafting a personalized mobile dog house.
Sizes:
- Small (up to 25 lbs)
- Medium (26-50 lbs)
- Large (51-75 lbs)
- Extra Large (over 75 lbs)
Supplies:
- Plywood sheets
- Insulation material
- Waterproof roof covering
- Casters for mobility
- Screws and nails
- Wood glue
- Paint or wood stain
- Weatherproofing sealant
- Basic tools (saw, drill, sandpaper)
Cost: Approximately $100 – $250, depending on size and materials selected.
Difficulty: Moderate
Total Time: 2-3 days
Special Instructions:
- Choose the size based on your dog’s breed and comfort.
- Weatherproof the dog house with paint and sealant to ensure durability.
- Ensure proper insulation for temperature regulation.
- Secure the house properly on the casters to maintain stability.
Notes:
- The house can be customized with additional features like a nameplate, windows, or a feeding station.
- Regular maintenance will extend the life of the dog house.
Original Source: Instructables
Here is a mobile dog house plan which can be made quite easily! No one wants to end up with an end result that isn’t the right size, so make accurate measurements! Mower wheels, hinges, paint, liquid nails and a few other supplies will be needed. The final size will be around 600mm x 750mm x 1100mm. instructables
16. Indoor Dog House
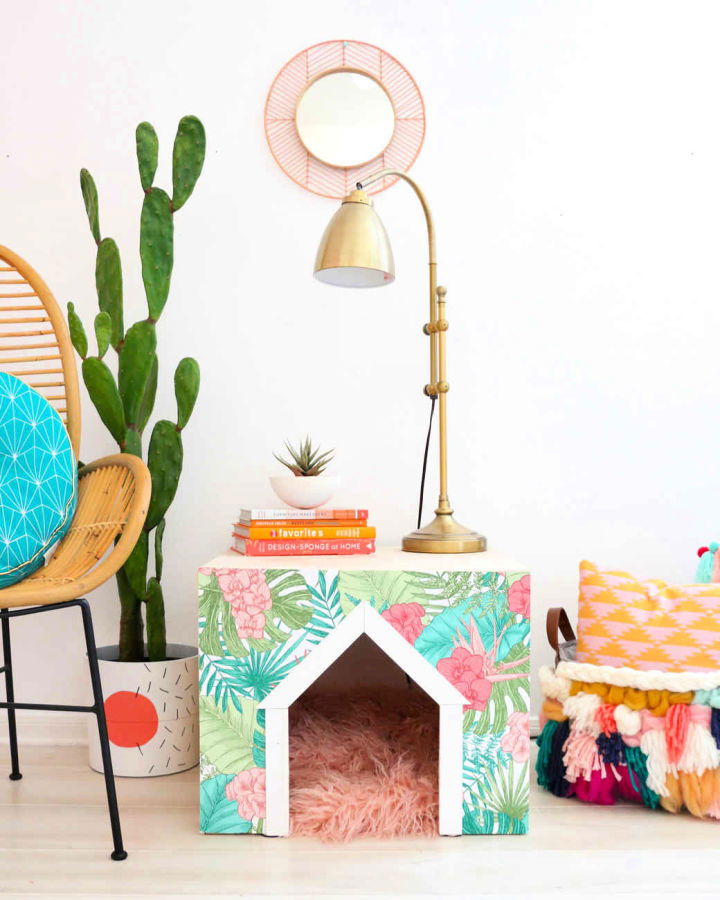
This DIY indoor dog house is very functional. Firstly, you can literally use it as a home for your furry friend and a nightstand at the same time! Secondly, it has such a nice rug on the bottom to provide ultimate comfort to your precious pet!
17. DIY Cardboard Dog House
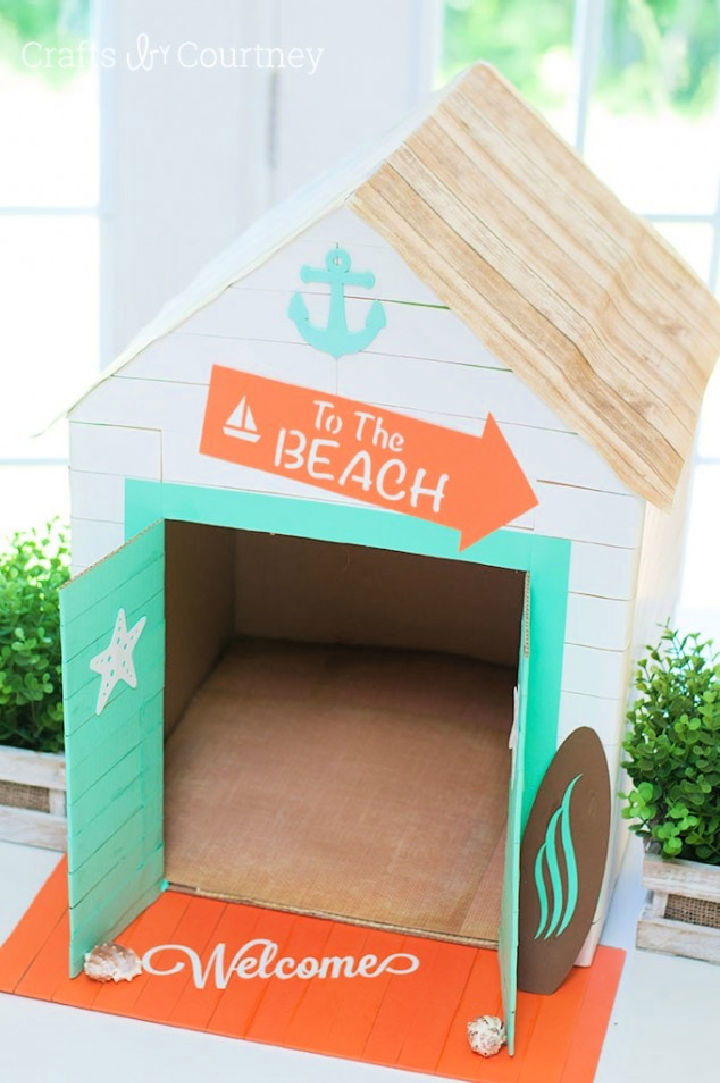
Looking for a fun and creative project? Learn how to make a beach-themed DIY cat house with this step-by-step guide. This craft can also be adapted for a dog house! Engage in this exciting activity and give your pets a cozy and unique place to relax.
Sizes: Small to medium
Supplies:
- Cardboard box
- Painter tape
- Extra cardboard pieces
- Sharpie
- X-acto knife
- Mod Podge
- White cardstock
- Scrapbook paper
- Hot glue gun
- Shells
- Silhouette Cameo
Cost: Affordable
Difficulty: Medium
Total time: 2-3 hours
Special Instructions:
- Be cautious when using sharp tools like the x-acto knife.
- Ensure proper ventilation when using Mod Podge.
Notes: Adjust the colors and decorations to match your personal style.
Original Source: Crafts By Court
18. Double Door Dog House
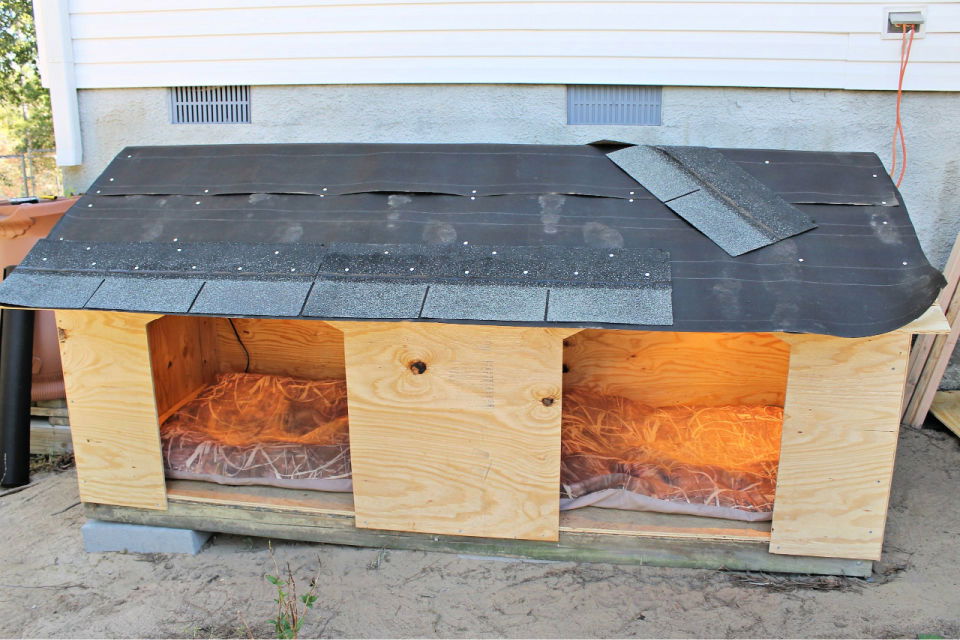
Building a double-door dog house for two large dogs can be a fulfilling project, especially if you can’t find one that suits your needs in the market. This article provides step-by-step instructions and a list of materials and supplies needed to build a spacious dog house with added features such as heat lamps for the dogs’ comfort during winter.
Sizes:
- 38″ x 96″ (Base dimensions)
Supplies:
- 5 sheets of plywood 4 x 8 x 1/2
- 12 pieces 2 x 4 x 8
- 1 Roll Roofing Felt
- 2 Packages of Asphalt Shingles
- 4 angled rafter hangers
- 4 adjustable angle brackets
- 1 1/4″ screws
- 2″ nails
- Roofing tacks
- 2 Heat lamps with clamps
Cost: Varies based on location and store.
Difficulty: Moderate wood-building skills required.
Total time: Time-consuming, patience required.
Special Instructions:
- Install heat lamps prior to adding the front of the dog house.
- Build a hole in the back wall for the cords to pass through.
- Cover the door with clear bubble wrap during cold weather.
Original Source: intelligentdo
Remember to paint the dog house once it is completed. This dog house is ideal for large dogs who enjoy spending time outdoors. Ease of access to heat lamps and overall durability make it a comfortable shelter for your furry friends.
Firstly, this plan is very spacious so your dog is going to love it, it’s spacious with 2 doors so if you have 2 dogs, it’s certainly ideal! Secondly, it’s very simple and easy to do – a very beginner-friendly project. Lastly, you only need a few supplies – pieces of plywood, rafter hangers, asphalt shingles, nails, roofing tacks, heat lamps etc.
19. DIY Crooked Dog House
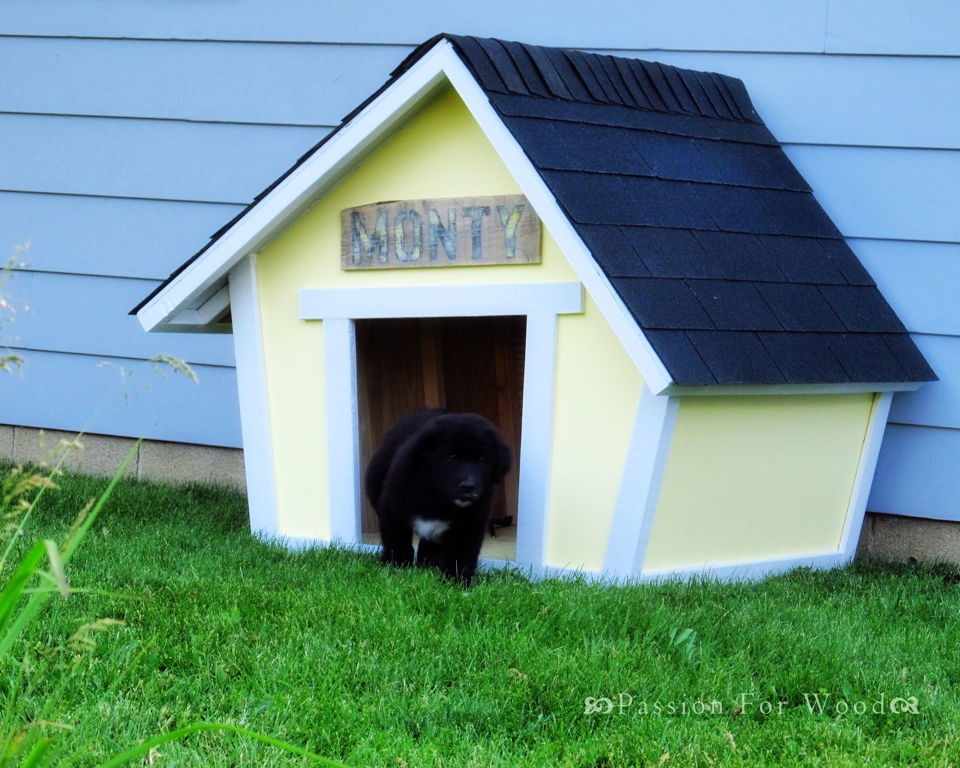
In comparison to the other dog house plans, this has a crooked shape to it which matches the animated cartoon themes perfectly! The final size of your house will be around 34″ x 42 3/4″! Exterior plywood, finish nails, wood glue, wood screws, lumber and a few other supplies required for this project.. ana white
20. Homemade Dog House
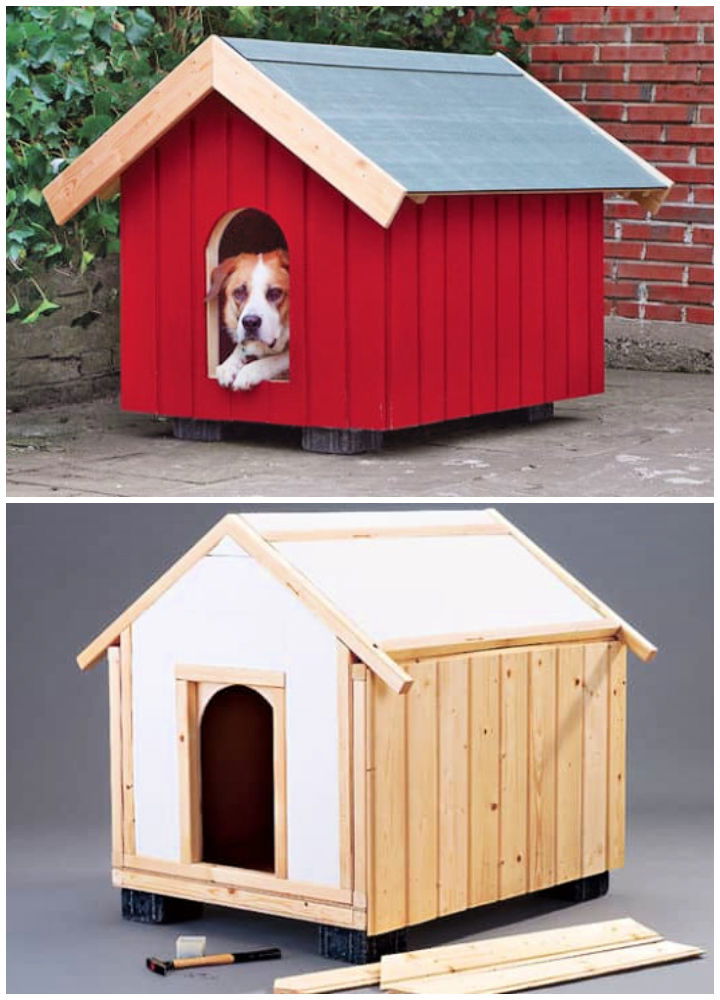
Why is this wood dog house plan just amazing? It’s made out of plywood, which is a very strong material and it has a fully covered shed to keep your dog safe from rain and snow! Also it can be moved around easily! Yes, it’s made in a way that you can easily carry it around from place to place – indoors to outdoors, your car to your house, etc. handymantips
21. Extra Large Dog House
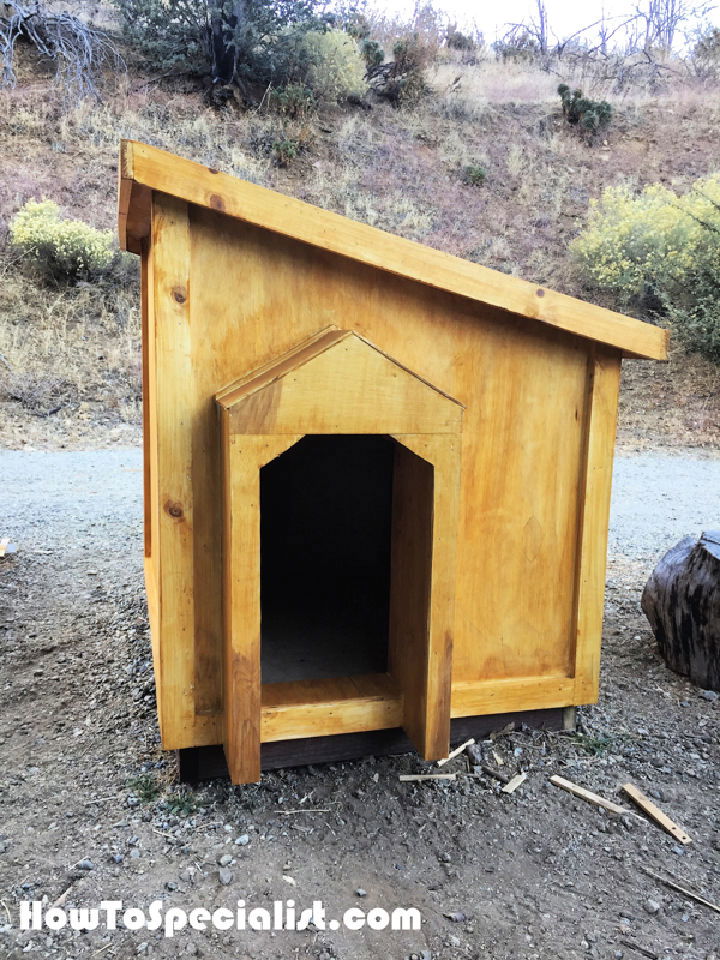
This is a very suitable plan for those people who have a huge yard or patio. That is because this DIY dog house will take up a lot of space – it’s perfect for “big” dogs! Miter saw, table saw, screw driver, thick Styrofoam, drill and a few other tools and materials will be required. howtospecialist
22. Ultra-Light Dog House
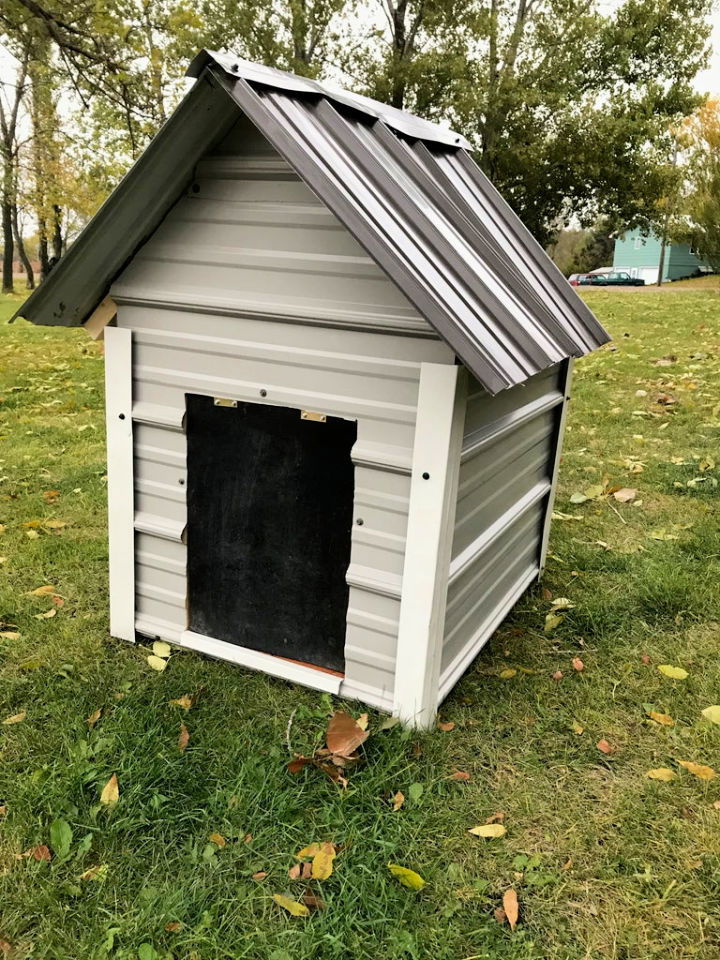
If you are someone who doesn’t like to carry out heavy things or have a back problem, minimizing the weight of the dog house would be a good thing to do. How can you do that? Simply use materials that are lightweight but sturdy and stable- – follow this plan to learn more! instructables
23. Doghouse Out of Pallets
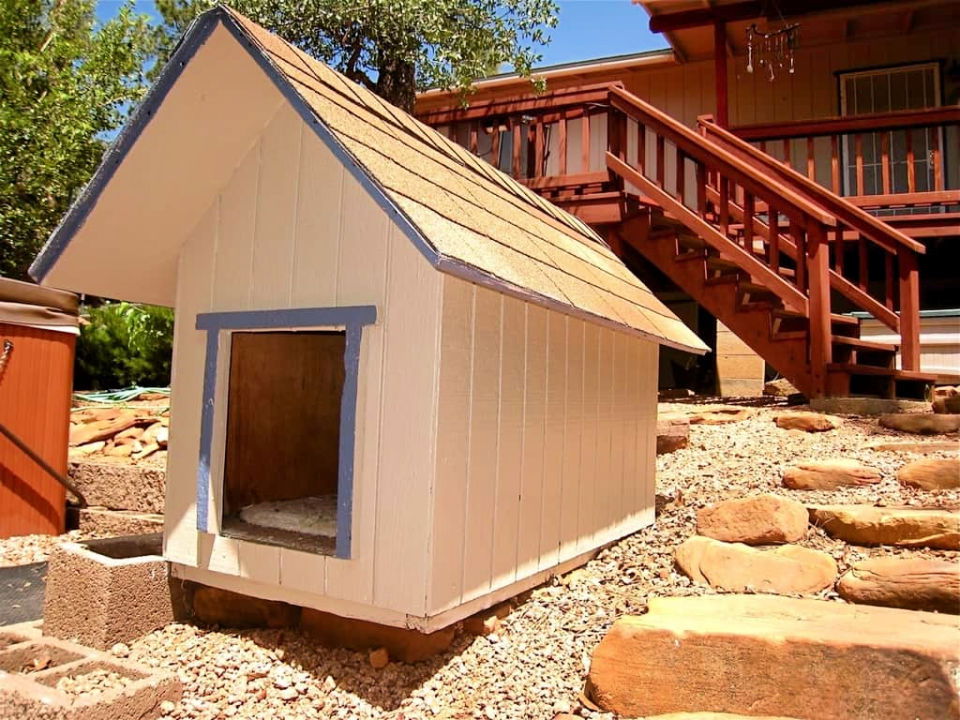
Why spend a ton of money on other materials when you can just use pallet wood to construct a house for your little one? Paint, miter saw, table saw, pallet, drill and a few other basic supplies will be needed for you to successfully nail this project. thestarryeye
24. Handmade an Open-Air Doghouse
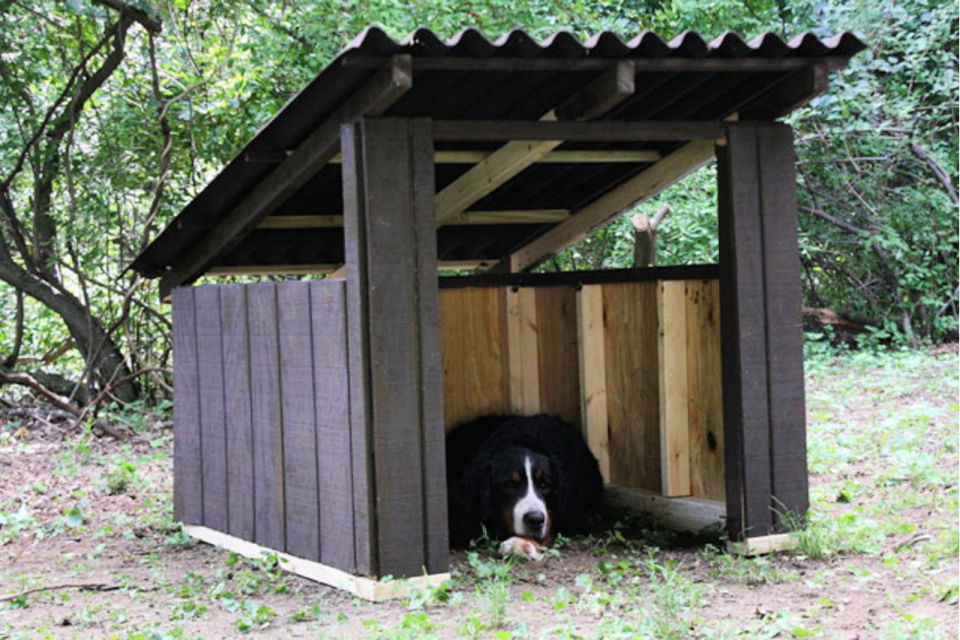
Not all dog houses need to be closed off. Some dogs can feel claustrophobic due to that so you can make open-air houses like these for them! It will give them the chance to run around and stay active inside and around their space. Moreover, it will also protect them from extreme weather! Find this simple dog house plan here diynetwork
25. Barrel to Dog House
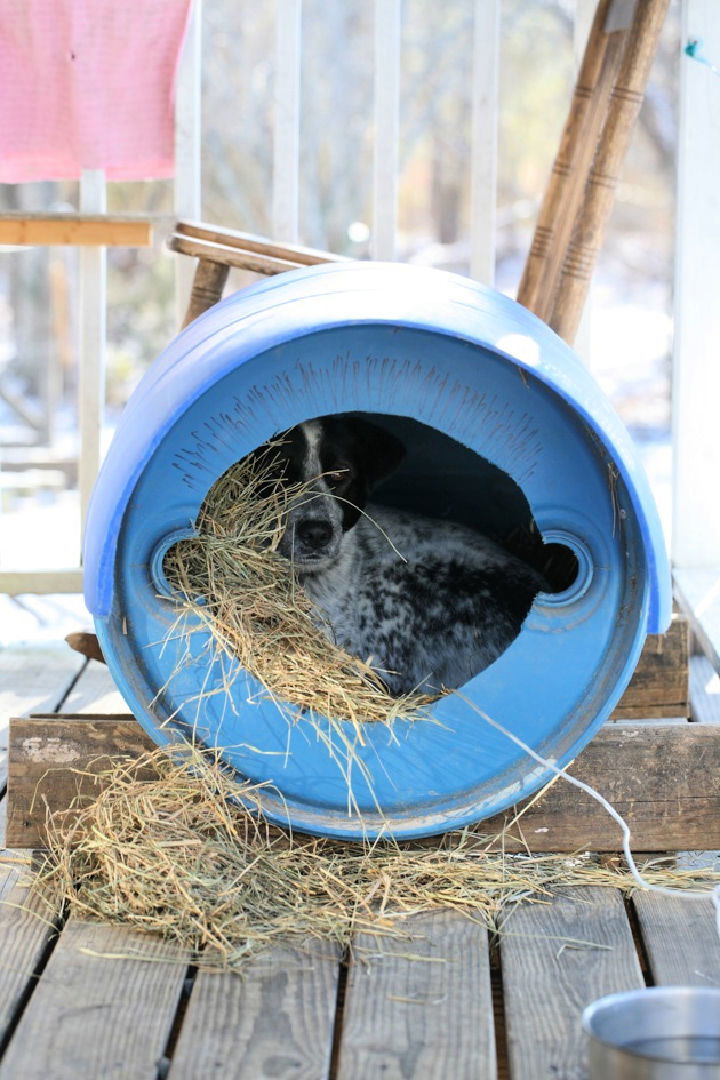
In comparison to other dog house designs, this plan is totally easy and cheap. Build dog house very simply by using a plastic drum! Maybe you spend a lot of money on your dog’s food already or just have the right budget these days. Whatever the case may be, if you want to save up some money – take a look at this plan! All you need is a barrel. Cut a hole through it and you’re good to go! ladyleeshome
26. Log Cabin Doghouse
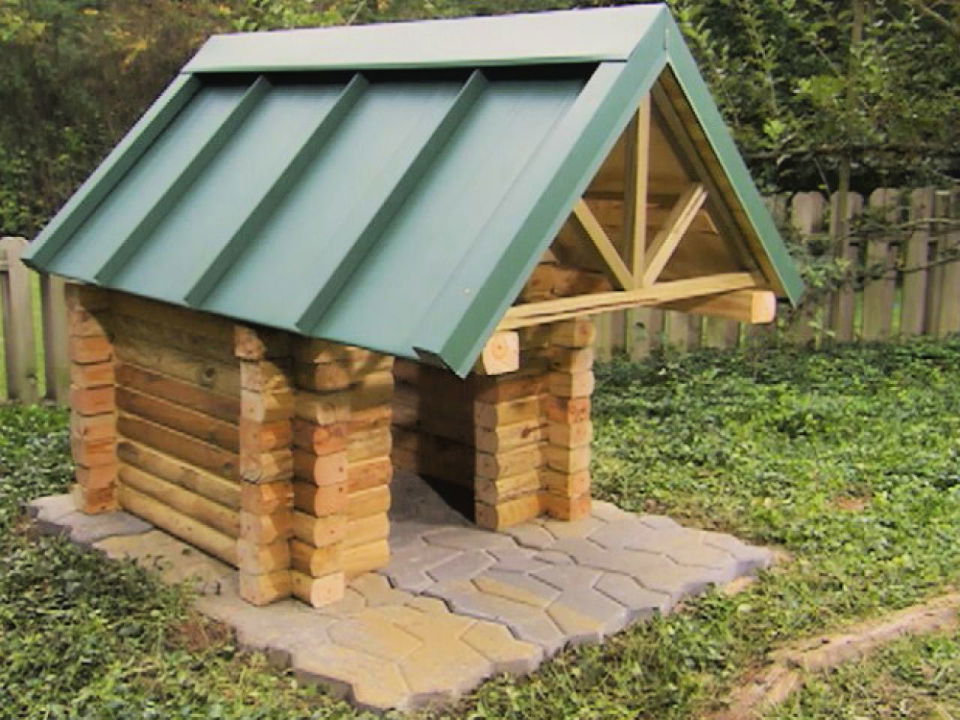
Isn’t this jus the fanciest thing you’ve seen in this guide? It’s super cool and the tiles at the bottom just make it look so nice! Start off by measuring your pet as you don’t want to end up with something that is not the right size! It will take around 1 day to finish and the skill level is intermediate! diynetwork
27. DIY Plywood Dog House
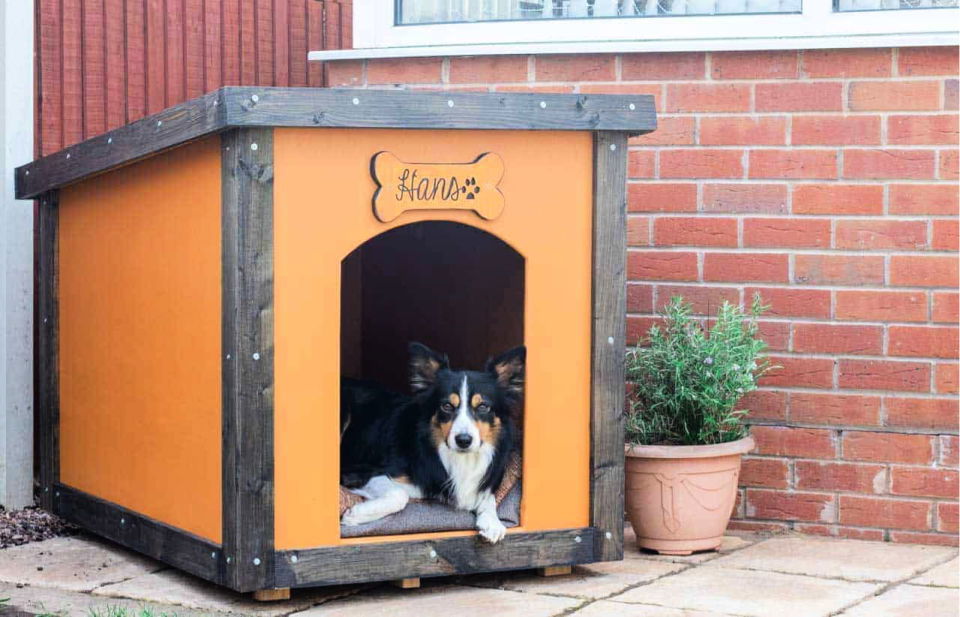
Discover the simple process of creating a durable and personalized DIY dog house using 18mm plywood, perfect for keeping your furry friend dry and cozy. This detailed guide provides you with all the information you need, from choosing the right materials to step-by-step building instructions. Not only will you learn to craft a robust structure with a lean-to sloping roof, but you’ll also add style to your garden while ensuring the comfort of your dog.
Sizes:
- Medium-sized dog house dimensions
Supplies:
- 18mm hardwood plywood
- Erbauer power tools
- Structural timber for base frame
- Roofing materials (felt, adhesive, nails)
- Wood preserver and exterior paint
Cost:
- Variable, depending on material choices
Difficulty:
- Moderate, accessible to those with some DIY experience
Total Time:
- One weekend project
Special Instructions:
- Treat all plywood cuts with wood preserver.
- Ensure accurate measurements for a comfortable fit for your dog.
- Follow safety precautions when using power tools.
Notes:
- Customize the size based on your dog’s measurements.
- Opt for pre-treated timber to enhance durability.
Original Source:
28. Dog Playhouse Out of a Box
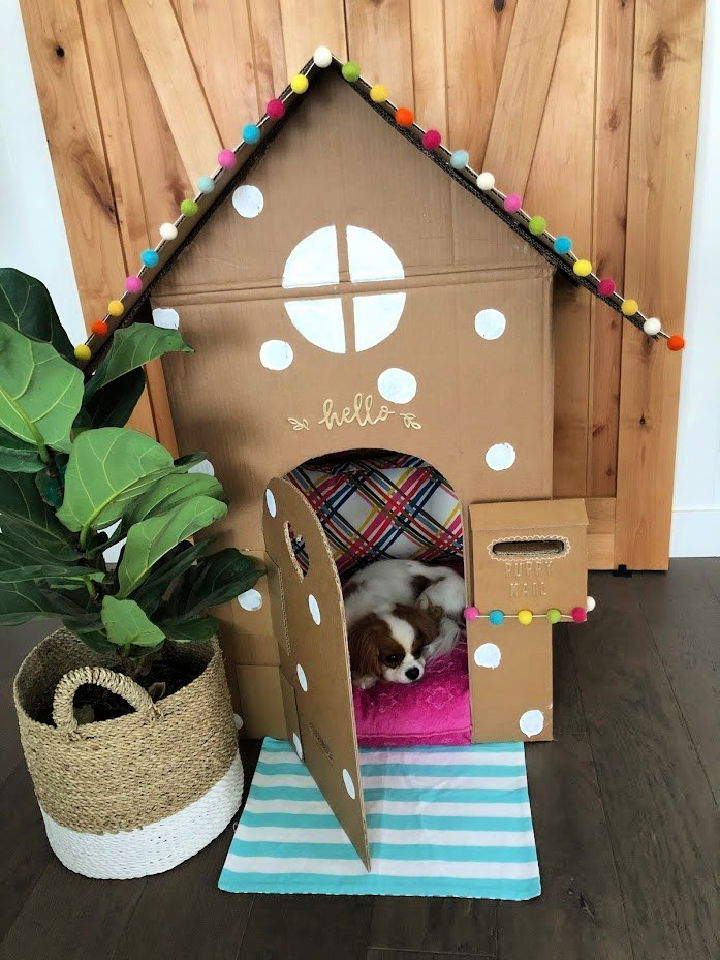
Isn’t this just the most adorable thing you’ve ever seen? This simple DIY dog house is definitely amazing for the environment as you can make it using cardboard. Furthermore, it’s suitable for a small dog as a big dog won’t fit into a box and cardboard is not the most durable material. Ruler, pencil, and a few other supplies needed. tatertotsandjello
29. DIY Mid-Century Dog House
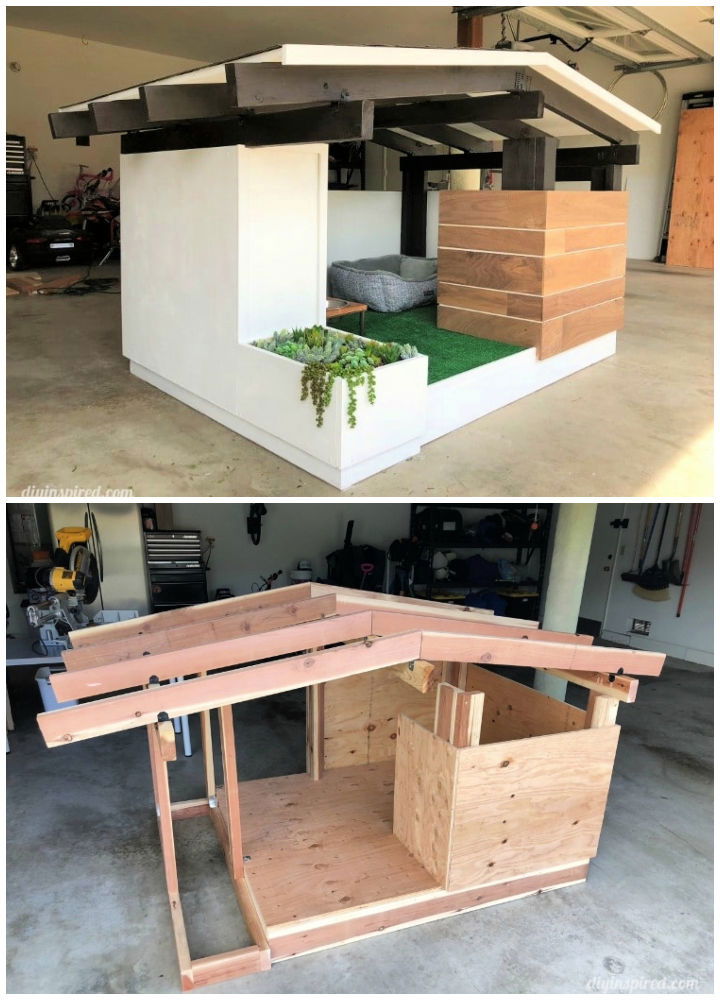
Transform your backyard into a cozy retreat for your furry friends with our comprehensive guide on creating a Mid Century Modern DIY dog house. With detailed steps, a list of materials, and helpful tips, this guide will help you craft a stunning, durable shelter that’s sure to be the envy of the neighborhood. Perfect for pet owners who love adding a touch of vintage flair to their outdoor space.
Sizes:
- Roof: 69” x 50”
- Base: 88” x 54”
- Height: 48.5”
Supplies:
- 2 X 4 Pine
- Pine Plywood
- Post Caps
- Wood Screws
- Miter Saw
- Nail Gun and Nails
- Pocket Hole Jig
- Paint and Stain
- Artificial Grass
- Titanium Scissors
- Liquid Glue
- Walnut Wood Boards
- Exterior Grade Plywood
- Roofing Paper
- Roof Shingles
Cost: High (due to the use of high-quality materials like walnut wood boards and cedar plywood)
Difficulty: Intermediate (requires the use of power tools and precise measurements)
Special Instructions:
- Stain the wood a dark ebony for a modern look.
- Paint the walls white for contrast.
- Ensure all cuts are precise, especially the eight-degree angle for the roof.
Notes:
- A splurge on higher-end materials can enhance the dog house’s look and durability.
- Consider liquid glue instead of double-sided tape for laying artificial grass.
Original Source: DIY Inspired
30. Dog House Using Pallet
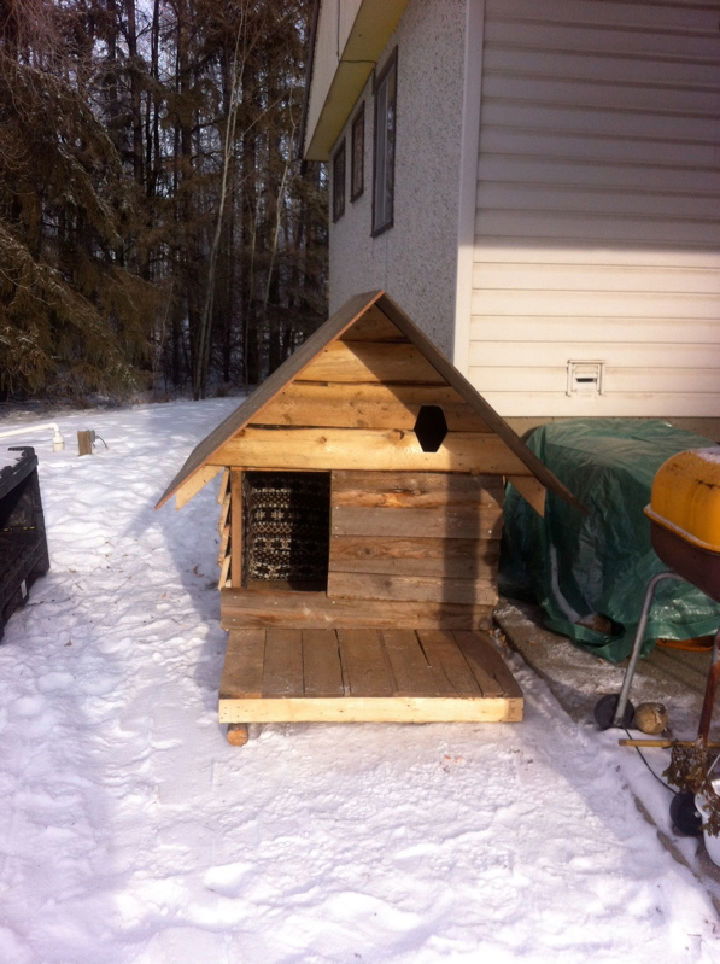
Embark on a rewarding project to build a warm, insulated doghouse for your furry friend using simple materials and tools. This guide offers a step-by-step approach to constructing a comfortable shelter with a peaked roof and eco-friendly insulation. You’ll find practical tips to help you repurpose a pallet into a cozy haven, ensuring your pet’s comfort and safety in any weather.
Sizes:
- Half-size doghouse based on a standard pallet dimension
Supplies:
- Sturdy pallet
- Rough-cut planks
- Deck screws
- Raw wool or alternative insulation like recycled denim
- Fleece material for interior walls
- Asphalt shingles for roofing
- Staple gun
- 2×4 wood for framing and rafters
- Feed bags or windbreaker material for external wind-proofing
Cost: Low (most materials can be sourced for free or at a low cost)
Difficulty: Intermediate (some woodworking skills and tools required)
Total Time: Varies depending on skill level and design choices
Special Instructions:
- Choose a strong, intact pallet as the base.
- Frame the front and back walls and reinforce the structure with boards.
- Insulate the walls with fluffed-up raw wool or preferred material.
- Cut planks for the siding and attach using screws, overlapping for weatherproofing.
- Construct rafters for a peaked roof and cover with roof boards.
- Move the doghouse using a sleigh or similar device for easy transport.
Notes:
- Recycled materials are encouraged for cost efficiency and environmental benefit.
- Insulation choice is critical for the pet’s comfort; avoid using fiberglass due to potential health risks.
Original Source: Adventures with Teresa hovergirl
32. DIY Tropical Dog House
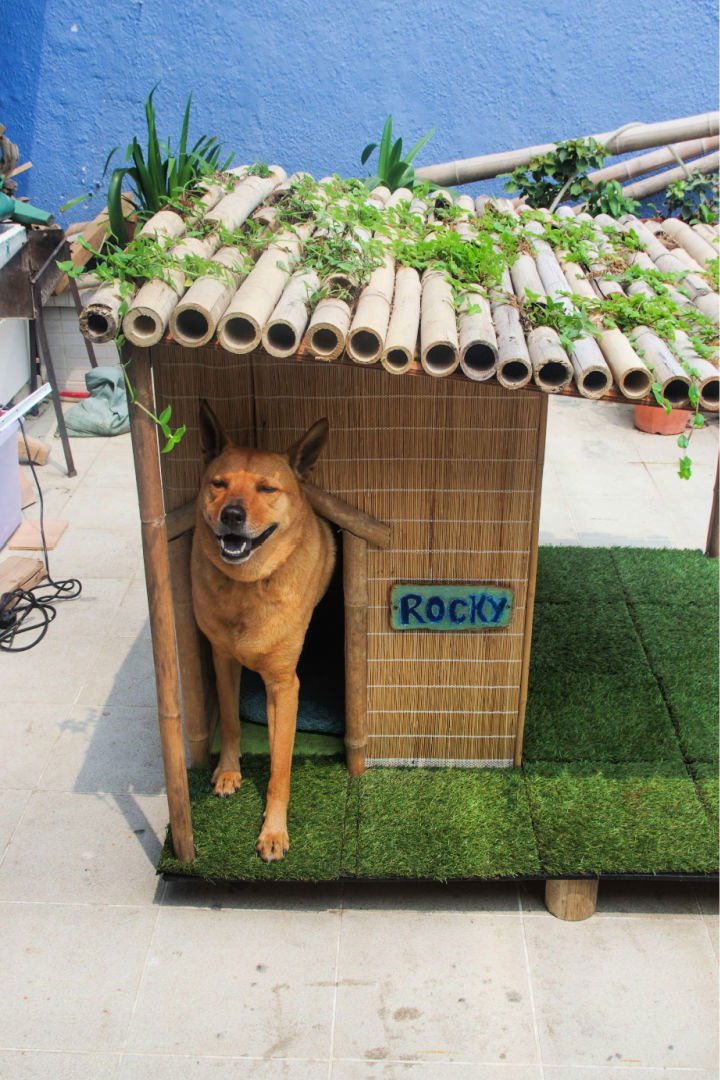
Dive into the world of creative pet care with our step-by-step guide to constructing a Tropical Dog House that is both functional and visually appealing. This unique DIY project is perfect for pet owners looking to provide their dogs with a cozy retreat that stands out. With clear instructions and practical tips, you’ll learn how to build a raised, green-roofed haven, complete with a comfy interior and a personalized nameplate, ensuring your pet enjoys comfort in style.
Sizes:
- Overall dimensions based on pet size
- Porch area
- Interior space
- Height off the ground
Supplies:
- Bamboo sticks
- Plywood for roofing
- Soil for green roof
- Creeper plants
- Artificial turf
- Foam padding and bedding
- Nameplate
- Tools for cutting and assembling
Cost: Varies based on sourcing of materials and tools
Difficulty: Intermediate
Total Time: 1-2 weekends (depending on skill level and work pace)
Special Instructions:
- Ensure the bamboo is properly treated to withstand weather conditions.
- Use non-toxic, pet-safe materials for all aspects of the house.
- Consider the size of your dog to determine the house’s dimensions.
Notes:
- The green roof provides aesthetic appeal and may offer some insulation.
- Raising the house off the ground is beneficial in rainy climates.
Original Source: Imgur
33. Knock-Down Dog House
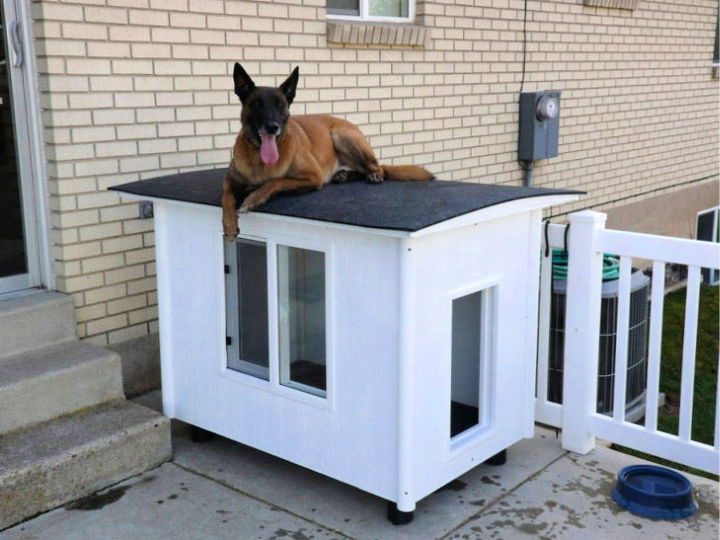
Build a cozy and reconfigurable shelter for your beloved dog with this step-by-step guide to constructing a “Knock-Down Dog Mansion.” Ideal for pet owners who want to provide their canine companions with a warm, insulated space that can be easily moved or disassembled, this dog house combines functionality with a touch of charm. Discover the satisfaction of building a pet-friendly haven that meets both your design preferences and your dog’s comfort needs.
Sizes:
- Customizable to fit your dog’s dimensions
Supplies:
- 2×4 framing lumber
- 1/2″ plywood
- 1/8″ Melamine sheet
- 4×4 posts
- Polyurethane construction adhesive
- Roof Edge Flashing
- Roofing Paper
- Rigid Insulating Foam
- Exterior Sheathing (OSB)
- Roof material (rubber mat)
- Plastic corner trim
- Baltic Birch scraps
- Window Screen
- Furniture Bolts
- T-Nuts
- PVC Pipe
- Exterior primer and paint
- Silicone sealant
- Various screws, staples, etc.
Cost:
- Approximately $375 (cost may vary based on material choices)
Difficulty:
- Intermediate to Advanced
Total time:
- Varies based on skill level and working pace
Special Instructions:
- Customize dimensions based on your dog’s size for optimal comfort.
- Ensure all wood is sealed to prevent moisture damage.
- Follow safety precautions when using tools and handling materials.
Notes:
- The dog house design includes insulation and solar-warming features.
- Walls can be rearranged or removed for different configurations.
Original Source: Instructables
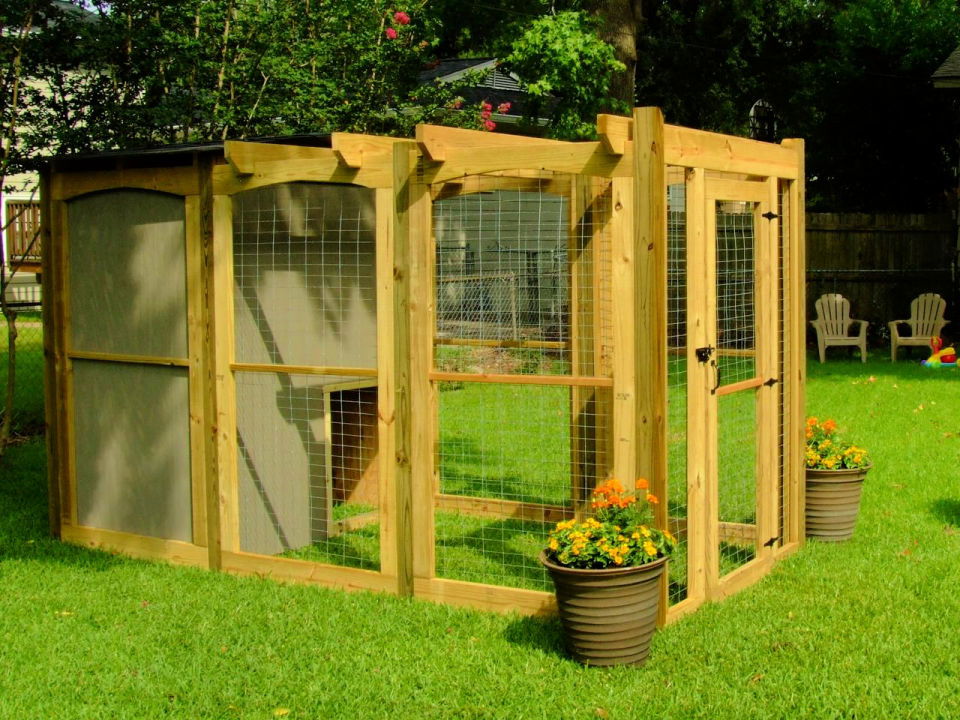
34. Dog Run with Attached Doghouse
35. DIY 1,000 Year Doghouse
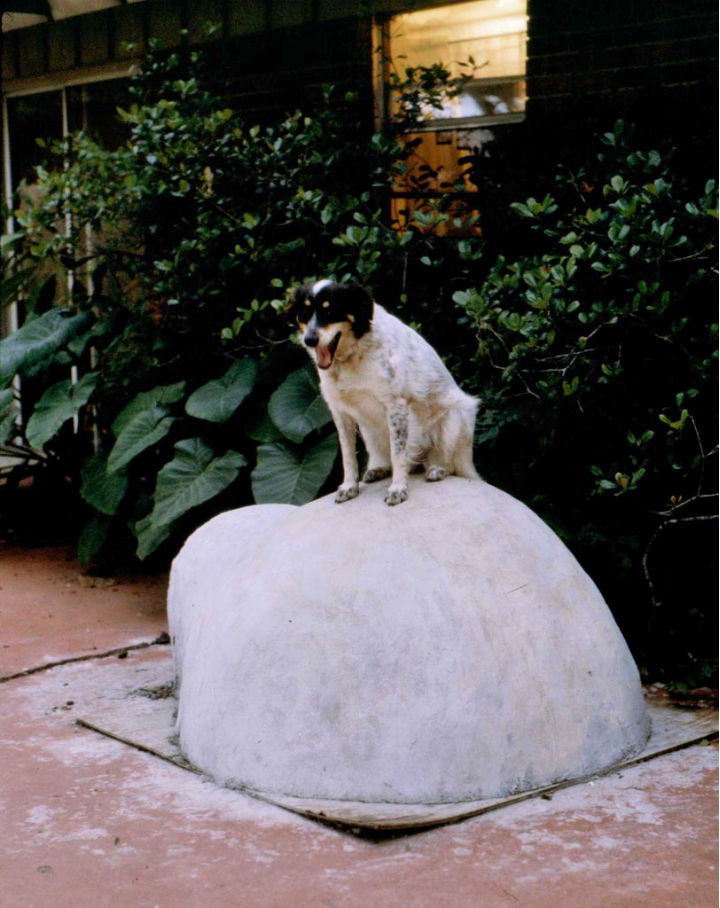
The 1,000 Year Doghouse project on Instructables offers a unique and sturdy solution for pet owners seeking a durable shelter for their dogs. Using ferrocement, a strong and cost-effective material, this doghouse is designed to withstand extreme weather conditions and even provide protection from small nuclear detonations. The guide provides detailed steps on constructing this virtually indestructible doghouse, ensuring your pet’s safety and your peace of mind. Whether you’re a DIY enthusiast or simply looking to build a safe haven for your dog, this guide offers valuable insights into building a long-lasting doghouse.
Sizes:
- Small: 25″x30″x30″
- Medium: 30″x35″x40″
- Large: 35″x40″x45″
Supplies:
- Wire mesh
- Portland cement
- Sand
- Water
- Building tools (trowel, bucket, wire cutters)
- Protective gear (gloves, mask)
Cost:
Approximately $50 – $100 (varies by size)
Difficulty:
Intermediate
Total time:
8-12 hours
Special Instructions:
- Build a solid foundation for the doghouse to ensure stability.
- Shape the wire mesh carefully to avoid sharp edges that could harm your dog.
- Apply the cement mixture in layers, allowing adequate drying time between each layer.
Notes:
- Personalize your doghouse by adding a waterproof paint or designing the exterior.
- Ensure proper ventilation to keep your pet comfortable.
Original Source: Instructables
Frequently Asked Questions
Get answers to all your common questions about DIY dog houses, including how to make your own cheap dog house with free plans. Learn more below!
What materials are best for building a DIY dog house?
The best materials for building a dog house can vary depending on the climate and your dog’s needs. Common materials include:
- Wood: It’s sturdy and provides good insulation. Cedar and redwood are naturally resistant to rot and pests.
- Plywood: It’s an economical choice, but may not be as durable as solid wood.
- Pallets: A budget-friendly and eco-friendly option, but they may require additional treatment for weather resistance.
- Plastic: Easy to clean and resistant to rot, but may not offer as much insulation as wood.
- Metal: Durable but can become very hot or cold depending on the weather, so it’s not commonly used for the entire structure.
How do I ensure the dog house is the right size for my dog?
To ensure a comfortable fit, measure your dog’s height and length and add a few inches to each dimension. Here’s a quick guideline:
- Height: The dog house should be at least 25% taller than your dog’s height at the shoulder.
- Length: There should be enough room for your dog to lay down and stretch out fully.
- Width: The interior should be wide enough for your dog to turn around easily.
Can I insulate a DIY dog house?
Yes, you can insulate a DIY dog house to provide additional warmth in cold climates. Materials like foam insulation boards, fiberglass, or reflective foil can be used. Always ensure that the insulation is covered to prevent your dog from chewing on it.
Should the dog house be elevated off the ground?
Elevating the dog house off the ground can provide several benefits:
- Keeps the interior dry: It prevents water from entering during rain.
- Insulation: It provides a layer of air that serves as insulation from the cold ground.
- Pest control: It makes it more difficult for pests to get inside the dog house.
How can I make the dog house more weather-resistant?
To make the dog house more weather-resistant, consider the following tips:
- Use water-resistant materials: Choose woods that are naturally resistant to rot or treat the wood with a non-toxic water repellent.
- Elevate the structure: Keep it off the ground to avoid moisture.
- Sloped roof: This allows rain and snow to slide off easily.
- Overhangs: Extend the roof to prevent rain from entering the doorway.
- Caulk seams: Seal the seams of the house with silicone caulk to prevent drafts and moisture.
Is it necessary to add a door to the dog house?
While not absolutely necessary, a door flap or panel can help to keep the elements out and provide extra insulation. It also gives your pet a greater sense of security. Clear vinyl strips or a heavy piece of fabric can serve as simple door solutions.
How often should I clean the dog house?
Regular cleaning is essential to keep the dog house hygienic and free from pests. A good rule of thumb is to clean the dog house every two weeks or more often if it gets dirty quickly. Use pet-friendly cleaning products to ensure your dog’s safety.
Can I add a porch or deck to the dog house?
Yes, adding a porch or deck can provide your dog with a shaded area to relax outside of their shelter. It can be as simple as an extended flat area in front of the doorway or a more elaborate structure with railings.
Do I need to anchor the dog house?
In windy areas, it might be necessary to anchor the dog house to the ground to prevent it from tipping or being blown away. You can use stakes or attach it to a heavy base.
How can I make the dog house eco-friendly?
To make your dog house eco-friendly, use sustainable materials like reclaimed wood, eco-friendly paints or stains, and natural insulation options. Also, consider adding a green roof with plants for extra insulation and to absorb rainwater.
These FAQs can guide you through the process of designing and building a comfortable and safe shelter for your canine companion. Remember to personalize the dog house to suit your dog’s size, the local climate, and your personal aesthetic preferences.
How do you make a simple dog house?
To make a simple dog house:
- Start by measuring and cutting the plywood for the base, walls, and roof.
- Assemble the pieces into a rectangular shape using wood glue and screws.
- Leave an opening large enough for your pup to enter and exit.
- Cover the entire structure with weatherproofing material such as tar paper.
- Add shingles to the roof and decorate with a coat of paint.
Your pup now has a simple, safe home!
How to build a cheap dog house?
Building a cheap dog house is an easy task. To do so:
- Gather supplies such as plywood, 2x4s, and screws.
- Cut the plywood into two panels for the sides of the house, then cut four 2x4s to form a frame that will hold up both panels.
- Place the frame on a level surface and attach the panels to it.
- Screw the 2x4s together and add a door or window for ventilation.
Your dog house is now ready! Enjoy!
Will a doghouse keep a dog warm?
Yes, a doghouse can help keep a dog warm. It protects from weather elements, like rain, snow, and wind. Additionally, it will retain some of the heat generated by your pup’s body heat. To get the most out of a doghouse, make sure it is insulated and draft-proofed with straw, hay or cedar shavings. Put a waterproof cover on the outside and add a heating pad to the inside for extra warmth during cold weather. This way, your pup can stay cozy and comfortable in its own doghouse!
How expensive is it to build a dog house?
The cost of building a dog house can vary widely depending on the size and complexity of the design. For a basic model, you can expect to pay anywhere from $50-$150 for materials such as lumber, nails, screws, and paint. If you’re looking for something more intricate or luxurious, costs could rise as high as several hundred dollars. The best way to estimate the cost is to build a budget and plan out exactly what materials you’ll need for your project. With some preparation and research, you can easily find an affordable option that suits both your pup’s needs and your wallet!
What are the five steps to building a dog house?
- Step 1: Measure your dog and build a plan.
- Step 2: Gather materials like wood, nails, screws, saws and other tools.
- Step 3: Cut the wood to size according to the plan.
- Step 4: Assemble the pieces making sure it is sturdy and well-constructed.
- Step 5: Add some insulation and a roof to protect your pup from the elements. Finally, personalize it with decorations or paint to make it complete!
Remember to make sure the house is suitable for your dog’s size and needs when constructing. Have fun creating a special home for your beloved pup!
What’s the best thing to put in a dog house?
The best thing to put in a dog house is something that will keep your pup comfortable, safe and secure. A warm, waterproof bed with plenty of blankets can help keep them happy and cozy. Additionally, it’s important to provide your pet with toys, chew sticks or other items they can enjoy. Consider providing treats or a comfortable doggy pillow for added comfort. Make sure to provide plenty of fresh air and ventilation for your pup. With these items in place, your pup will be ready to snuggle up and enjoy their new dog house!
Should a dog house have the floor?
Yes, a dog house should have the floor since it serves an important purpose. It helps insulate the house from cold and moisture which can cause discomfort for your pet. A wooden or plastic floor is best as it will not rot like dirt, making it less prone to bacteria and other germs that could be harmful to your pup. Additionally, a floor will give your pup more comfort and stability and provide an easier-to-clean surface. Choosing the right type of material for the flooring is important to ensure the longevity and comfort of your dog.
What size should a dog house be?
The size of a dog’s house should be large enough for them to stand up, turn around, and lie down comfortably inside. It should be tall enough that they don’t have to duck their head when entering it. The house size also depends on the breed of the dog; larger breeds need bigger houses than smaller breeds. Generally, the house should be at least one-and-a-half times the dog’s length from nose to tail. It’s also important that the space is well insulated and protected from wet weather to keep your pup comfortable.
Do I need to assemble the dog house?
Yes, usually, you will need to assemble the dog house yourself. Depending on the size and type of dog house you choose, it may require more or less time to assemble. Most dog houses have instructions and all the necessary hardware to complete installation. It is a good idea to read through all instructions before starting assembly, so you know what materials are needed. It can be helpful to have a friend or family member help with the assembly, especially for larger dog houses. Follow directions carefully and double-check any connections you make for safe installation. Have fun creating a comfortable home for your pup!
What is the best way to build a dog house?
The best way to build a dog house is first to determine the size of your space, then plan accordingly. You will need materials like plywood and 2x4s to build the frame and strong screws and nails. Make sure you use weatherproof stain or paint on all wood surfaces. Measure twice before cutting lumber to ensure the frame is properly constructed. Lastly, remember to include a door, ventilated windows, and insulation for added comfort. With these steps, your pup will have its own safe haven in no time!
Can I make a dog house out of recycled materials?
Yes, you can make a dog house out of recycled materials. To build the structure, you will need wood, cardboard, and other supplies such as screws or nails. You may also want to use insulation material like foam sheets or bubble wrap to keep your pup warm in colder climates. To finish it off, you can use paint or a sealant of your choice to make it look nice and protect it from the elements. With little skills, you can build a stylish, eco-friendly, and functional dog house.
Finally, add some love and care while assembling your recycled dog house, and your pup will be grateful!
What is the best way to insulate a dog house for cold weather?
The most effective way to insulate a dog house for cold weather is to add extra layers of insulation such as polystyrene foam boards, rigid foam insulation, or fiberglass batts. It is also important to make sure the house has adequate ventilation and is elevated off the ground, so it doesn’t absorb cold temperatures from the ground. Adding a door or flap to the entrance can also help keep cold and warm air out. Lastly, using straw as bedding helps retain warmth in the dog house. These measures can make a big difference when it comes to keeping your pup warm in the winter months.
How long does it take to make a dog house?
Making a dog house can take anywhere from a couple of hours to several days, depending on the complexity of the design and materials used. A simple structure made from wood can be constructed in the afternoon, while more intricate designs may require multiple visits and additional carpentry skills. If you plan carefully and have the proper tools handy, you should be able to complete a basic structure in no more than one day. Remember, the size of your dog may require you to adjust the dimensions accordingly. Take your time and enjoy the process! Happy dog house building! 🙂
Can I use any type of wood for my dog’s house?
The type of wood you can use for a dog house depends on the size and breed of your dog. Generally, it is best to use waterproof woods such as cedar, cypress, redwood, or another rot-resistant species. For larger breeds like German Shepherds and Huskies, pine boards are well-suited as they are strong and durable. However, steer clear of plywood, particle board, chipboard, or other composite woods, as these are not very durable for outdoor use. It is important to check with a local home improvement store for the best type of wood. Additionally, consider weather-resistant paint or sealer to protect the wood from the elements.
What is the best way to keep my dog’s house clean?
To keep your dog’s house clean, it’s important to vacuum or sweep the bedding regularly. Additionally, make sure you have proper ventilation in the dog house by leaving the door or windows open. Also, disinfecting the inside walls with an antibacterial cleaner will help remove any bacteria and germs that may be lurking. Lastly, wash any bedding and blankets often to keep them fresh. Following these simple steps allows your dog house to remain a clean, safe space for your pup.
Can I make a dog house out of cardboard?
Yes, you can make a dog house out of cardboard. It is an inexpensive and eco-friendly option for making a comfortable home for your pup. You will need to ensure that the box is sturdy enough to hold your pet’s weight and waterproof in case of rain or snow. It would be best if you also lined the inside with insulation such as sheepskin or cedar shavings to increase your pup’s comfort. Additionally, you can use creativity to decorate the outside of the house with paint, markers, stickers and more. With a few supplies and some time, you can make a great cardboard dog house for your four-legged friend.
How long does it take to build a dog house from scratch?
Building a dog house from scratch can be a time-consuming task depending on the complexity of the design and materials used. Generally, it should take between 1-3 days to complete the project. This includes any cutting, sanding, measuring, and staining/painting required. It’s important to make sure you have all your supplies and tools ready before beginning the build. With a detailed plan and careful attention to detail, you should have a complete dog house in no time. Good luck!
I want to make a dog house, but I need to figure out where to start. Can you help me?
Yes, Our free dog house plans can help you. To start:
- Decide on the size of your dog house and draw up a plan to ensure it’s big enough for your pup. You’ll need materials like wood, nails, and screws, as well as tools such as a saw or drill.
- Measure twice and cut once, so everything fits perfectly.
- Follow the instructions from your plan and assemble the pieces.
- Remember to paint or decorate it when you’re done for a personal touch!
Good luck with your project.
I don’t have a lot of money. Can I still make a dog house that will look good and my dog will like it?
Yes, you can build a dog house that looks nice, and your pup will love it. You don’t need to have a lot of money to do this. Consider using materials such as plywood, PVC piping, or even cardboard boxes for the frame. Paint it in an attractive color or use patterned contact paper for a unique design. You can also use old blankets and towels to make the inside comfortable. Finish with some toys and a personalized bowl, and your pup will be in doggy heaven!
Add some extra extras to make the house special, like an outdoor doggy door or an indoor pet bed. Remember lots of love and attention – that’s essential to make sure your pup feels truly at home. Good luck, and have fun!
Related DIY Projects for your Dogs:
USE PVC: Build a dog bed using PCV pipe, These PVC dog bed ideas are amazingly beautiful and impressive looking and would make an epic present for a dog!
Sew a dog bed: Skip the expensive store-bought dog beds and learn how to sew a dog bed at home. These free dog bed patterns are simple projects that offer maximum comfort to your pets.
Conclusion:
So are you ready to experiment with these simple dog house plans? Was your puppy acting really cute this morning, or did it actually do something to make you proud? Whatever the case may be, you don’t really need a reason to re-build something like this for your dog! Dogs are loyal, loving, friendly, caring, and just the best companions! So why not pay them back for just being in your life and making it a happy place? They’re certainly going to be so thankful and act extra nice to you because they notice and remember everything you do for them!


